
Category

cleaning tips

Category

No one likes to have dirty sneaker shoelaces. They can make the rest of your shoes look dirty even though they might be clean. Today I will show you how to clean shoelaces whether it’s white or colored.

Also, check out this article if you want to know how to clean your sneakers.


How to clean shoelaces by hand
When cleaning shoelaces you have to make sure that you are cleaning them based on their colors and how dirty they are.

If your shoelaces are white then you might want to wash them with bleach, if they are colored then you cant use bleach and other harsh chemicals to clean them or they’ll lose their color.

Instructions:

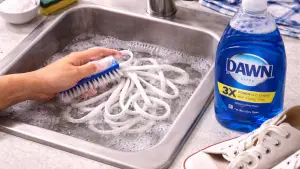
I prefer to use a sink to clean shoelaces by hand. Simply lather the laces in the sink with a small drop of Dawn dish soap. Next, wash with your hands. When they are clean, rinse well, and twist the water out then hang on a hanger to dry.


I am now going to show you how to clean your shoelaces based on color.


Cleaning white shoelaces without bleach
 

When cleaning white shoelaces there are different methods which you can use. Some methods may work differently for most people. The following are some of the best methods to use when cleaning white shoelaces:

Instructions:

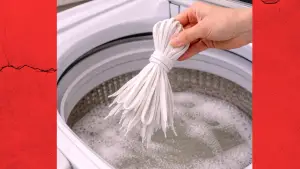
You can simply tied them together and wash it the washer with baking soda or hydrogen peroxide. However, if you prefer not to use harsh chemical to wash your white shoelaces use the instructions below.

Using Oxi clean stain remover:

This can be used on all color shoelaces:

  1. Get a small dish or container and add 2-3 cups of warm water into it. Then add 1 cup of oxi clean stain remover into it.
  2. Remove the laces from the shoe and place them into the water.
  3. Now get an unused toothbrush and place the bristles into the mixture and use it to clean the shoelaces. Make sure to brush away all the dirt and grime from the laces.
  4. After cleaning the shoelaces with the toothbrush, pour out the water from the container and rinse the laces under running water. When rinsing them make sure that you get all the soap out of them.
  5. (optional)-If there are still visible stains or dirt on the shoelaces then let them soak for an hour or two.
  6. Now it’s time to dry the white shoelaces. If you don’t want your shoelaces to shrink then it’s best to air dry them. To air dry them the only thing you need to do is hang them up somewhere.


Using Bleach: GOOD BUT, USE WITH CAUTION

When cleaning white shoelaces, bleach is definitely the best option. But most people don’t really like to use bleach because it is very harsh, but if you use it the right way you won’t have to worry about that.

  1. First, put on gloves and wear a face mask.
  2. Pour the 1/2 – 2 cups of bleach into a bucket (depends on how big the bucket is).
  3. Now fill the bucket quarter to halfway up with warm water. Then add 1 cup of your favorite detergent into it.
  4. Now place the shoelaces into the water and use your hands to wash the laces. Wash them for around 2-5 minutes.
  5. After washing them let them soak for an hour or two.
  6. Now rinse the shoelaces under warm running water. Make sure to get all the bleach and soap out of them.
  7. Now place them outside under the sun on a flat surface (like a table) and allow them to dry. If you don’t care about shrinkage then you can place them in your dryer.


Using vinegar:

Cleaning white shoelaces with vinegar is almost the same as cleaning them with bleach. You might be wondering that if it’s the same method then why not just mix the bleach with the vinegar?

Well if you are planning to do this DON’T!!. If you want to know more about what happens if you mix bleach and vinegar together then click here.


Making your own cleaning DETERGENT:

  1. Get a small bucket and fill it quarter way up with warm water and add 2-3 tbsp of dish soap and 2 cups of vinegar into it.
  2. Now get a small brush and use it to clean the shoelaces.
  3. After cleaning them, let them soak for 2 hours.
  4. Then air-dry them.


I’ve shown you how to clean white shoelaces, now it’s time to show you how to clean the colored ones.


Cleaning colored shoelaces

Cleaning colored shoelaces is almost the same as cleaning white shoelaces, the only difference is that you don’t use anything that contains bleach or any other strong chemicals. Here are some different ways you can clean your colored shoelaces:

Using dish soap:

Option 1

  1. Remove the laces from the shoes and place them under running water. Then squirt a few drops of dish soap onto them.
  2. Now since the laces are soapy, use your hands to wash them. Do this for 2 minutes.
  3. After washing them rinse them under running water and dry them.

Option 2

  1. Get a bucket and fill it up with warm water and add 2-4 squirts of dish soap into it.
  2. Place the shoelaces in the water and use your hands to wash them.
  3. When washing them with your hands you need to rub and squeeze the laces together so that they get all the dirt and grime from them.
  4. After washing them, let them soak in the water for 30 minutes.
  5. After letting them soak you should rinse then air dry them.


Using powder soap or your favorite detergent

  1. Remove the shoelaces and place them under running water
  2. Add powder soap or liquid detergent to them.
  3. Then use your hands to rub them together. Rubbing the bundle of shoelaces to gether is a great way to wash them.
  4. Place them under the running water again to rinse them.
  5. After that dry them using a dryer or hang them up somewhere where there is a lot of air circulation.


Soaking method: FOR WHITE SHOES

  1. Get a bucket and fill it up with warm water and add 1 cup of bleach into it.
  2. Place the shoelaces in the bucket of water and let them soak for 2 hours
  3. After letting them soak take OVERNIGHT . Rinse well  and place them inside the washer- NO MORE BLEACH HERE.
  4. After washing the laces place them inside the dryer or air dry them. If you use a dryer to dry them they might shrink a little So again, make sure to tie them in a bundle.


Cleaning STAINED colored shoelaces

  1. Place them inside the washing machine. Always tie shoelaces before washing or drying them in a machine. If not, they will knot themselves and become hard to untie. So to prevent this wrap them in a bundle before washing.
  2. Add 2 scoops of oxi clean stain dark protect into it.
  3. Set the washer to a regular wash cycle.
  4. After washing them, Place them somewhere where they can dry easily.


Conclusion

In this article, I showed you how to clean your shoelaces, whether they are white or colored. I hope that you found the methods somewhat helpful.




Windbreaker jackets are great to wear if you are a person who likes going camping or doing any outdoor activities. They are also worn by people who are just looking for a casual fit. While windbreaker jackets are nice and comfortable, they can be somewhat complicated to clean. This is because they are made differently compared to your average jacket. In this article, I will show you how to wash a windbreaker jacket the right way.


Can you wash windbreakers?

You can wash windbreaker jackets, but you have to do it in a slightly different way because they can be a bit complicated to clean. But below I will show you the right ways on how to wash a windbreaker jacket.


How to wash a windbreaker jacket

There are two different ways to clean a dirty windbreaker jacket. If your jacket is not all that dirty but you still want to clean it, all you have to do is wipe it down with a damp cloth, then air dry them. Doing this will definitely make your windbreaker jacket cleaner than before.

While this is a great tip to clean these types of jackets you still may need a different way to deep clean them.

When deep cleaning a windbreaker jacket you have to make sure that you only do it if the jacket is badly stained.  To deep clean the jacket, the first thing you should do is to place the jacket flat on a surface. The next thing you need to do is to get a detergent that won’t damage the jacket. It’s best to use detergents that don’t contain any chlorine in them. Now dab a piece of cloth into the detergent and use it to rub the stains on the jacket in a circular motion. After doing this leave the detergent on the jacket for 10 minutes.

Place the windbreaker jacket in a lingerie bag then place it inside the washer (use the same detergent to wash it). After washing, let the jacket air dry.

While this method may work for almost any stain, you may not get the same results if you had bloodstains on your jacket. Now the reason why you may have blood stains is that you probably injured yourself on accident while you had the jacket on. To wash the blood stain from your windbreaker jacket you just need to do everything I mentioned above except instead of using detergent to clean the stains, use hydrogen peroxide.


Know Your Windbreaker Material (Why It Matters)

Not all windbreakers are made the same. Most fall into these categories:

  • Nylon windbreakers – Lightweight and durable, but sensitive to heat

  • Polyester windbreakers – Slightly more durable but still prone to heat damage

  • Water-repellent or coated jackets – Require extra care to preserve the protective finish

Understanding the material helps you avoid common mistakes like using fabric softener or hot water, both of which can ruin performance coatings.

Always Check the Care Label First

Before doing anything else, check the care label inside your jacket. This small tag provides important instructions such as:

  • Recommended water temperature

  • Whether machine washing is allowed

  • Drying instructions

  • Warnings against bleach or heat

If the label says “gentle cycle” or “cold water only,” take it seriously—these instructions are there to prevent shrinking, warping, or peeling.

How to Lightly Clean a Windbreaker (Spot Cleaning)

If your windbreaker isn’t visibly dirty and just needs a refresh, spot cleaning is often enough.

How to Do It:

  1. Dampen a soft cloth with lukewarm water

  2. Add a small drop of mild liquid detergent

  3. Gently blot dirty areas such as cuffs, collar, and underarms

  4. Wipe with a clean damp cloth to remove soap

  5. Hang to air dry

This method is perfect for quick cleanups and helps extend the life of the jacket by reducing how often it needs full washing.

How to Machine Wash a Windbreaker Jacket Safely

When your jacket needs a deeper clean, machine washing is usually safe—as long as you do it correctly.

Step-by-Step Instructions:

  1. Zip up all zippers and fasten Velcro closures

  2. Turn the jacket inside out

  3. Place it in a mesh laundry bag for protection

  4. Use cold water on a gentle or delicate cycle

  5. Add a small amount of mild liquid detergent

  6. Skip fabric softener and bleach entirely

Avoid washing windbreakers with heavy items like jeans or towels, which can cause unnecessary friction.

How to Hand Wash a Windbreaker Jacket

Hand washing is the gentlest option and ideal for delicate or older jackets.

How to Hand Wash:

  1. Fill a sink or basin with cold water

  2. Add a small amount of mild detergent

  3. Submerge the jacket and gently swish

  4. Let it soak for 10–15 minutes

  5. Rinse thoroughly with cold water

  6. Press out excess water—do not wring

Lay flat on a towel or hang to dry.

How to Remove Common Stains From Windbreakers

Blood Stains

  • Apply hydrogen peroxide directly to the stain

  • Let it fizz for a few minutes

  • Blot gently and rinse with cold water

Mud or Dirt

  • Allow mud to dry completely

  • Brush off loose dirt

  • Spot clean with mild detergent and water

Sweat or Odor Buildup

  • Mix equal parts water and white vinegar

  • Lightly mist affected areas

  • Let air dry before washing

Grease or Sunscreen

  • Apply a small drop of dish soap

  • Gently work it into the stain

  • Rinse and wash as usual

How to Dry a Windbreaker Jacket

Drying is where many people accidentally ruin their jackets.

Best Drying Method:

  • Air dry only

  • Hang on a sturdy hanger

  • Dry in a shaded, well-ventilated area

Can You Use a Dryer?

If the care label allows it:

  • Use low heat or air-only setting

  • Remove promptly

High heat can melt fibers, shrink fabric, or destroy protective coatings.

How Often Should You Wash a Windbreaker?

Unlike everyday clothing, windbreakers don’t need frequent washing.

  • Spot clean after light use

  • Wash only when visibly dirty or smelly

  • Over-washing can break down water-repellent finishes

Less washing equals longer jacket life.

Common Windbreaker Washing Mistakes to Avoid

  • Using fabric softener

  • Washing in hot water

  • High-heat drying

  • Ironing directly on the fabric

  • Scrubbing aggressively

These mistakes can cause permanent damage.

Optional Products That Help Protect Your Jacket

  • Mesh laundry bags

  • Mild detergent for synthetic fabrics

  • Water-repellent spray for re-proofing

These tools help maintain both appearance and performance.

How to Store Windbreaker Jackets Properly

Before storing:

  • Make sure the jacket is completely clean and dry

Storage tips:

  • Hang instead of folding when possible

  • Store in a cool, dry space

  • Avoid plastic bags that trap moisture

Proper storage prevents odors, mildew, and fabric breakdown.


Can you put a windbreaker in the dryer?

Don’t put your windbreaker jacket in the dryer, because it may damage the material of the jacket and also make it shrink. If you want to dry your windbreaker, all you need to do is just let it air dry for a couple of hours.


Can you shrink a windbreaker?

 If place a windbreaker jacket in the dryer for a long time, or if you keep doing it then it will eventually shrink.


Final Thoughts

Knowing how to wash a windbreaker jacket properly can make a huge difference in how long it lasts. With gentle care, mild detergent, and low heat (or none at all), your windbreaker can stay fresh, functional, and ready for years of wear.

A little extra care now saves money—and frustration—later.

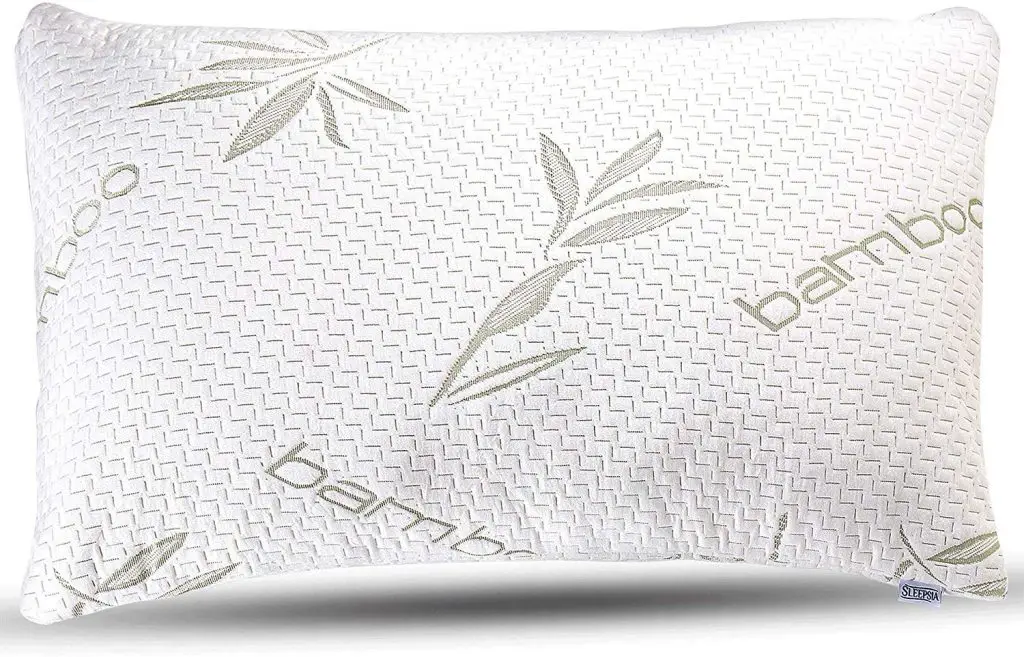
Cleaning pillows isn’t really complicated but cleaning bamboo pillows can be. Bamboo pillows are usually washed once or twice every year but people with sensitive skin might need to do it 4 times instead. In this article, I will show you how to wash bamboo pillows.


What are bamboo pillows?

Typically, bamboo pillows consist of memory foam or bamboo fiberfill encased in a woven outer cover made from bamboo fibers.

Most Bamboo pillows usually cost more than regular pillows and this is because they come with a number of benefits.


Steps on how to wash bamboo pillows

Now I am going to show you the steps needed to clean your bamboo pillows


Steps 1. Wash the pillowcases

 This step is very easy, all you have to do is remove the bamboo pillowcases from the pillows. Then place them In the washer. Make sure to wash the bamboo pillowcases with warm water (not hot or cold).


Step 2. Dry the pillowcases

When drying these types of pillowcases you should air dry them instead of using a dryer. This is because the heat from the dryer will damage the pillowcase.

When air drying the pillowcases you should place them on a hanger rock and put them somewhere where there is a lot of air.


Step 3. Wash the pillows in a washer:

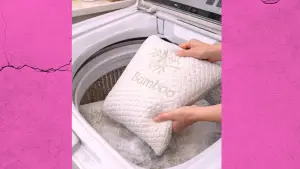
Simple place the pillows in the washer then add a mild laundry detergent (not the powder). When doing the don not just tossed them in. Carefully place them upright. then wash.

I prefer to use the quick wash cycle as this will not have them for an hour tossing around. This could actually make the pillow not fluffy anymore. When they are done washing, place them in the dryer on “fluff” or use they cycle for white clothing.


STEP 4.  SOAKING METHOD

There are two methods you can use to wash your pillows, the squeezing method, and the soaking method. For the first method, you need to get a large bucket filled with warm water and add 5tbsp of detergent.

Make sure to use a detergent that doesn’t have any harsh chemicals in it. Now place the pillow inside the bucket and squeeze it by pressing into it. Keep pressing/squeezing the pillows until both of them are fully clean.

For the second method, you need to place the pillow inside a large bucket filled with warm water and then add 5tbsp of detergent into it. Now place the pillow inside the bucket.

Make sure every part of the pillow is being soaked. Now do the same for the other pillows and let them soak for a couple of hours.

I don’t recommend you to do the 2nd method unless your pillows are really dirty.


Step 5. Rinse the pillows

Now it’s time to rinse the pillows. When rinsing the pillows make sure to use warm water. Also, make sure to rinse the pillows multiple times until there is no more detergent in them.


Step 6. Dry the pillows

You can dry the pillows by exposing them to sunlight or just airdrying them.


Related Questions


How many times should you wash bamboo pillows?

It’s usually normal to wash bamboo pillows once or twice a year but if your skin is really sensitive then I recommend you to wash them 4 times instead.


Can you put bamboo pillows in the dryer?

Using a dryer to dry your bamboo pillows won’t nearly damage them but if you keep on doing it then over time the memory foam will start to get worn out.

They Take-Away:

Throughout this article, I showed you how to wash your bamboo pillows using some simple yet effective methods.


Cleaning baseboards is usually not hard but cleaning baseboards while having a bad back can be somewhat difficult for a lot of people. Sometimes having an aching back can make someone not want to clean their baseboards and this is a bad thing because dirty baseboards can make the inside of your home look dirty. So if you have a bad back and want to clean your baseboards don’t worry because in this article I will show you how to clean your baseboards without bending over.


How to clean baseboards without bending over

I am now going to show you some easy ways to clean dirty baseboards.

Things you need:

Extendable duster
Microfiber cloths
Bucket of water
Vacuum
Broom
Rubber bands
Spray bottle
Dish soap
Microfiber mop


Step 1 Remove dust from the baseboards

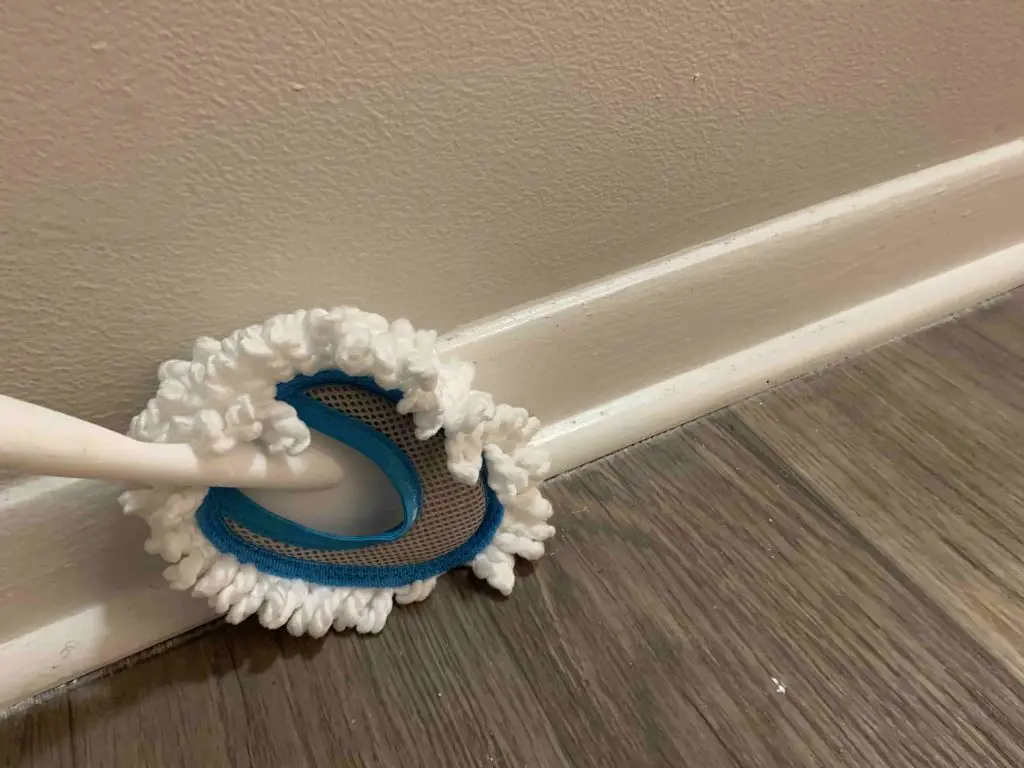
cleaning baseboard using an extendable dusterThere are a couple of ways you can remove dust from baseboards. The first way is to use an extendable duster to clean the baseboard. An extendable dust cleaner is really good because it can remove any dust from almost any surface. Another way to remove dust from your baseboard is to use a vacuum.
The best vacuum to use is one that can have parts added to it. So if you have a vacuum that has a tube-like attachment then use it to suck up the dust from your baseboards.

If you don’t have an extendable duster or vacuum with attachments then you can use a big cleaning towel to remove the dust. If you want to clean your baseboard with a towel without bending over then just use one of your legs to navigate the towel over the areas on the baseboard that you want to clean.


Step 2 Make the baseboard cleaning solution

When it’s time to deep clean your baseboards you can either make your own baseboard cleaning solution spray or just use a bucket of warm water.

For the second method, all you have to do is get a bucket (half full) with warm water and add 1-2tbs spoon of dish soap into it, preferably dawn dish soap.

For the first method, you need to get a spray bottle filled halfway up with warm water. Then add 1 tsp of dawn dish soap and 1/2 – 1 cup of vinegar into it, then shake. Now spray the mixture all over the baseboards.

If you are interested in how to make an all-purpose cleaner then click here.


Step 3 Time to clean the baseboards

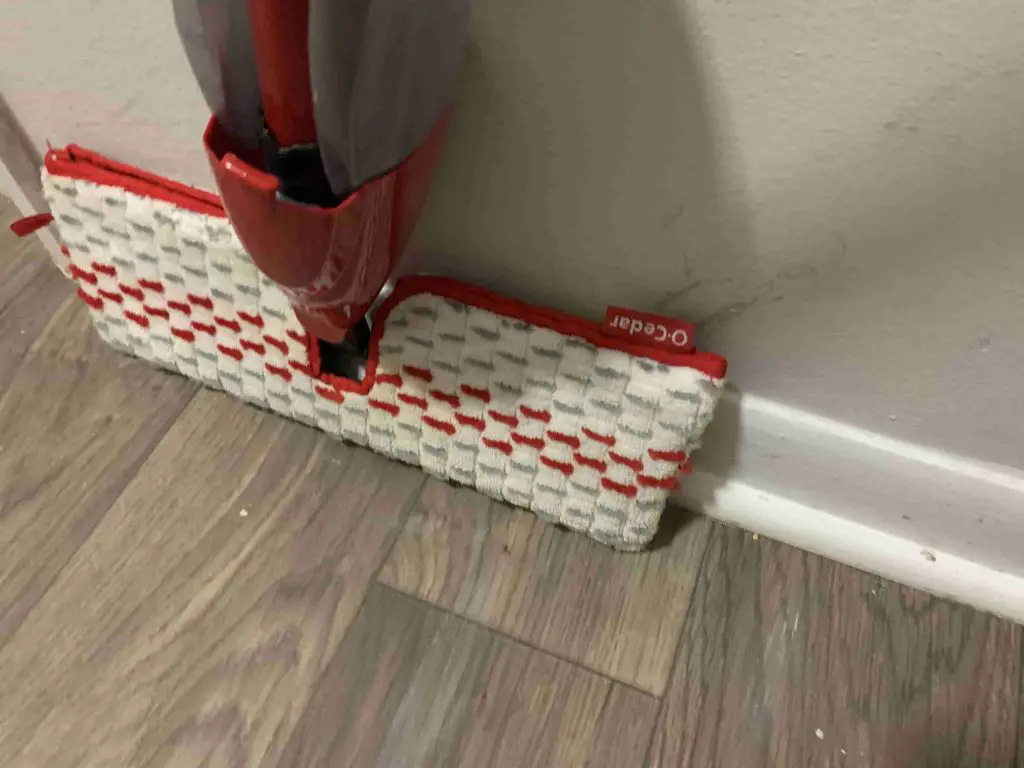
cleaning baseboard using a mopIt’s finally time to clean the baseboards. There are 2 methods you can use when deep cleaning your baseboards. The first one is to use a spin or microfiber mop.
Dip the mop inside the bucket of water or spray the baseboard cleaner all over the baseboard (make sure the mop is damp). Then use the mop to clean everywhere on the baseboards.

Make sure you clean the hard-to-reach areas. Now for the second method, you need to follow my instructions carefully.

Get a broom and place a clean microfiber cleaning cloth around the broom bristles. Make sure the cloth covers up the front and the back of the broom bristles.

Next, use 1-3 elastic bands to hold the cloth on the broom so that it won’t fall off. Now spray the baseboard cleaner all over the baseboard or dip the tip of the broom inside the bucket of water then use it to wipe down the baseboards.

Make sure to clean every baseboard in the house such as the ones in your room, bathroom, on the stairs, etc.


Step 4 Dry the baseboards

For this step, all you have to do is dry the baseboards with a large dry cleaning towel, extendable duster, or a dry mop. Either way, make sure that the baseboards are dry.


How to prevent baseboards from getting dirty

To prevent your baseboards from getting dusty you need to do at least one of the following:

1. Dust removal hacks

I made an article a while ago that will show you how to remove dust build-up in your home. These dust removal hacks/tips will come in handy if you want to know how to keep your baseboards from getting dusty.

2 Use dryer sheets

This might sound a bit weird but trust me, this is one of the best ways to prevent your baseboards from getting too dusty. All you have to do is rub a piece of dryer sheet all over the baseboards.

The reason why dryer sheet is great for reducing dust build-up on baseboards is that they contain some ingredients that repel dust. Not only do dryer sheets repel dust from your baseboards but they will also clean them as well.


How often should you clean your baseboards?

Baseboards tend to get dirty very easily and this is because they are near to the ground where there is a lot of dirt and dust. So it’s always important to clean your baseboards once a month or every other month. The reason why you shouldn’t clean your baseboards more often is because you don’t want to ruin the paint.


The best ways to clean your baseboards; Baseboard cleaning hacks

Throughout this article, I showed you how to clean your baseboards without bending over. But now I will show you some incredible baseboard cleaning hacks that I think everyone should know.

Use hydrogen peroxide to restore baseboard color
This may sound weird but hydrogen peroxide can be used to restore the color of any dirty baseboards. To do this all you need to do is to get a pour hydrogen peroxide all over the microfiber cloth on the broom and use it to wipe down the baseboard.

Doing this will restore the baseboard color.

Magic eraser
Using a magic eraser is a great way to clean your baseboards. They are good at absorbing and cleaning away dirt and grime.

Baseboard cleaner spray
To make your own baseboard cleaner spray you need to do the following. Get a spray bottle filled halfway up with warm water and add 1tbsp of dish soap and 1 cup of vinegar into it. Now shake the mixture together. Now you have your own baseboard cleaner spray.

CONCLUSION:

Gone are the days when we get on our knees to clean baseboards. With these clever ways to clean baseboards your baseborads can be clean and maintain a pristine look all the time.


If you want to clean your shower tiles without scrubbing, you came to the right place. In this article, I will show you how to clean shower tiles without scrubbing.

Always Pre-clean your shower

One of the best ways to Clean bathroom tiles without scrubbing is to pre-treat your shower. To pretreat your shower the only thing you have to do is to let hot water run in your shower for about 15-20 minutes.

This will make it easier to clean your shower tiles or any tiles in your bathroom.


How to clean shower tiles without scrubbing

I will now show you how to clean shower tiles without scrubbing and leaving any streaks.


1. Use Scrubbing Bubbles

Scrubbing bubbles are great because they are made up of certain chemicals which are good for removing soap scrum, dirt, and grime off of your bathroom tile areas.

“Can you use scrubbing bubbles on tiles?” is a question that a lot of people seem to ask, and I stated above that it can.

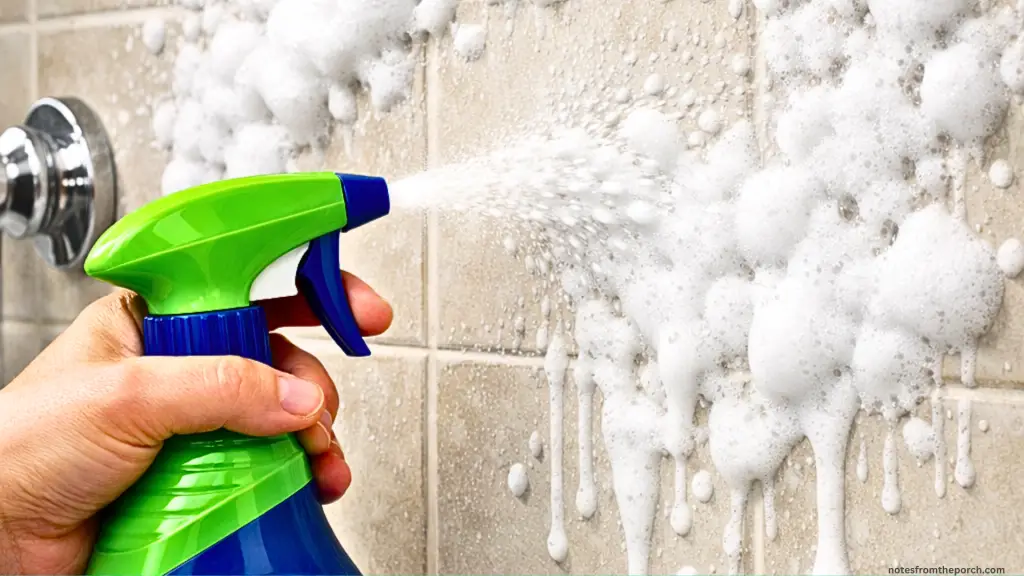
To clean your dirty shower tiles with scrubbing bubbles, the first thing you need to do is pre-treat your shower for a couple of minutes, then after that, you spray a bottle of scrubbing bubbles all over the shower tiles and let the scrubbing bubbles residue sit on them for an hour. After that just rinse the shower walls with warm water.

This is one of the best ways to clean shower tiles without scrubbing.


2. Baking Soda and Vinegar

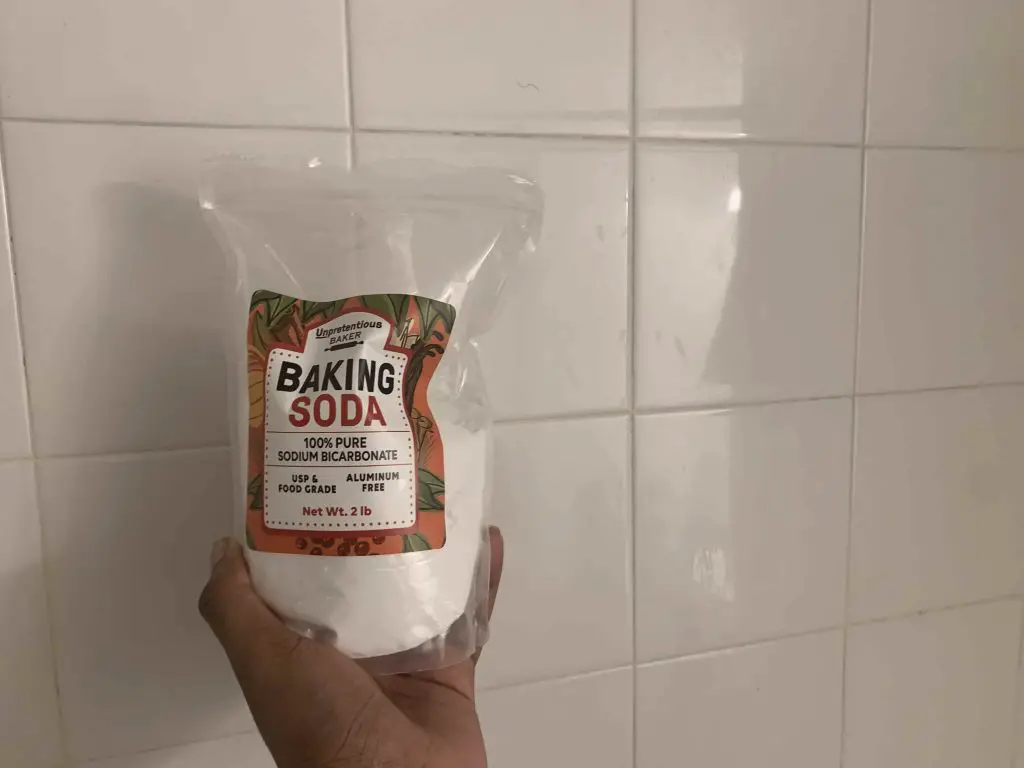
baking soda on shower tilesBaking soda and vinegar are two of the best products to use when cleaning a lot of things such as tiles. When these two are mixed together they create a very effective tile cleaner.
Baking soda and vinegar aren’t only good at cleaning but they will get rid of any foul scent that’s coming from your tiles as well.

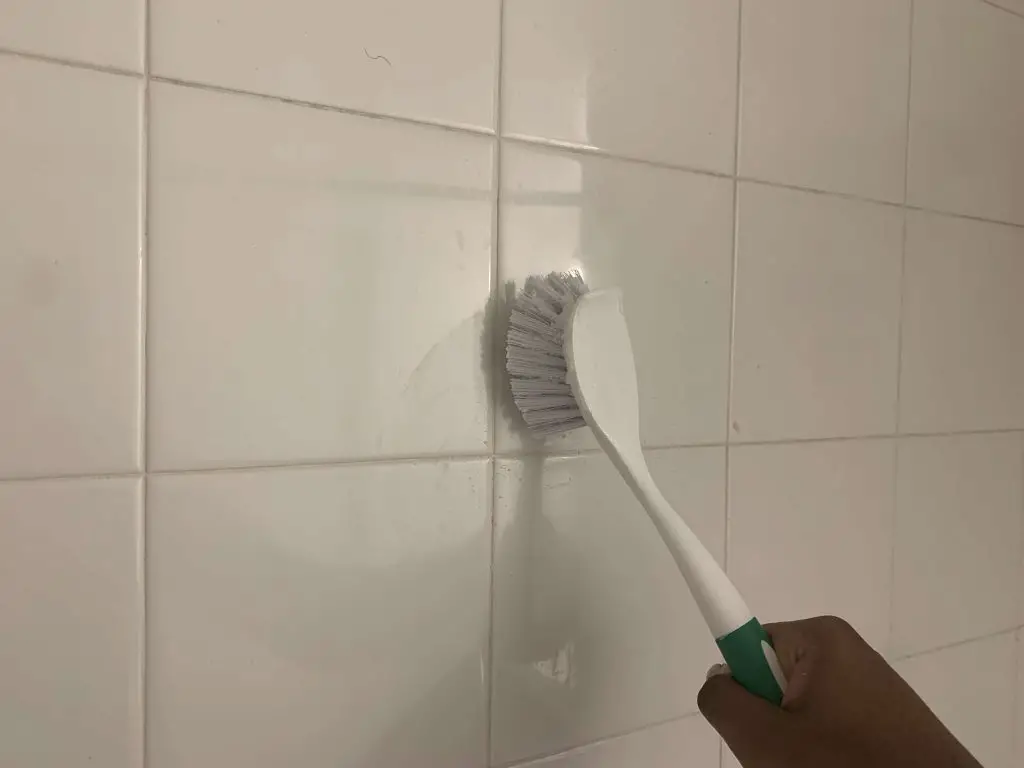
To clean your shower tiles with vinegar and baking soda, the first thing you need to do is to mix baking soda with equal parts vinegar and water. After mixing them, you should get a brush with stiff bristles and dip it in the mixture. Now use the brush to clean the entire shower wall.

After cleaning the shower tiles, do not rinse. Let the solution sit on the tiles for an hour. After an hour, you should rinse off the shower tiles with warm water. Then use a dry cloth to wipe away the water from the tiles so that mold doesn’t grow on them again.


3. Borax

Brush that has borax on it cleaning shower tilesClean bathroom/shower tiles with borax are very effective. Borax is an amazing household product because it can be used for both laundry purposes and cleaning. There are two ways in which you can clean your shower tiles with borax. The first method is to just use borax and the other method includes hydrogen peroxide.
To clean your shower tiles with borax, just pour it all over the tiles in your shower and let it sit there for 6 hours. After that just add some warm water and use a brush or a clean spare broom to wash the tiles. Be sure to wash the shower wall tiles first then work your way to the floor tiles.

That was the first method. For the second method, you need to mix borax with equal parts hydrogen peroxide in a medium-sized container filled 1/4 to halfway up with warm water.  Make sure that there is enough borax and hydrogen peroxide in the water to make it somewhat thick. Now dip a cleaning brush or a clean spare broom into the mixture and use it to clean the shower wall tiles and then the floor tiles. Leave the mixture on the tiles for a couple of hours.  Then use warm water to rinse off the shower tiles.


4. Hydrogen Peroxide and Baking Soda

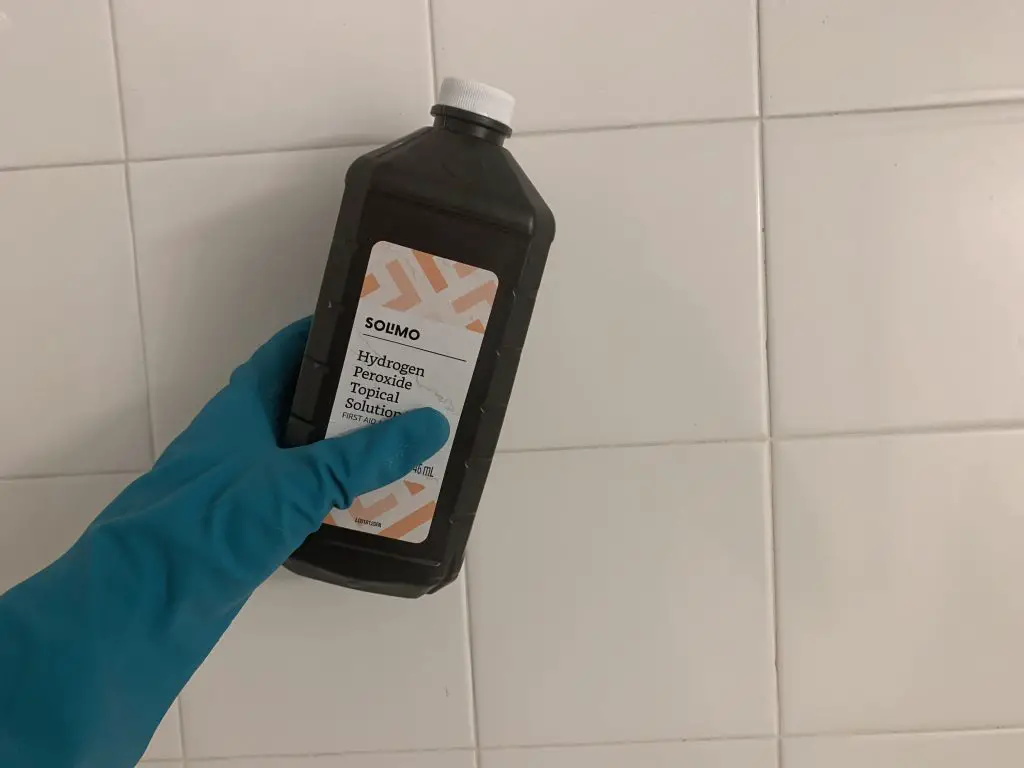
hydrogen peroxide on shower tilesBoth hydrogen peroxide and baking soda are amazing household products with a lot of uses. They are very accessible and cheap so using them for multiple purposes won’t hurt your pocket.
While both of them can be used for different things, when mixed together they are great at cleaning shower tiles. To clean your shower tiles with baking soda and hydrogen peroxide just do the following.

Mix together equal parts baking soda and hydrogen peroxide in a spray bottle. Now spray the shower tiles and let the mixture sit on them for 45 minutes. Now rinse the tiles with warm water.

Doing this will get rid of any mold and mildew that was on the tiles. This is also a great way to clean your tile grouts as well.


5. Bleach

Using bleach to clean shower tiles is very effective even though it isn’t the most recommended method. The reason why it isn’t recommended is that bleach is a very harsh chemical. It can irritate your eyes, skin and the smell is also very strong. When using bleach you have to wear gloves, a mask, and goggles.

Now not because it isn’t the most recommended doesn’t mean you can’t use it. You can use Oxi clean liquid stain remover as a bleach substitute. It still has bleach in it but not as much as regular bleach products.

It is also great for cleaning shower tiles without scrubbing too hard. To clean your shower tiles with bleach the first thing you need to do is spray the bleach all over the tiles in your shower (make sure you are wearing gloves and a mask). Allow the bleach to sit on the tiles for 20 minutes. Now rinse off the tiles with warm water. After rinsing the tiles use a dry cloth to wipe away the water. Remember to air the bathroom out whenever you use any bleach products.

Above I showed you how to clean your shower tiles with oxi clean bleach. Now I will show you how to clean them with chlorine bleach.

When using chlorine bleach or any other bleach products be sure to wear gloves, goggles(or any other protective eyewear), and a face mask. So now that you are geared up it is now time for me to show you how to use chlorine bleach to clean your shower tiles.

To clean shower tiles with chlorine bleach you need to pour 1/2 cup of bleach in a spray bottle and also add 2-3 cups of warm water to dilute it. Then spray the bleach onto the shower tiles and let it sit there for a couple of minutes. After doing that just rinse the bleach off the tiles with water.

So as you can see the main difference between using oxi clean bleach and chlorine bleach is that you have to dilute the chlorine bleach so that it isn’t as harsh as before.


6. Bathroom Cleaner

Using regular bathroom cleaners is almost the same as using bleach to clean the tiles in your shower. To clean your shower tiles with a bathroom cleaner spray all you need to do is spray the shower tiles and let the bathroom cleaner sit there for a couple of minutes. Then use a soft microfiber cloth to wipe the shower tiles. Make sure to clean the grout as well. The reason why you should use a microfiber cloth is that it will make your tiles shiny and clean without leaving any streaks.

Now rinse the tiles in your shower with warm water. After rinsing them you should use a dry cloth or cleaning towel to wipe away the moisture.


7. Dawn Dish Soap and Vinegar

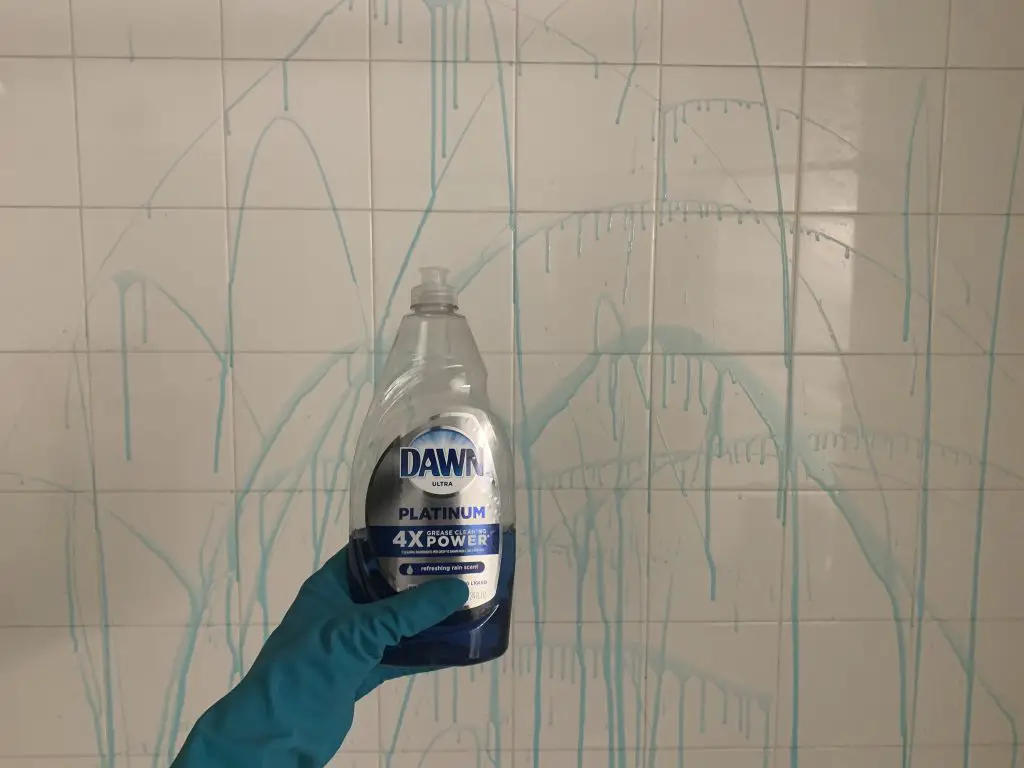
dawn dish soap being used to clean shower tilesWe already know that Vinegar is great for cleaning tiles because its acidic content will break down and remove any soap scum stain from them. But dawn dish soap is great for cleaning tiles as well because it will deep clean the tile grout and remove any mold and mildew that was on them.

So when you mix these two together, you’ll have a powerful tile cleaner.

To clean shower tiles with vinegar and dawn dish soap you need to mix dawn dish soap and vinegar in equal amounts into a spray bottle filled with 1/4 cup of warm water. Now spray the mixture onto the tiles and leave the solution on them for 1-2 hours. After that, you can rinse off the solution from the tiles.

Doing this will get rid of all the stains that were on the tiles.


8. Use a Steam cleaner

If you don’t want to use any harsh chemicals, then you should probably get a steam cleaner. A steam cleaner will get the job done by blasting steam directly onto the tiles. While this is a good thing, a steam cleaner costs a lot of money. You can rent one instead, but that will still cost you a good amount of cash.


How to prevent shower tiles from getting dirty

If you want to avoid deep cleaning your shower tiles every month, you might want to start maintaining them regularly.

Here are some tips on how to maintain your shower tiles.


  • Always air dry your shower after using it. Doing this will reduce the amount of mold and mildew that usually grows in your shower by a large amount.
  • Spray your shower tiles with vinegar at least 2-4 times a week.
  • Rinse the shower floor with water after using it. Doing this will get rid of the dirt (that came from your body) from the tiles.


Conclusion

Cleaning shower tiles without scrubbing may seem hard at first but after reading through this article and using it as a guide you’ll realize that it is very easy.

In this article, I showed you how to clean shower tiles without scrubbing. If you want to know more about cleaning your shower then you can click here to find out.


If you have a lot of dry erase markers lying around and you also have kids that like to play with a lot of items, then you know that eventually, your walls will have marks on them made by the markers you had laying around. In this article I will show you how to get dry erase marker off your wall.


Easy way to get dry erase marker off your walls


Things you’ll need:

  • Cotton balls
  • Rubbing alcohol
  • Clean damp rag
  • Hair spray
  • Office/magic eraser
  • Nail polish remover


Rubbing alcohol/cotton ball method

Rubbing alcohol is one of the best things you can use to clean certain stains around your home. SO it will do a really good job of getting dry erase markers off your walls. It doesn’t matter whether if its, writing, drawings, or simple lines, rubbing alcohol will get rid of it.


Instructions:

  1. Get a small container or dish and pour about 1/4 to a half cup of rubbing alcohol into it. Then dip a cotton ball into the rubbing alcohol.


  1. Gently wipe the area on the wall (with the cotton ball) that has the dry erase marker lines.


  1. Use the damp rag to wash off the rubbing alcohol residue that’s on the wall. The reason why you do this is because you don’t want the paint on the wall to get damaged over time.


This is just one of the methods you can use to get dry erase markers off walls. Here is another method that includes hairspray.


Hairspray method

Using hairspray to get dry erase markers off walls may sound a bit unusual but a lot of people said that this method worked for them. So if the previous method didn’t work for you I suggest you try this one.

Before you do this make sure to spray another wall in your house with hairspray to see if it will remove the paint. If not then it is safe to use.


Instructions:

  1. The first thing you need to do is to spray the area where the marker was used and leave the hairspray residue on that same area for 5-10 minutes.


  1. After that just use a dry cloth to wipe the area in a circular motion.


  1. Then use a damp cloth to wipe the same area again.


This method will definitely make your wall spotless.


Magic eraser method

Magic eraser is great for cleaning a lot of things and getting rid of stains, so I’m pretty sure it would do a good job of getting dry erase marker off of walls.


Instructions:

  1. Get a magic eraser sponge and dip it under running water.


  1. After doing that just squeeze out the excess water and use it to gently scrub the marker ink off the wall.


  1. If this method doesn’t work just repeat it over and over until you see results.


If this still didn’t work for you then maybe the next method will.


Acetone free Nail polish remover method

This method may seem weird but trust me it will work. Most Nail polish removers have rubbing alcohol in them. This is great for dissolving nail polish and removing them. it should do the same for the dry erase marker ink.

Before you try to follow the steps below, make sure to test the nail polish remover on a different wall where no one will see it. If the paint is being removed by the nail polish then I suggest not to use it.  However, if the paint isn’t being removed then I think it’s ok if you proceed with the following steps.


Instructions:

  1. Get a cotton ball or swab and pour a little nail polish remover onto it.


  1. Then use the cotton ball to lightly scrub the area on the wall that has the marker ink on it. If the marker stain is old you will probably have to repeat this step a couple of times.


  1. After wiping the wall with the nail polish remover, use a damp cloth to rinse off the wall.


Toothpaste method

This method is probably the simplest one to follow. Just follow the instructions.


Instructions:


  1. Apply a small amount of toothpaste onto a toothbrush


  1. and use it to gently scrub the marks on the wall.


Fabric stain remover spray method

Using a fabric stain remover spray like oxi clean or resolve is a surprisingly effective way of getting dry erase marker ink off your walls.


Instructions:

  1. Spray the marks with the fabric stain remover


  1. After spraying the wall allow the spray residue to remain on it for a couple of minutes.


  1. Then use a soft cloth to blot away the marks on the wall.


These are the best methods you can use to get dry erase marker off your wall. Now I am going to answer some questions that a lot of people seems to ask when it comes on to dry eraser marker cleaning.


Some other cleaning related articles you might be interested in:


Questions related to dry eraser marker cleaning


How to erase dry erase markers out of clothes?

Just pour a little rubbing alcohol on the stained area of your clothe and dab the area with a piece of paper towel.

How to get dry erase marker off of skin?

 Pour a little rubbing alcohol on a damp clean cloth and use it to remove the dry erase marker off of your skin. You

How to clean dry erase marker from carpet? 

To remove the dry erase marker from the carpet; what you need to do is to dampen a sponge with rubbing alcohol and use it to blot and absorb the stains out of your carpet.


I hoped you find this article on how to get dry eraser marker off your wall helpful.


Nike air force ones are some of the best sneakers to wear. They go well with a lot of casual fits but everyone knows that sneakers get dirty very easily and air force ones are definitely prone to getting dirty. A lot of people who own them said that the reason why he buys multiple air force ones is that they tend to get show a lot of dirt especially the white ones.

There might be different reasons for why you would want to clean your air forces:

  1. You may want to resell them
  2. You probably want to return them to the store
  3. You probably just want to clean them so they look good on you.

Whatever the reason don’t worry because I’m going to show you how to clean your dirty air force one sneakers in this article.


Tips on How to clean air forces at home?

  • When cleaning your air forces at home be sure not to use any strong chemicals such as bleach as this may damage the materials.
  • Be sure to always clean them with a soft brush or cloth after wearing them outside. You can even use a magic eraser sponge as well. The reason why you want to do this is that most white air force ones usually start showing a yellowish buildup if not cleaned regularly.
  • To avoid getting dust on them while they are sitting in your closet or room, just place them in their original box and close it.
  • It is always important to deep clean your air force ones at least once a month because sometimes just quickly wiping it down won’t work.


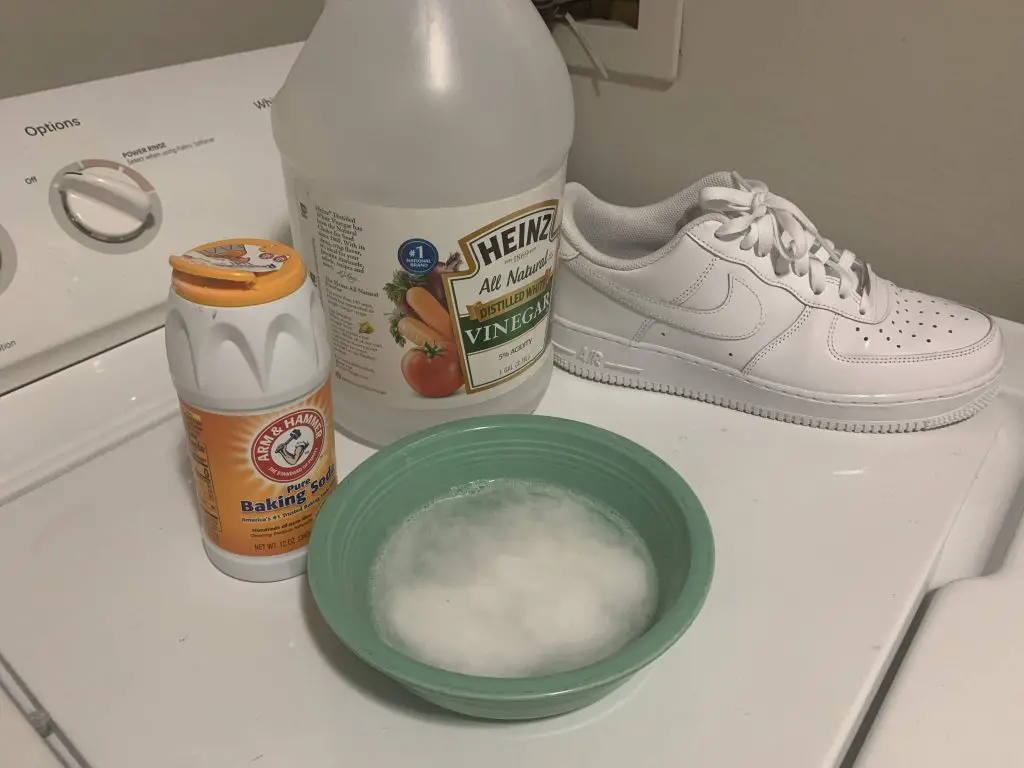
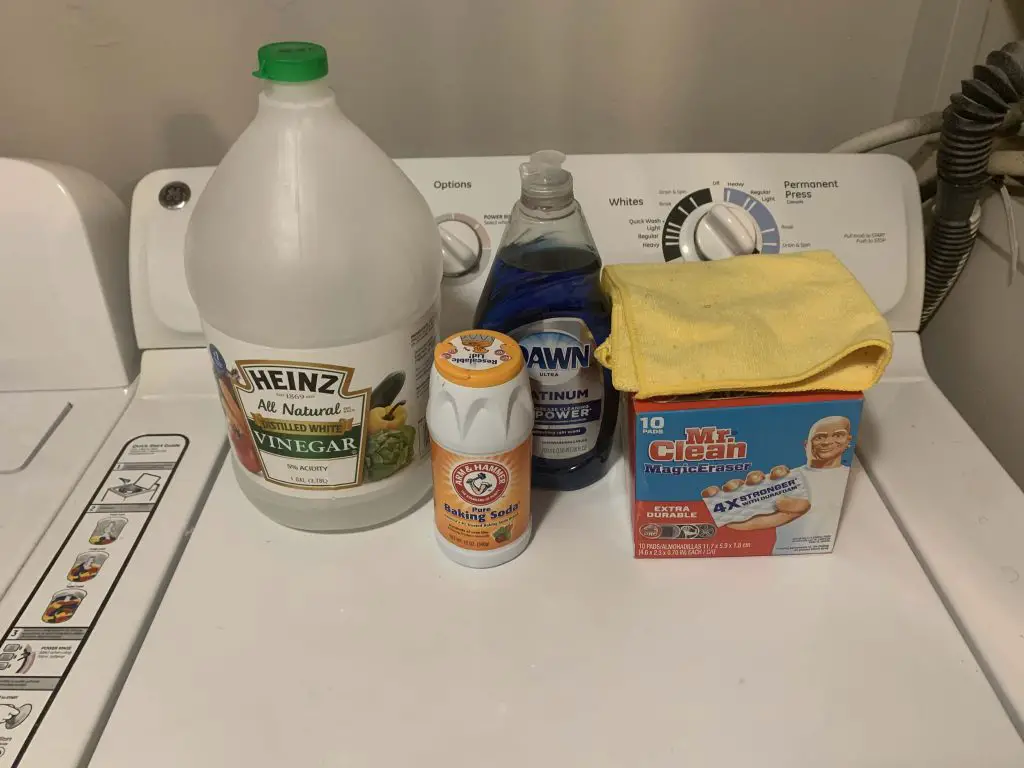
I will now show you how to deep clean your air force ones but first here are the things you need:

Vinegar,baking soda,dawn dish soap, magic eraser and microfiber cloth on top of washing machine

Things you need:

  • Dish soap
  • Water
  • Baking soda
  • toothbrush
  • White vinegar
  • Shoe brush
  • Clean cloth
  • Magic eraser
  • Small bucket or plastic tub


You might be wondering why do you need so many items but trust me most of them are needed if you want to your shoes look brand new again.


How to clean airforces step by step

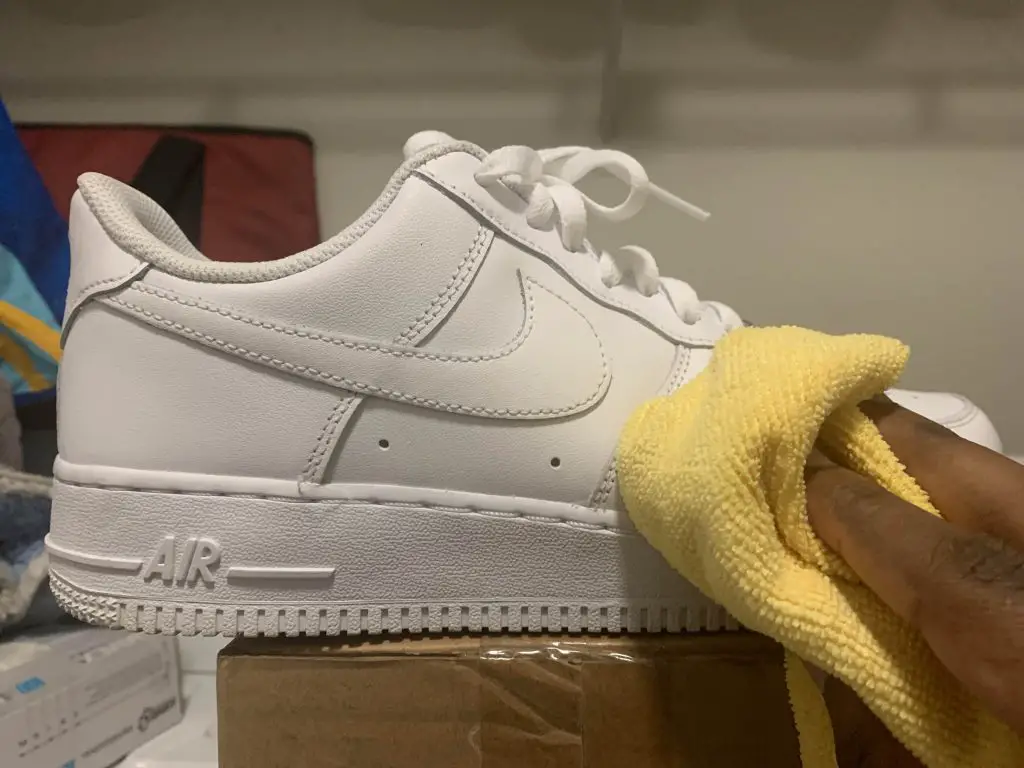
Cleaning white air force one sneaker with a microfiber cloth

Step 1. Remove the laces

Before you start cleaning it is always important to remove the laces from your shoes. Some air force ones may also come with some small decorations. Remove them as well (only if they can be removed).


Step 2. Remove loose dirt with a shoe brush

Just use a shoe brush with soft bristles to brush the dirt from the shoes. Most of the loose dirt will be on the sole of your shoes so make sure to clean them properly.


Step 3. Mix dish soap into the small tub of water

Make sure that the tub is only filled with about 1-2 cups of water.  Make sure to use the right dishwashing liquid because some of them may have some really strong chemicals that might damage the shoes. I think that dawn dish soap might be the best to use for something like this.


Create a cleaning solution or a DIY shoe cleaner (Optional step)

Get a spray bottle and mix together warm water and dish soap into it. When you are ready to use the spray mixture make sure to shake the bottle.

You can also mix baking soda and water together but I will explain this method later in this article.


Step 4.  Use the brush to clean the shoes

Dip the shoebrush into the mixture and gently clean the shoes. When cleaning your air force ones, you should use the brush in a circular motion. Doing this will get rid of all the dirt/dust that was on your shoes.


If you want a more precise way to clean or maybe you just want to clean the hard-to-reach spots on the shoes, just use a toothbrush instead of a shoe brush. When using a toothbrush you have to be careful not to scrub as the bristles on them are harder than the ones on a shoe brush.


Step 5. Rinse the bristles as you clean

This is a small but required step, but when cleaning your air force ones with a brush you have to make sure that you rinse the bristles as you clean. Doing this will prevent you from rubbing dirt all over the shoes.


Step 6. Clean the soles

When cleaning the soles of your shoes there are a lot of things to do. Most people will just tell you to clean them with a soft damp cloth and while that may be true some shoe soles might be so dirty that cleaning them with a cloth isn’t enough. If your shoe soles are like this then don’t worry because this step will come in handy.

Mix baking soda, warm water, and dish soap together in a small bowl. This will create a paste-like substance. Dip the toothbrush into the paste mixture and use it to clean the shoe soles. Rinse the toothbrush with clean water and repeat. Finally, wipe the bottom of the shoes with a wet cloth and then use a dry cloth to finish the job. You can also use a magic eraser sponge.

If you want more ways on how to clean your shoe soles just check out this article “ how to clean the bottom of shoes ”. Just make sure to avoid any method that includes bleach or other harsh chemicals that may damage your air force ones.


Step 7. Give the shoes a final wipe

After following every step above make sure to get a clean damp microfiber cloth and use it to wipe your shoes.


Step 8. Clean the shoelaces

Durty shoelaces can make even the cleanest shoes look very old. To clean your shoelaces you need to get a small container of water (around 2-3 cups) and add a few drops of dish soap or wash soap into it. Then place the shoelaces into the mixture and let them soak for a couple of minutes. After letting them soak use your hands to massage the laces. Then rinse them under running water. After rinsing them you should let them air dry.


Step 9.  Allow the shoes to air dry

Make sure you air dry your shoes at room temperature.  It is also important to allow them to dry before wearing them again (around 8-10 hours).


These tips are the best to follow when cleaning your air force ones.


How to clean air force ones that have yellow stains

Baking soda and vinegar mixture.Most old air force ones usually have yellow stains on them that are very hard to clean but don’t worry I’ll show you an easy way to clean them.
 

To get rid of the yellow stains on your air force ones you will need to use vinegar and baking soda.

  • Mix the vinegar and baking soda into a small dish. Mixing them together will create a paste substance.
  • Dip a toothbrush or a shoe brush into the paste and use it to gently rub your sneakers. Then let the shoes dry for about 10 minutes.
  • Use a damp cloth to wipe away the paste residue that’s on the shoes.

After doing this, your air force one sneakers will be looking brand new.


How to clean different air force one sneaker materials

Throughout this article, I showed you how to clean regular air force ones the right way. But there are many other air force ones that are made up of different materials such as suede, knit, etc.


I am going to give you some tips on how to clean these different materials.


How to clean suede airforce one sneakers

Suede is known to be very difficult to clean. One of the reasons why suede material is hard to clean is because you have to clean it with things other than water.

Here are some ways to clean your suede sneakers:

  • Use a suede brush to brush away any dirt or scuff marks you see on the shoes. Make sure that you brush the shoes in the same direction as the material. You can also use a suede rubber to clean the shoes as well.
  • If the shoes have tougher stains on them, just dip a soft clean microfiber cloth into a small bowl of vinegar and use it to gently scrub the suede material.


How to clean knit material on Flyknit air force ones

Flyknit shoes are very delicate and they tend to get dirty very easily. Not only that but you have to be extra careful when cleaning them. To clean flyknit air force ones and other knit shoes all you need to do are mix water and soap in a small container. Make sure the soap doesn’t have any harsh chemicals in it. Then use a cloth to clean the shoes.

These are the best ways to clean suede and flyknit air forces.


Now that you’ve finished cleaning your shoes, here are some frequently asked questions you should probably read.


Frequently asked questions about cleaning air force ones:


Can you wash air force 1s with a washing machine?

The answer to this is no. Washing your air forces in the washer is a very bad idea. While some other shoes are made of more durable materials, your Air force ones on the other hand would probably be damaged because it is made up of leather.


What to do if your shoes are still dirty after cleaning them?

If your air force ones or any other shoes are still dirty even if you followed all the steps and methods above then maybe your shoes are too old and you probably might need a new pair.


How to get rid of bad shoe odor?

This doesn’t only go for air force ones but a lot of shoes tend to smell bad after a while. The reason why this might happen is that the inside of your shoes was wet and you didn’t dry them properly or maybe it’s because of the bacteria that’s in your shoe or on your feet.

To get rid of the bad odor all you have to do is sprinkle baby powder inside your shoes and leave it overnight. The next morning you should shake out the baby powder and your shoes should be smelling way better than before. You can also use baking soda.


Why do air force ones turn yellow over time?

The reason for this is mainly due to oxidation. According to collinsdictionary.com oxidation is “ a process in which a chemical substance changes because of the addition of oxygen.”. So if you get dirt or dust on your air forces they will eventually turn yellow. Unfortunately, there aren’t a lot of ways in which you can prevent this.


How often should you clean air force ones?

This usually depends on how often you wear your shoes. Most people who jog daily or go out a lot will probably need to clean their shoes every two weeks while those who don’t usually go out or jog that often should only clean their shoes once a month or when they start to look really dirty.


Throughout this article, I showed you how to clean your air force ones and also answered some frequently asked questions about them. I hope this article was helpful to you.

If you work on cars a lot or maybe you were just randomly carrying gasoline around, the chances of it spilling on you are high. While gasoline may not damage your skin immediately it can still cause some irritations and it will also mess up your clothes as well. So if you have gas spilled on your hands or on your clothes don’t worry because in this article I will show you how to get the gas smell off your hands and clothes.


How to get rid of gas smell off hands

I am now going to list some simple ways on how to get gas smell off hands.


1. Use baking soda

Baking soda is great for cleaning and deodorizing. So it will definitely do a good job at getting rid of gas smell off your hands. All you have to do is get a small dish and mix baking soda with a little water to create a paste-like substance. Now rub the paste all over your hands and leave it on them for about 3-10 minutes. Then rinse your hands under running water. After doing this you will no longer have any gasoline odor coming from your hands.


2. Rubbing alcohol

Rubbing alcohol is great for getting rid of grease and bad odors. That is why you should use it if you spilled gas all over your arms. To get rid of the gas smell with rubbing alcohol all you need to do is pour a little in the palm of your hand and rub it all over. Do this until the gasoline smell is gone.


3. Use white vinegar

When cleaning your hands with white vinegar you have to make sure that you rub it between your fingers as well. After doing that just rinse your hands under running water. If your hands smell like vinegar after, just wash your hands with hand soap and rinse them.


4. Use vanilla extract

Get a cup of water and place a few drops of vanilla extract into it. Be sure not to use too much extract, because while it may smell good too much of it might be hard to bear. After that just use the vanilla extract to deodorize your hands. Be sure to rub your hands for 1-3 minutes until the gasoline smell is gone.


5. Scrub with lemon

For this, you can either use a fresh slice of lemon or lemon juice. If you are going to use a slice of lemon, all you have to do is just rub it all over your hands for around 2-3 minutes. Using lemon juice is similar; just pour a little all over your hands and rub them until you can no longer smell the gasoline. How to get the gas smell off hands


6. Use hydrogen peroxide

To get rid of the gas smell off your hands with hydrogen peroxide you need to mix the peroxide into a bowl of water. Then soak your hands in it for around 2 mins. Don’t soak for too long, as peroxide can be harmful to the skin. After doing that just rinse off your hands with water.


7. Use dawn dish soap

Dawn dish soap is known to get rid of grease easily. It is a good way to Wash the gas off your hands. When washing your hands with dawn dish soap make sure to do it for 3 minutes. After that just rinse them and the smell will be gone.

If you want to know some more incredible dawn dish soap uses just click here.


8. Get a mechanic hand soap

Using a mechanical soap is probably the best way to get rid of gasoline grease and smell from your hands.

These were the best ways to get the gasoline smell off your hands now I will tell you how to prevent your hands from smelling like it.


How to prevent your hands from smelling like gas?

The simplest way to protect your hands from smelling like gas is to just wear chemical-resistant gloves when handling gasoline. While gasoline may damage other gloves; these types of gloves are very resistant to a lot of chemicals including gasoline. You can find these gloves at your local home depot.

Throughout this article is told you some incredible ways on how you can get the gas smell off your hands. Now I am going to show you how to get rid of gas stains/smells from your clothes.


How to get rid of gas smell/stains from your clothes

Having gas-stained clothing is no joke. They are very unsafe for your body and also hazardous because they’re flammable. If you have large gas spills over your clothing I would highly recommend that you get rid of them.

Now if you have some smaller gas spills you can just clean the gas stains out of them. You might be thinking that this might be very hard and I would be lying if I didn’t agree; but it is not as hard as you think, just do the following steps and the gas stains will be out of your clothing and they will smell great again in no time.


1. Air dry your clothes

Before you you start removing the stains, it is best to let the clothes air dry first. This is because it is much easier to get rid of dried gasoline stains than wet ones. So just let your gas-stained clothes air dry for a whole day. The reason why you want to air dry and not use the dyer is that the dryer has a lot of heat inside of it and gasoline is highly flammable.


2. Soak the clothes in vinegar

After letting your clothes air dry, you should now soak them in a mixture of vinegar and warm water for 45 mins to 1 hour.

The vinegar will help to deodorize the clothes so that they don’t smell like gasoline anymore.


3. Use baking soda

After letting them soak use baking soda to gently scrub each of the gasoline stains on the clothes. You can use a cleaning brush or an old toothbrush to do this.


4. Wash them with hot water

Immediately after scrubbing them with baking soda, put them inside the washer. When washing the clothes make sure to use hot water and a stain-removing detergent. After washing them the gas stains will be gone and they will know smell way better than before.


5. Let them air dry again

After washing them don’t put them in the dryer instead just air dry them outside and they will be dry and ready to wear again in a day or two.


I hope that this article showed you how to get the gas smell off your hands and clothes.


In this article, I will show you how to get rid of roaches in car. I will also show you how to prevent cockroaches from getting into your car.


How and why do roaches get in your car?

Roaches like to sneak into small areas and because they have very tiny bodies they are able to do so easily. Your car has many small areas where roaches can fit through and this will cause a roach infestation inside your car. Now the reason why roaches live inside your vehicle is maybe that there is a lot of food inside of it. Roaches love places where there is food, shelter, and water, and most times when a car is very filthy it probably has a lot of food in it and maybe water as well. Now you might be saying “my car isn’t that filthy” and maybe it isn’t on the surface, but if you look into certain areas you’ll realize that there is a lot of food crumbs and other things that might be attracting roaches.


Dangers of having roaches in your car

One of the worst things about roaches is that they spread different types of bacteria. These bacteria can cause health problems. If you don’t do anything about the roaches in your vehicle they might lay eggs inside your car and that is one thing you don’t want to happen.


Where do they hide?

Cockroaches like to hide in very small and unexpected places such as under the car speakers, seats, ac vents, etc. So sometimes it’s best to bait them out with something then you kill them.

Now I am going to tell you some of the best ways on how to get rid of roaches in your car.


Some of The best ways to get rid of roaches in your car

I am now going to show you some incredible ways to get rid of roaches that are inside your car.


1. Clean inside the car by removing trash from it

Inspect your car to see if there is any garbage in it. By garbage, I mean things like leftover food, plastic, food bags, food crumbs, etc. Use your hand to pick up most; if not all the garbage that’s inside your car.


2. Use insecticide to kill the roaches

If you have a can of insect spray just spray it inside the areas you think the roaches are hiding. Be sure to wear a mask. You can also use bug bombs as well. After using them you need to air out your car. Doing this will help to get rid of the toxic fumes that most insecticides have. I also highly recommend that you don’t use your car for around 2-4 days.


WarningWhile those 2 methods are somewhat good. The cons outnumber the pros. First of all, using insecticides in your car isn’t a good idea because they are very toxic and it can take a while for the fumes to go out of your car. It’s also recommended that after you use them you have to steam clean (a steam cleaner can be very expensive) inside of your car. I personally would not try these 2 methods unless the roach infestation is very bad and I don’t have any other options.

Now I will show you a safer method on how to kill the roaches in your car.


3. Use Borax as bait

Borax is a great and safe household item to use. It’s not only great for laundry but it has tons of different uses as well. If you are interested in some of if its other uses then click here to get rid of roaches. But now I am going to tell you how you can use it to get rid of cockroaches that are inside your vehicle.

The first thing you need to do is mix together borax and something sweet like honey, sugar into multiple bottle caps or small dishes. You can also just sprinkle the borax where you think the roaches are hiding (under the seats, trunk, car floor, etc) and mix it with honey or sugar. Roaches love the sweet smell of food so this will attract them and after consuming the honey or the sugar they will eventually die because the borax acts as a poison to them.


4. Vacuum inside of the car

This method is similar to the first one but the difference is while the first one is about picking up garbage, this one is about just getting rid of much food crumbs as possible. If you eat a lot in your car then you will definitely have crumbs spilled somewhere whether it’s under the seats, between them, on your dashboard, or on your floors. To clean inside of your car with a vacuum is easy, all you need is a portable vacuum and clean the areas that I’ve just mentioned. Doing this will definitely get rid of the food crumbs that are in your car and it will also prevent roaches from showing up or make them want to leave.

The good thing about this is that you are not only getting rid of the food that’s in your vehicle but you are also cleaning it as well by getting rid of dust and dirt particles that were in it.


5. Get your car steam cleaned

I’ve mentioned before that you can get inside your car steam cleaned if you used any strong insecticide products in it. Even if you didn’t use any insecticide in your car you can still use a commercial steam cleaner to clean inside your car. As I’ve mentioned before in this article a lot of commercial steam cleaners are very expensive. This is one of the only cheaper ones that I’ve seen that have decent reviews about it “ McCulloch MC1385 Deluxe Canister Steam Cleaner “.

Before you clean your car with a steam cleaner you still need to do the 1st, 3rd, and 4th methods I’ve listed.

Cleaning inside your car with a steam cleaner will help to keep roaches away.


I don’t recommend that you just buy a steam cleaner for only getting rid of roaches even if you think that the other methods won’t work (which most of them will). Now If you already had a commercial steam cleaner at home then it would be fine to use it since you won’t spend a ton of money.


How to prevent roaches from returning into your vehicle.

Throughout this post I’ve been telling you some ways on how to get rid of roaches in your car, but now I will tell you how to prevent them from showing up.


1. Avoid getting food crumbs on the floor and on the seats.

This is a common issue for a lot of people who eat a lot in their vehicles. Now I don’t want to tell you that you shouldn’t eat in your car because there isn’t a problem with that but you have to make sure that you immediately clean up the food crumbs with a portable vacuum or just spread a large towel over your body when you are eating. Food is probably the number one reason why roaches would want to be in your vehicle.


2. Close windows

If you are probably thinking “but everyone closes their vehicle windows” you can move on to the next method since this doesn’t really apply to you. Some people don’t really close their car windows fully which is weird and bad because it might be easier for car thieves to break-in. But sometimes a car can be old or it may have some issues going on with the windows which won’t allow them to shut completely. This will cause roaches to go inside your car especially if you have food inside of it.

If you cant fully shut your car windows I would suggest that you use some cardboard to block the windows.

3. Make sure not to store any food in the car

By this, I mean that you shouldn’t leave things like food bags and other food-related garbage in your car because you might think that there isn’t anything left in them but the roaches will know that there is food left for them to eat.  So it’s best to just get rid of any food bags and other garbage you might have laying around in your car.


Conclusion

So in this article is told you how to get rid of roaches in your car and also how to prevent them from showing up. Alot of these methods worked for other people so I hope it works for you as well.


Maggots are very disgusting. They tend to be in areas where there is a lot of bacteria and this includes your trashcans/garbage bins. If your trash can has maggots and you don’t know how to deal with them don’t worry In this article I will show you how to get rid of maggots in trash can.


What are maggots and where do they come from?

Maggots are larvae of flies; in particular, they are houseflies, cheese flies, and blowflies, rather than mosquitoes and crane flies, which are Nematocera flies.


Flies usually like to find places where there is food and your trash can is one of these places. When flies find an area with the food they usually lay their eggs there and their eggs become maggots. So it’s always best to keep your trashbags sealed because if you keep flies away from your garbage bins/trash cans you will be less likely to have a maggot infestation.


Will garbage man take garbage with maggots?

This question has been asked a good amount of times and all I have to say to this is yes, the garbage man will still empty your garbage even if you have a lot of maggots in the trash can. When the garbage collector disposes of trash they arent looking inside of your trash can, depending on where you live the truck usually picks it up so no one will see inside of it ( and even if they did, they would still have to dispose of the trash).


So while the garbage man will still dispose of your garbage even if you have maggots in your trash can, this doesn’t mean that your maggot infestation problem will be solved. You still have to get rid of the maggots or prevent them from showing up. Below I’ve listed a couple of ways you can get rid of maggots in your trash can.

Different Ways to get rid of them

  1. Use bleach-Mix bleach with equal parts of water and use this to spray the maggots inside the trash can. After spraying them close the trash can and wait for 30 mins. The harsh bleach fumes will suffocate the maggots. You can also use a hose and fill the bottom of the garbage bin with water and then pour some bleach into it. Make sure that you put enough bleach so that it’ll be enough to get rid of the maggots. Now close the lid of the trash can and wait 20-30 mins and then open it and wash the inside with bleach.


  1. boiling water- Boiling water is a simple yet effective method of getting rid of maggots. All you need to do is boil a pot or kettle filled with water and pour it all over the maggots inside the trash can. This will definitely eliminate all the maggots that were in it.

While this is a good method there are still more ways to get rid of maggots in your trash can.


  1. Use Vinegar– Attach a spray nozzle onto a bottle of vinegar and spray the maggots. Do this until all the maggots are eliminated. You can also fill the bottom of the garbage bin with water and pour a lot of vinegar into it and close the lid. Then after an hour, all the maggots should be dead.


  1. Mix the all-purpose cleaner with boiling water– For this, all you have to do is mix the all-purpose cleaner with equal parts boiling water and pour the mixture onto the maggots. This will get rid of all the maggots that were inside your trash can.


  1. Use insecticide– Insecticides works well on maggots. You can get insecticide at your local store online. If you are using a spray insecticide all you have to do is spray the maggots with it and also everywhere inside the trash can, then close it. Remember to wear a mask as insecticide can be very toxic to humans as well.


Ways to prevent maggots

Throughout this article, I’ve listed ways on how to get rid of maggots in trash cans but now I am going to tell you how to prevent them. There are three incredible methods you can use to prevent maggots from showing up in your trash can,


  1. Clean your trash can-cleanliness is a good way to prevent maggots. So if you want to avoid maggots from showing up inside your trash can just make sure you clean inside of it very often. It’s also best if you use bleach as its fumes will get scared away from flies from going inside your bin.


  1. Use big cart liner trash bags– Let’s say you have already cleaned inside your trash can and you want an additional way to prevent maggots. Just use jumbo garbage bags and place them inside the trash can/garbage bin. This is a great method because even if the maggots do appear in they are only inside the garbage bag.


  1. Seal garbage/trash– Make sure that you double your garbage bags so that if the one with the garbage rips there is still another bag to hold everything. This is good because when garbage bags (filled with garbage) rips and tears it allows flies to go inside and find any food-related things inside of it and lay their eggs witch becomes maggots. So it’s always best to double your garbage bags.


Conclusion


These are the best ways on how to get rid of maggots in trash can. I hope you find the method that worked best for you.