Let’s be honest: those trusty wooden spoons are the heartbeat of the kitchen, but they can get pretty gross if you aren’t careful. Because wood is porous, it loves to soak up flavors, stains, and—unfortunately—bacteria. If you’ve ever wondered if your favorite spatula is actually clean after a soak in the sink, it’s time for a deep dive. Learning how to clean wooden cooking utensils properly doesn’t just keep your food tasting better; it extends the life of your kitchen tools so they last for decades. From simple DIY cleaning hacks to effective natural sanitizing methods, I’m breaking down exactly how to keep your woodware pristine without using harsh chemicals.
Here is the best way to deep clean and maintain them:
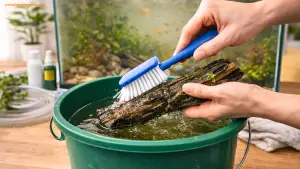
1. The Standard Clean
After every use, wash your utensils immediately. Avoid letting them soak in a sink of water, as this causes the wood to swell and eventually crack.
-
Use mild dish soap and warm water.
-
Scrub with a soft sponge to remove food particles.
-
Hand dry immediately with a clean towel instead of letting them air dry in a rack, which helps prevent warping.
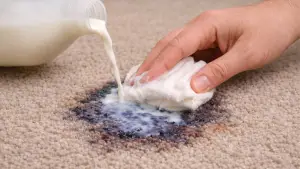
2. Deep Sanitizing & Deodorizing
If your spoons have been used for raw meat or have absorbed strong odors like garlic or onion, use these methods:
-
Hydrogen Peroxide: Wipe the utensil down with 3% hydrogen peroxide. Let it sit for a few minutes to kill bacteria, then rinse thoroughly.
-
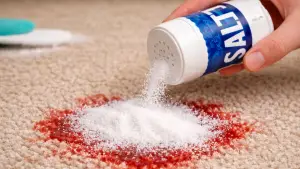
Lemon and Salt: Sprinkle coarse salt over the wood and rub it in with the cut side of a lemon half. The salt acts as a gentle abrasive while the citric acid sanitizes and removes stubborn smells.
-
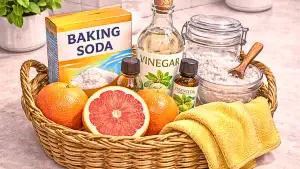
White Vinegar: To kill surface bacteria and remove grime, wipe the wood with a cloth dipped in a mixture of equal parts white vinegar and water.
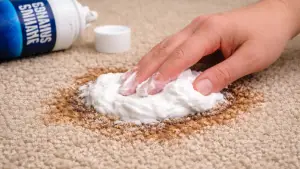
3. Removing Stains
For stains from turmeric, tomato sauce, or beets:
-
Create a paste of baking soda and water.
-
Apply it to the stain and let it sit for 15–20 minutes.
-
Scrub gently and rinse.
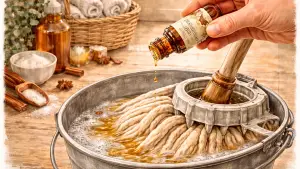
4. Maintenance: The Oil Finish
To keep the wood from becoming “fuzzy” or brittle, you should condition it once a month or whenever it looks dull.
-
Use Food-Grade Mineral Oil: Apply a thin layer of food-grade mineral oil or a specialized “butcher block” beeswax cream.
-
Avoid Food Oils: Never use olive, vegetable, or canola oil, as these can go rancid over time and create a sticky, smelly residue.
-
Let it Soak: Apply the oil, let it sit for several hours (or overnight), and wipe off any excess with a clean rag.
Important: Never put wooden utensils in the dishwasher. The high heat and intense water pressure will strip the natural oils and cause the wood to split or mold.
The “Fuzzy” Texture Fix
Sometimes after washing, a wooden spoon or utensils feels rough or “hairy.” This is called grain raising. You can tell your readers that this isn’t a sign the spoon is ruined—it just needs a 2-minute “reset.”
-
The Hack: Use a small piece of fine-grit sandpaper (320-400 grit) to lightly sand the surface when it’s dry. It smooths the fibers back down so they don’t trap food or feel strange in the hand.
2. When to Say Goodbye (The Safety Check)
Part of being an expert guide is knowing when a hack won’t save the day.
-
The Advice: If a wooden utensil has a deep, dark crack that goes halfway through the wood, it’s time to toss it. Bacteria can hide so deep inside those cracks that even a lemon scrub can’t reach them. Safety first!
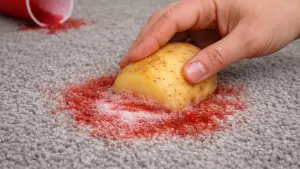
3. Quick Deodorizing Hack for Strong Smells
If someone just cooked a heavy garlic or onion dish and needs a “right now” fix:
-
The Hack: Rub the wood with a cut potato. The enzymes and starch in the potato help neutralize organic odors quickly without needing a full deep-clean cycle.
4. Storage Tips to Prevent Mold
Most people toss their spoons in a crowded drawer while they are still slightly damp.
-
The Advice: Always store wooden tools in an upright crock or hanging on a hook. Air circulation is the best natural defense against mildew and “old wood” smells.
The Takeaway:
At the end of the day, taking five minutes to care for your tools makes a massive difference in your kitchen routine. By sticking to hand washing wooden utensils and avoiding the dreaded dishwasher, you prevent cracking and mold before they even start. Whether you’re using a lemon and salt scrub to deodorize or a quick vinegar rinse to sanitize, these small steps ensure your “kitchen workhorses” stay safe and beautiful. Don’t forget to finish with a little food-grade oil to keep that wood glowing! Now that you know the best wood kitchenware maintenance tips, your utensils are ready for the next delicious meal.


")


")