Category

cleaning tips

Category

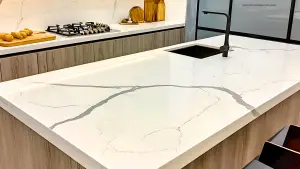
Everyone knows that quartz countertops usually look very beautiful. They also bring out the beauty in your kitchen as well. But when they get dirty this can be an issue.
The regular way to clean a quartz countertop

I will now show you the steps needed to clean a quartz countertop. These steps will guide you and show you the normal way to clean your countertops.


Step 1- wipe the countertop with dawn dish soap

Dawn dish soap is a very good dish soap to use. In fact, it is my favorite because it’s great at both degreasing and cleaning.

For this step, all you have to do is get a wet cleaning rag soaked with warm water (make sure to squeeze out the excess water). Then squeeze a drop of dawn dish soap onto the rag and use it to wipe down the quartz countertop.

After wiping down the countertop be used to dry it then move on to the next step.


Step 2-  remove gunk by scraping them away

This is a very simple step. The only thing you have to do is use a putty knife to scrape off the gunk that’s on the countertop.

You might be wondering why do you need to do this step if you’ve already done the first one. Well, this is because the first step was only to clean the overall surface of the countertop while this step focuses on removing the gunk that the dish soap and rag couldn’t get rid of.

Also, remember to be careful when scraping your quartz countertop because you don’t want to cause any scratches.


Step 3- spray the countertop with disinfectant spray

This step may seem like an odd step but trust me it is very much needed.

So in the step above you mostly scraped off gunk which means that your countertop might still have some small gunk particles left-back so it’s best to use a Lysol disinfectant spray to spray the entire countertop and then use a clean rag to wipe it.

Doing this will both clean and make your quartz countertop smell good.


Step 4- Clean the countertop with a de-greaser (optional)

This is an optional step which means you don’t have to do it. But if you want to know how to decrease your countertop then you can still follow this step.

The first thing you want to do is find a de-greaser, you can use this one or buy one at your local store/supermarket.

The next thing you should do is spray the countertop with the de-greaser and use a damp cleaning cloth or sponge to wipe/scrub it. Doing this will get rid of the grease from your quartz countertop which will make it look nice and beautiful again.


How to remove stains from quartz countertop

Overtime our countertops might have a lot of stains on them, especially food stains such as ketchup, mustard, etc, but in most cases, they aren’t hard to clean.

Cleaning stains from a quartz countertop is something you need to do as soon as any spills that might form stains happen because letting the stain SET-IN on quartz can ruin the look and also damage the stained area of the countertop.

I will now show you the steps needed to remove stains from a quartz countertop.


Step 1 – use goo gone

Goo Gone is great for cleaning and removing stains. So it makes sense to use it to remove tough stains from your quartz countertop.

When cleaning the countertop make sure to use a cleaning rag and gently scrub the surface. After doing this the stains will either be gone or look faded away. If they look like they are fading away then you can repeat this step or move on to the next one.


Step 2-  clean it with rubbing alcohol

Get a wet microfiber cleaning cloth and pour a little rubbing alcohol onto it. Then use the cloth to clean the quartz countertop stains. Make sure to scrub the stains until they disappear. If the stains are still visible then move on to the final step

If you are interested in some other ways you can use rubbing alcohol then click here.


Step 3- spray with glass cleaner

This might seem a little weird but it is very effective. All you have to do is spray the glass cleaner on the stains and use a non-abrasive sponge to scrub them away. The stains should finally disappear as you’ve completed all the steps.


Step 5- dry it with a paper towel or microfiber cloth

After removing the stains from your countertop make sure to use a dry microfiber cloth or paper towel to dry it.


How to prevent quartz countertops from being damaged and getting too dirty

Great job you’ve most likely finished cleaning your quartz countertop but here are some things you need to know to prevent your countertop from getting too dirty and being damaged.


Clean your quartz countertops regularly

This is very simple, all you need to do is set specific dates on when you are going to clean your countertop. I usually clean mine every two weeks with Lysol disinfectant spray and a microfiber cloth but you can use whatever works best for you (avoid using harsh chemicals).


Always clean up spills

Always make sure to clean spills when they just happened. If you leave any spill on the quartz countertop for a couple of days or up to a week, the material starts to look a bit damaged.


Avoid cutting it

When cutting anything make sure to use a cutting board and not your countertop. This tip should be used not only for quartz but any countertop you have.


Avoid heat

When I say avoid exposing your quartz countertop to heat I don’t mean natural warm temperatures. What I mean is that you should avoid placing hot things such as pots and pans or any other hot things beside or on the quartz.

This is because the resin that is used to make quartz is plastic which means if it is exposed to too much heat it can begin to melt which will damage the countertop.


CONCLUSION:

A clean good looking quartz countertop can really brighten the look of your kitchen so be sure to know how to clean them and avoid damaging them.



If you are wondering why your earrings are dirty this might be because you haven’t been cleaning them too often. This is something you want to avoid because the less you clean your earrings the more gunk starts to build upon them. This gunk usually has a bad smell. In this article, I will show you how to clean your earrings using these 8 amazing hacks.


What is the gunk that builds up on earings called?

That smelly gunky stuff that builds on the back of your earrings is called smegma. In the absence of washing or exposure to air, it forms when something is in contact with the skin for a long period of time.

In order to prevent this, be sure to take your earrings out every day and wash your lobes.


How to clean earrings

To clean your earrings properly I will show you 9 hacks you can use. After using these hacks to clean your earrings they will be way cleaner than before. They will also be no more gunk on them.


1. Clean them with vinegar

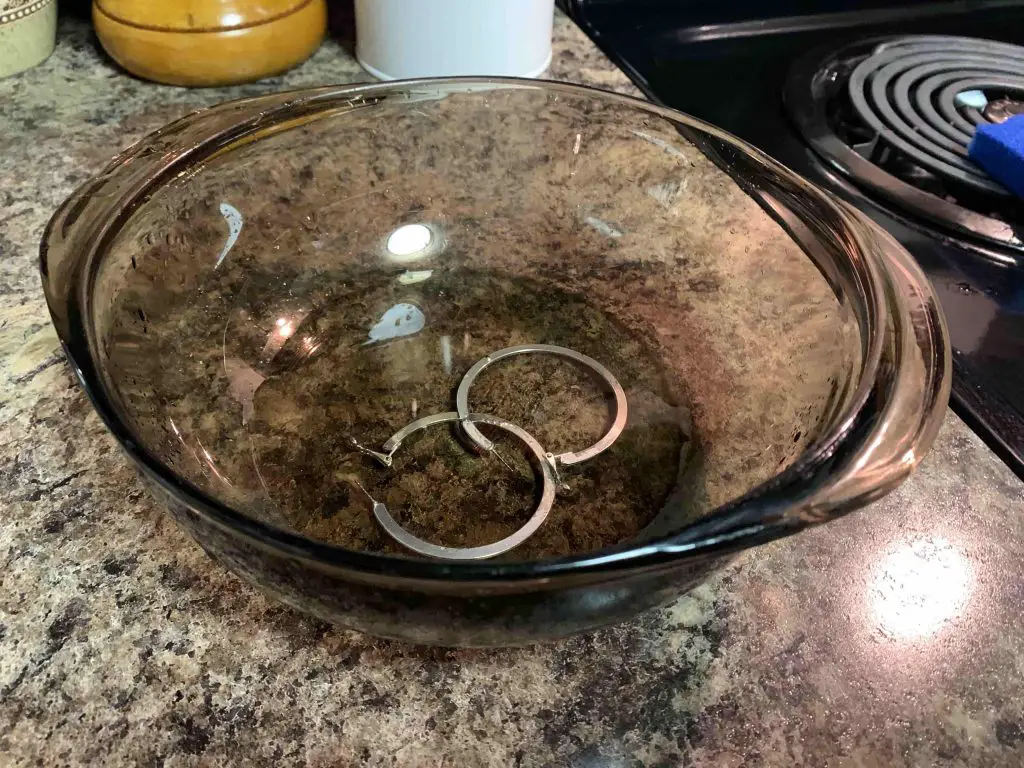
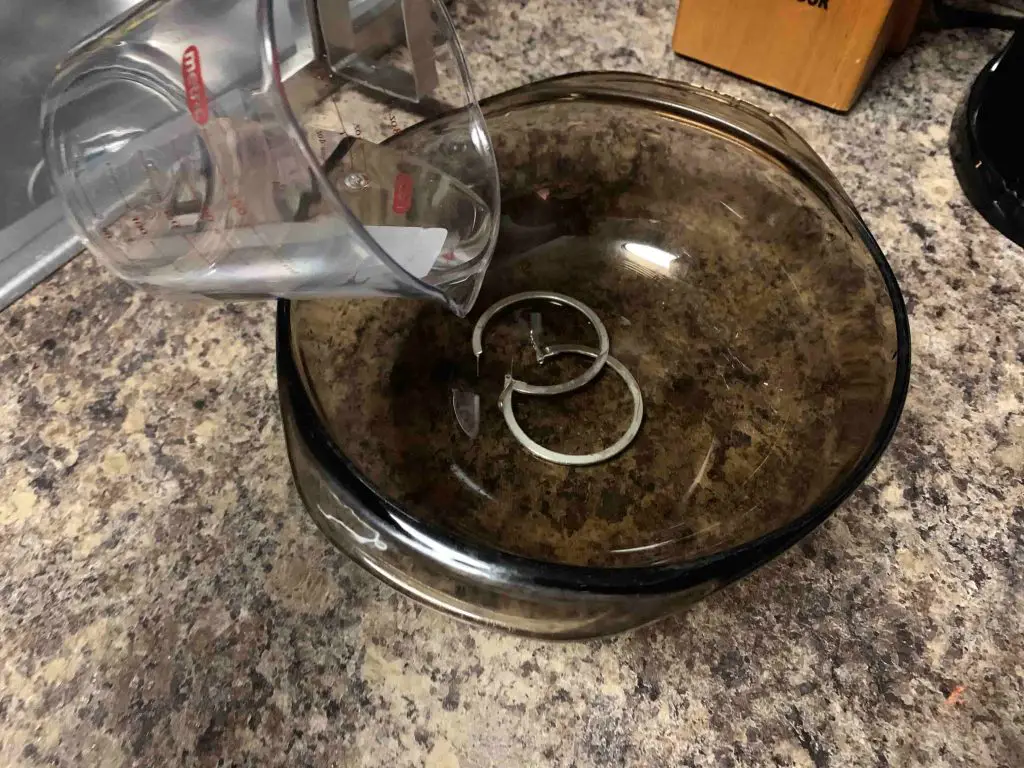
using vinegar to clean earrings in a dishDid you know that you can use vinegar as an earring cleaner? Well, now you know. Vinegar can be used to clean a lot of things. But before you clean your earrings with vinegar remember to do research to see if your type of earrings can be cleaned with vinegar.
 

To clean your earrings with vinegar all you have to do is pour 1-2 cups of vinegar into a mason jar and place the earrings inside of it. Now let them soak for 2-3 hours before taking them out.

The reason why you should let them soak for this long is that doing this will get rid of all the dirt, grime, and gunk that was on them. After letting them soak, it is now time to take them out and use a clean damp microfiber cloth to wipe them. Doing this will get rid of the vinegar smell. After wiping them place them somewhere to dry.


2. Use dish soap

Dish soap is great for cleaning earrings as well, especially diamond earrings. I will know you show you how to clean your diamond earrings with dish soap. To clean your diamond earrings with dish soap you have to mix together 2-3 drops of dish soap and 2 cups of warm water.

Then wait for the water to cool down and dip a toothbrush into it. Now use the toothbrush to gently scrub away the dirt and grime that’s on the earrings. You can also soak the earrings inside the solution as well. Soaking them will get rid of the gunk that was on the earrings.

After doing this use a let them soak in a different container of water, then dry them with a paper towel or a clean microfiber cloth.

You can also use a jewelry cleaning pen to clean your earrings.


3. Wipe Earrings with a microfiber cloth

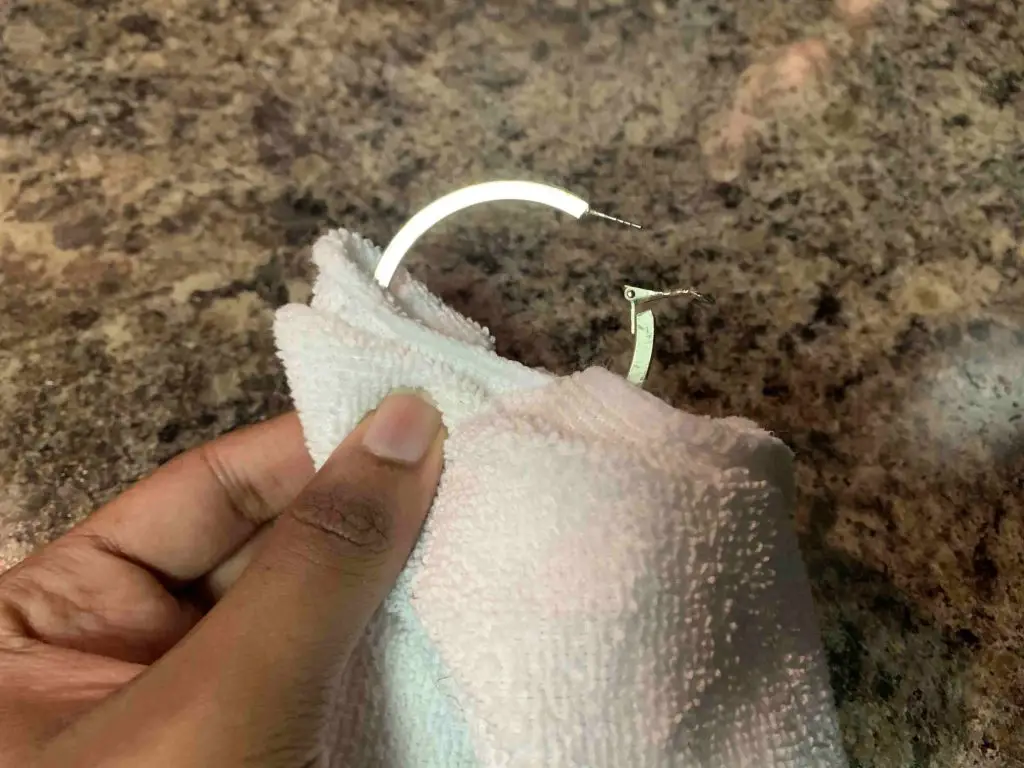
cleaning an earring with a clothMicrofiber cloths are a must to have when cleaning things because they can clean almost anything without leaving behind thread residues. While most time these residues aren’t a big issue, they can still make things such as your earrings look old and ugly.

A microfiber cloth will remove any grease or fingerprint marks that are on your earrings, it will also remove the black gunk that’s on it as well.

To clean your earrings with a microfiber cloth all you have to do is place the cloth under running warm water and use it to wipe the earrings. That’s it! Now place the earrings somewhere where they can dry easily.


4. Let them sit in warm water

Earrings in a dish of warm waterThis is the simplest hack in this article. All you have to do is boil some water and then pour it out in a mug or mason jar. Then place the earrings in the water and let them soak for 30 minutes.
After that, you should use a toothbrush to gently clean the earrings, then use a clean microfiber cloth to dry them. While this method is very simple it is not as effective as the previous hacks/methods.


5. Shine silver earrings with ketchup

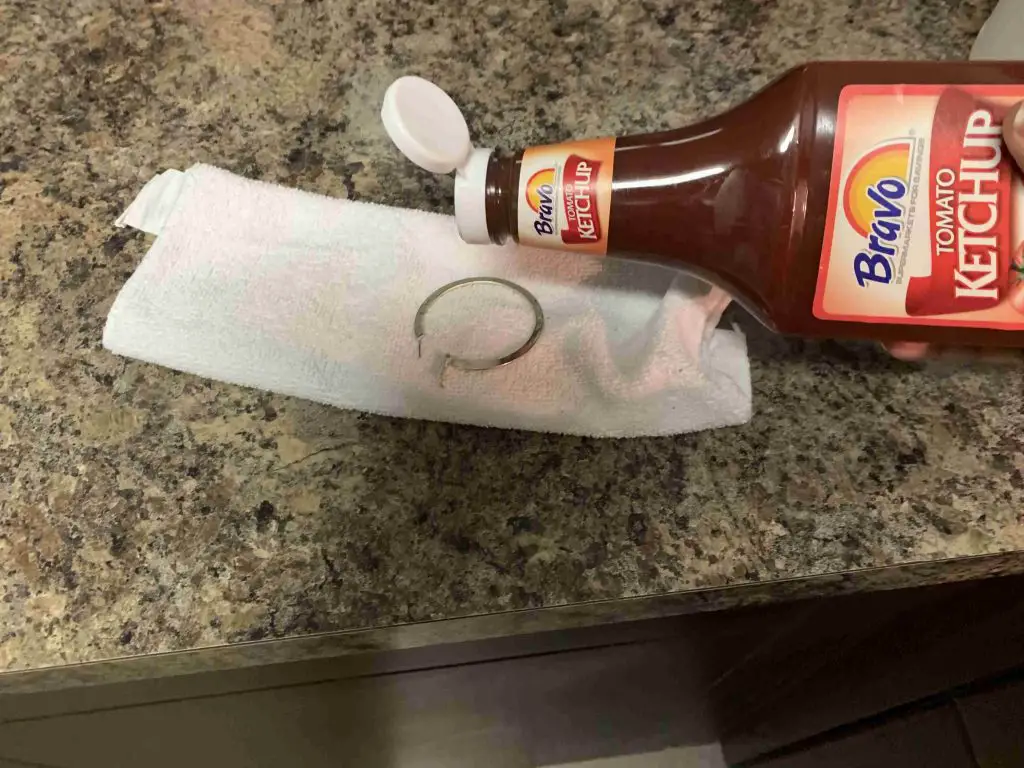
ketchup about to be squeezed on earring to clean itOut of all of the hacks in the article, this one is the strangest one. But not because it is strange and weird doesn’t mean it is not effective. Ketchup can be used for a lot of surprising things and cleaning silver is one of them. If you are interested you can check out an article I made showing you 5 different ketchup cleaning hacks.
When cleaning your silver earrings with ketchup make sure to only clean the silver areas. If your earrings have diamonds in them then I recommend not to do this hack. after doing this you’ll realize that your silver earrings are way shiner than before.


6. Clean with silver wipes

If you don’t want to use ketchup then your can use Silver wipes. Silver wipes are another great way to clean your silver earrings. You can get these on Amazon for a reasonable price.

These aren’t only good at cleaning earrings, they can also clean any silver material such as utensils and jewelry. The formula used to make these wipes aren’t strong enough to damage your earrings but strong enough to clean and make them shiny.


6.Use hydrogen peroxide

Hydrogen peroxide is another great earring cleaner. Not only will hydrogen peroxide clean your earrings it will also disinfect them as well making you less likely to get an ear infection.

To clean your earrings with hydrogen peroxide; pour a little dab of hydrogen peroxide on a microfiber cloth and use it to clean all over the earrings.

Another way to clean your earrings with hydrogen peroxide is to get a container and pour 1 cup of peroxide into it. Then place the earrings in the hydrogen peroxide for 6 minutes, then place them in a container of warm water for 2 minutes.

After 2 minutes take them out and use a toothbrush and gently scrub away the grime that was on the earrings.


7.Use a toothpick to clean hard to reach areas

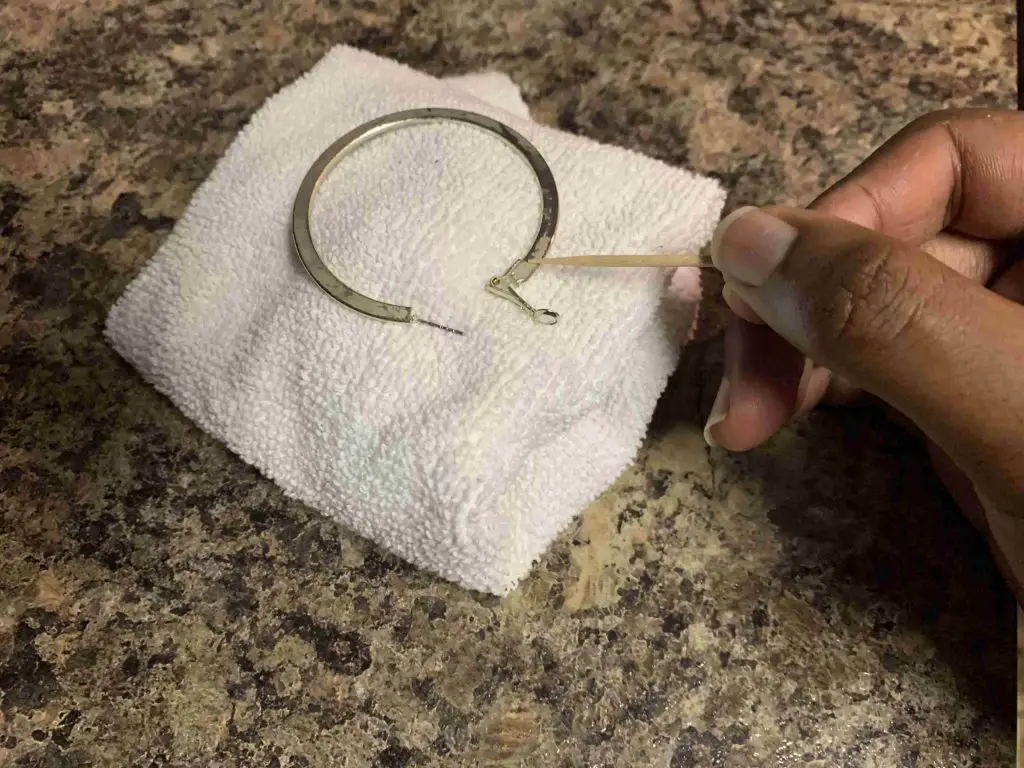
using a toothpick to clean an earringUsing a toothpick to clean earrings might seem odd at first but most earrings usually have a complex design with small crevices and holes.
These holes usually have gunk inside of them and a regular cleaning cloth won’t get rid of them, so it’s best to use a toothpick to clean these hard-to-reach areas.


Conclusion

In this article, I showed you how to clean earrings with 8 different hacks. I hope this article was helpful.


Today I will be showing you how to clean a sponge using 9 simple yet effective methods.


Why do dish sponges smell so bad?

The reason why most dish sponges smell so bad after time is because of three things; they have a lot of food on them, they aren’t being cleaned regularly and there is a lot of water soaked into the sponges. I will now show you the best ways to clean your dirty dish sponges.


1. Soak  it in boiling water

sponge being soaked in warm waterCleaning a sponge with boiling water is one of the best ways to remove bacteria from it. To clean your sponge with boiling water, you just need to fill up a pot with 3 cups of water and let it boil.
Then place the sponge inside of the boiling water and let it sit there for 4-5 minutes. After that let the pot cool down and take out the sponge and squeeze the excess water out of it.


2. Clean it with vinegar

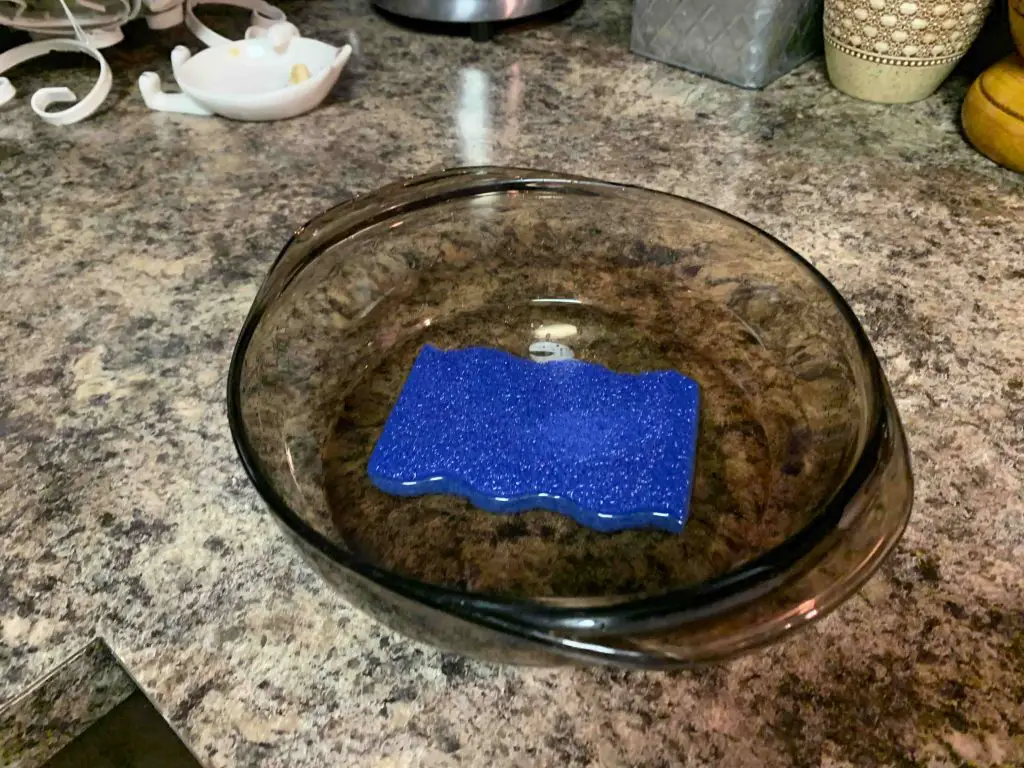
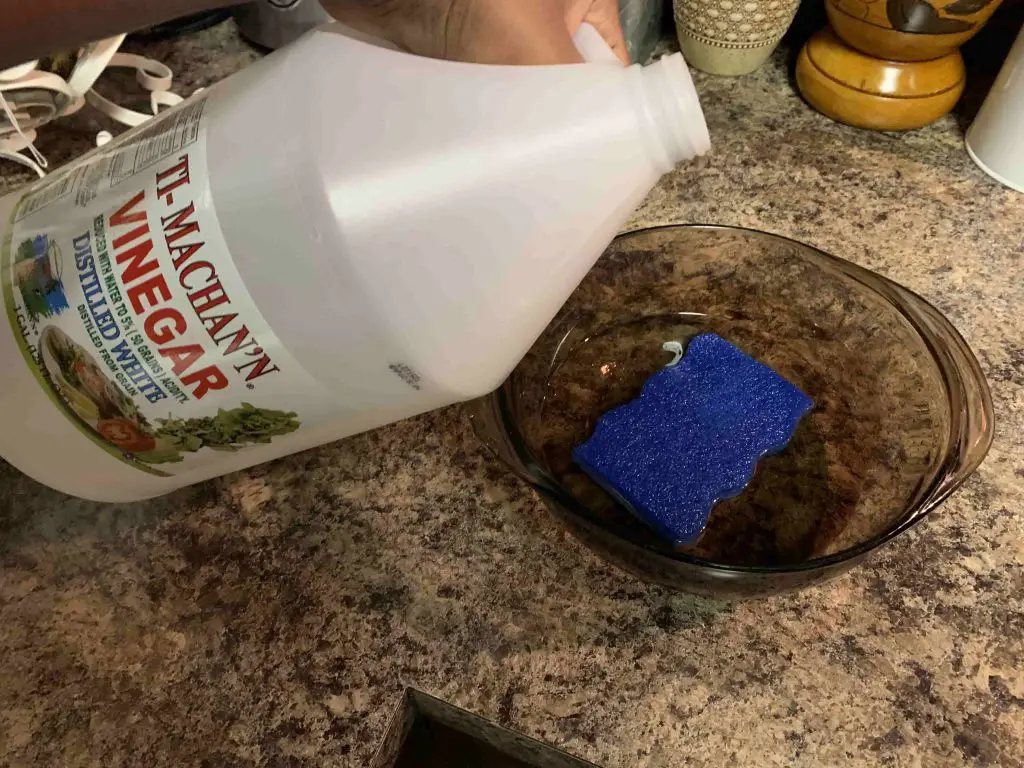
dish sponge being soaked in vinegarThe best vinegar to use when cleaning a sponge is one that is for cleaning and not for cooking/eating. Before you clean your sponge, make sure to rinse it under running water so that they are no food particles left on it.

After rinsing it you should place it into a small bowl filled with 2-3 cups of vinegar and let it soak for 10-30 minutes. After letting it soak take out the sponge and rinse it using dish soap and water.


3. Throw it in the washer

This is probably the easiest method in this article. All you have to do is just place the sponge inside of the washer and use your favorite laundry detergents (make sure to select the warm water option). After washing it, you should know to place it inside the dryer so that the heat can kill the remaining bacteria.


4. Place it in the microwave

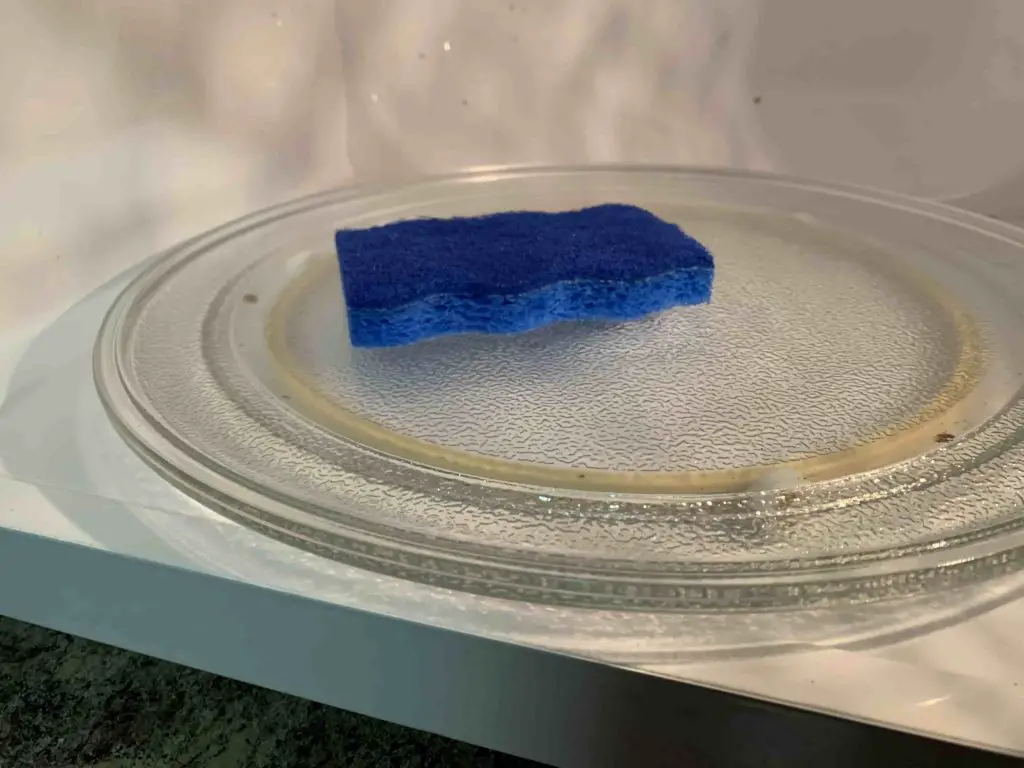
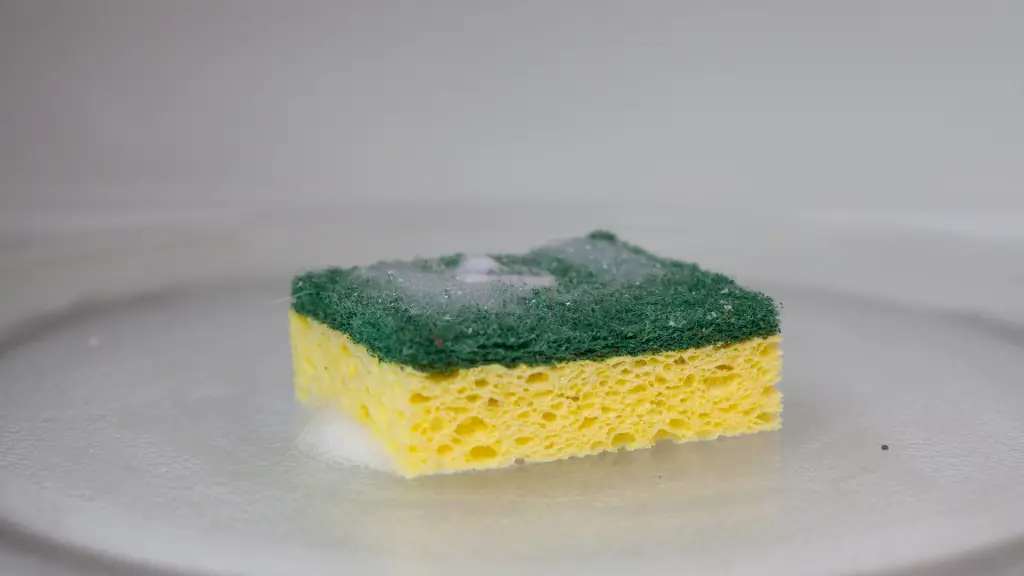
Sponge inside of a microwaveThis is one of the most popular ways to clean a sponge and it’s for a good reason. A lot of kitchen sponges are filled with a good amount of bacteria and germs and one of the best ways to kill germs and bacteria is to expose them to high temperatures of heat. Do you know what else produces a lot of heat? Your microwave!
Instructions:

To clean your sponge using a microwave, what you need to do is rinse the sponge so that there aren’t any food particles on it, then place it inside the microwave for one minute. Remember to keep an eye on the sponge as it can catch on fire.


Does microwave kill sponge mold?

The simple answer to this is yes because a microwave produces a lot of heat and which isn’t great for mold, germs, and bacteria but I would suggest that you shouldn’t use a sponge that had any type of mold on it, it’s always best to get a new one.


5. Clean the sponge in the dishwasher

Using a microwave to clean a sponge is great but using a dishwasher can be better because it won’t only heat it but it will clean it as well.

Before you place your sponge in the dishwasher you have to rinse it first so that there won’t be any solid particles on it.

When cleaning your sponge using a dishwasher make sure to place it on the top rack and choose the “heated dry” option, it might be different for you.


Will the dishwasher kill the mold on sponges

A dishwasher will kill any type of bacteria that’s on your sponges including mold. I still don’t recommend anyone to use a sponge that had mold on it because mold can cause some health issues so it’s best to get a new sponge.


6. Disinfect it with bleach

Bleach is great at cleaning a lot of things. So using it to clean your sponges isn’t a bad idea. Some people usually avoid bleach because the odor is too strong and harsh but all you have to do is wear a face covering, dilute it in water and wear gloves so that it doesn’t irritate your skin (it only does this to people with really sensitive skin).

To clean your sponge with bleach your first need to pour 1 cup of bleach into a bowl and add 3 cups of water into it. Now place the sponge into the bowl and let it sit there for 5 minutes. After that just rinse it with warm water.


7. Soak in Fabuloso Disinfectant

This is very simple, all you have to do is soak the sponge in a bowl filled with fabuloso disinfectant for 10-20 minutes, then take it out and squeeze the excess liquid out of it. Doing this will make the sponge clean and smell way better than before.


8. Clean it with rubbing alcohol

Rinse the sponge so that there are no food particles on it and pour 1 cup of rubbing alcohol onto it. Let the sponge soak up the rubbing alcohol for 20 minutes, then squeeze it out and rinse it using warm water.


9. Soak it in hydrogen peroxide

Get a small dish and pour 2 cups worth of hydrogen peroxide into it. Then place the sponge into the dish. The sponge will start to foam which means the method is working.

Let it sit in the bowl for 5 minutes, then take it and rinse it under running warm water.


How to keep dish sponge from smelling

Most times the dish sponge usually starts to smell after a while. There are many reasons for it to smell, it could be that there is a lot of small food particles stuck on them, the other reason could be that there is a lot of water inside the sponge.

To keep your sponge from smelling make sure to clean it every week, and also make sure to rinse it and squeeze all the excess water out of it after you use it.


When is the best time to get rid of a sponge?

The best time to get rid of a cleaning sponge and get a new one is when mold starts to grow on it and also if you’ve had it for over 5 months.


If you are a teacher or someone who just likes to write things down, you most likely have a whiteboard to use. Whiteboards are great for writing things down but one of the problems with them is that they tend to get dirty very easily. This can be caused by the constant erasing which will leave smudges, dust build-up, etc. Sometimes it’s not the fact that the board is dirty but sometimes permanent marker streaks are on it and it can be hard to remove them. In this article, I will show you how to clean a whiteboard.


How to clean a whiteboard using these six methods


Use rubbing alcohol

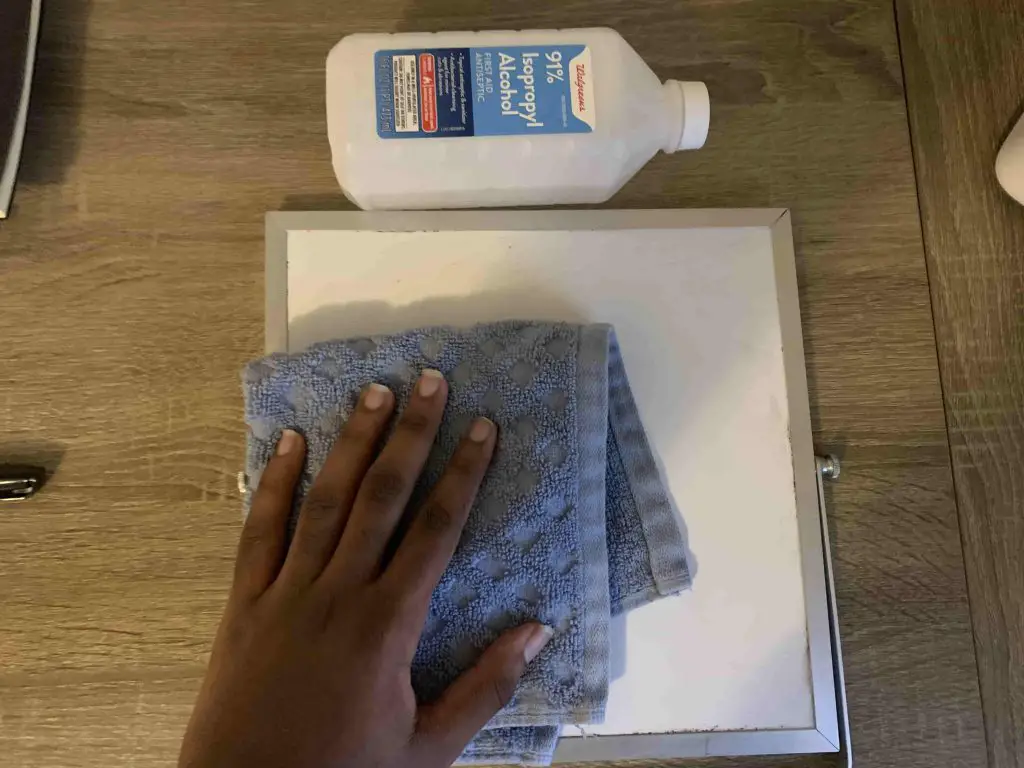
cleaning whiteboard using a cloth soaked with rubbing alcoholRubbing alcohol is a great way to clean your whiteboard if your dry eraser isn’t doing a good job. To clean your whiteboard with rubbing alcohol, the first thing you should do is pour some of it into a spray bottle. Now spray the rubbing alcohol onto the whiteboard and use a clean microfiber cloth or paper towel to clean the board.
 

If your board isn’t dirty but you want to eraser the marker writing from it but you don’t have any dry eraser; you can still use this method.


Clean it with vinegar

When cleaning your whiteboard with vinegar you have to make sure you mix the vinegar with water first. After doing that dip a clean sponge into the solution and use it to wipe away any marker streaks and dirt that’s on the board.


Use magic eraser

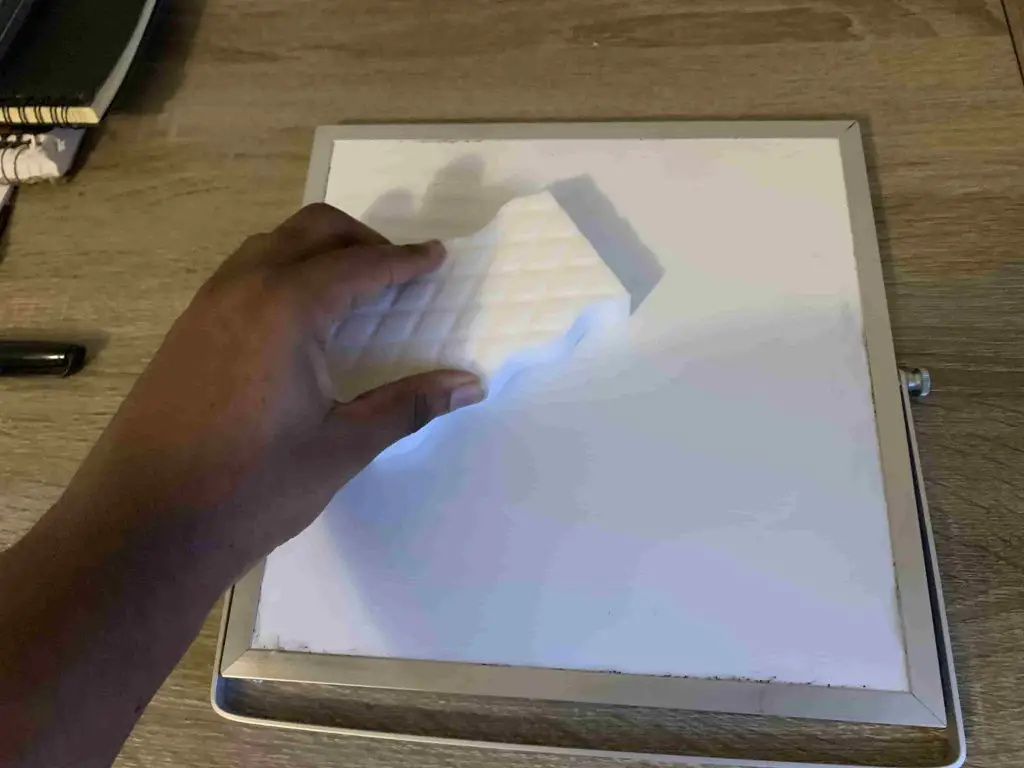
cleaning a whiteboard using a magic eraser spongeIf your dry eraser is smudging your whiteboard then it’s time to either clean it or get a new eraser. If you are planning to get a new eraser then you should get a box of magic erasers. These are way better than regular dry erasers because they won’t leave any smudges and streaks on your whiteboard. When cleaning your whiteboard with a magic eraser make sure to soak it in rubbing alcohol (squeeze the excess liquid out of the magic eraser sponge) and use it to wipe everywhere on the board. Doing this will make your whiteboard look very clean and brand new.


Clean it with hydrogen peroxide

Hydrogen peroxide is mostly known to clean wounds, but it is also good at cleaning different things as well including whiteboards. So if you tried the previous methods and they didn’t work, you should try this one.


Use wd-40

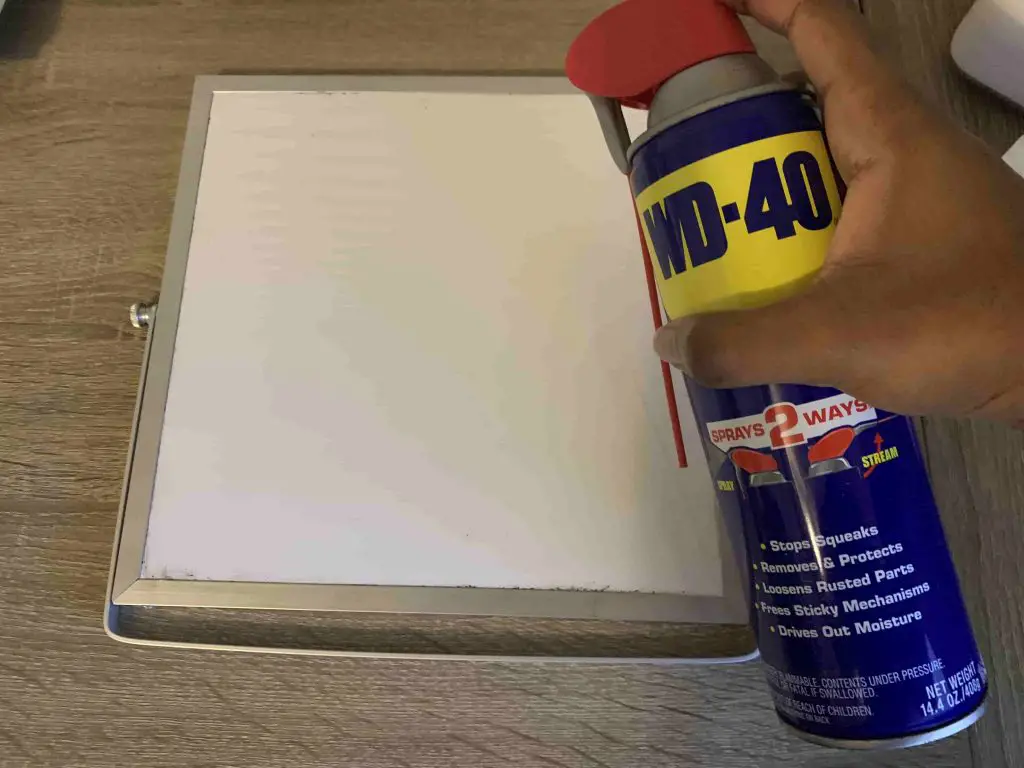
cleaning whiteboard using wd-40Wd-40 is a great household product because it has so many uses. If you are interested in some of its other uses, you should check this out. To clean your whiteboard with Wd-40, all you have to do is spray the board with the wd-40 and use a piece of paper towel to clean away every marker streak and smudge that’s on it.


Clean the whiteboard with nail polish remover

For this method, it is best to use a nonacetone nail polish remover. Just pour a little nail polish remover onto a sponge and clean the whiteboard with it. Then use a dry cloth to dry the board. You can repeat this until the whiteboard has no permanent marker streaks, smudges, or dirt on it.


How to prevent whiteboards from getting dirty

I will now show you two ways to prevent your whiteboard from getting dirty all the time.


Clean it with a damp cloth daily

The reason why you want to clean your whiteboard with a damp cloth daily is to prevent any permanent smudge streaks and also to prevent dust and dirt build-up. When cleaning a whiteboard make sure to always use a microfiber cloth.


Clean or get new erasers

Most times it’s the erasers that are leaving the smudge marks on the whiteboard. So to prevent this from happening it’s best to either clean them or get new ones. Personally, I like to buy multiple of them so that when one starts to cause a mess I can switch it with a cleaner one.


Is the outside of your windshield clean but the inside is dirty? If so then this is the right article for you because today I will show you how to clean the inside of your windshield using 3 simple yet effective methods.

Why I Realized My Inside Windshield Needed Cleaning Too


I’ve always kept the outside of my windshield spotless — it just felt like the part that mattered for driving. But one afternoon, as the sun was setting and its rays hit the glass at just the right angle, I noticed a hazy film that wasn’t dirt on the outside at all… it was on the inside.

That film made every oncoming headlight glare and every traffic signal fuzzier than it should have been. It wasn’t dramatic, just subtle, but enough to nag at me each time I drove. That’s when I realized: if the outside deserves love, the inside does too.


Can you use Windex on car windows?

The answer to this is yes but some people say that using Windex on tinted windows can cause damage. While there is no evidence of this it is still best not to use Windex on tinted windows especially third-party ones.

Windex is also known to leave streaks while cleaning, so before you use it on your windshield and windows, do quick research to see if it is safe to use on them.


Things you’ll need to clean car windshields inside

When cleaning your windsheilds you have to make sure you have the right things so you don’t cause things such as streaks and damages while cleaning. So here are the things you’ll need to clean inside of your car windshield:

  • Microfiber cloth
  • Rubbing alcohol
  • Glass cleaner
  • vinegar


How to clean car windshield from inside: Steps

I will now show you three different ways to clean your windshield.


Rubbing alcohol

  • Get a bottle of rubbing alcohol and attach a spray nozzle onto it and also get a clean microfiber cloth.
  • Spray the rubbing alcohol onto the windshield from the inside.
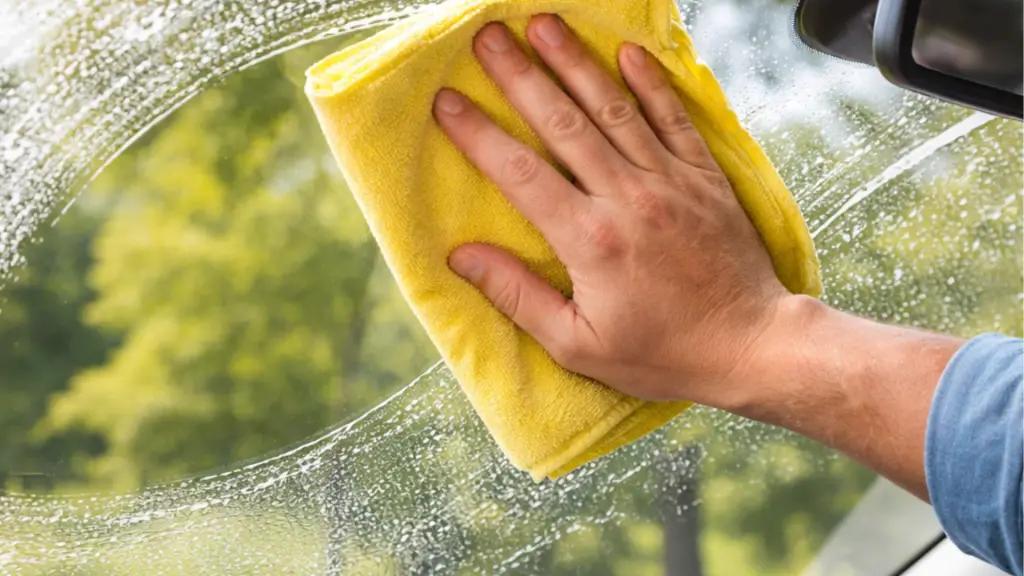
  • Use the microfiber cloth to wipe the windshield.
  • Keep doing this until the windshield is clear again.

Now you have your own car screen cleaner spray.


Glass cleaner

  • Spray Windex on your car windshield from inside
  • Use a microfiber cloth to clean it.
  • If there are streaks on your car windshield then run warm water on the microfiber cloth and squeeze the excess moisture out of it.
  • Use it to clean away the windshield streaks.


Vinegar

  • Mix together 1 and a half cups of white vinegar and 2 cups of warm water into a spray bottle.
  • Spray the solution onto the windshield.
  • Use a microfiber cloth to clean it.


Conclusion — Why This Small Step Makes a Big Difference

Cleaning the inside of your windshield isn’t glamorous, but it’s one of those small car chores that has a big impact on your comfort and safety. A clear interior windshield reduces glare, improves visibility at night and on sunny days, and just makes the whole driving experience feel better. Whether you’re heading to work, running errands, or taking a long road trip, you’ll appreciate that extra bit of clarity every time you sit behind the wheel.

So next time you wash your car, don’t forget that inside surface — it deserves attention too, and you’ll notice the difference the very first time the sun hits at the wrong angle.


In this article, I will show you how to clean a microwave using some simple hacks/ methods.


How to clean inside of a microwave

Most times when we use our microwaves the insides tend to get dirty a lot. This is because it is the only part that gets exposed to food a lot. When the interior of the microwave gets dirty this can cause a lot of issues. Not only will it look nasty but the smell can be terrible as well. Most times when a microwave has a foul odor anything you put inside and heat up will have that same odor as well and you don’t want that to happen. So it’s best if you cleaned inside of your microwave with these simple hacks/methods.


Clean with vinegar

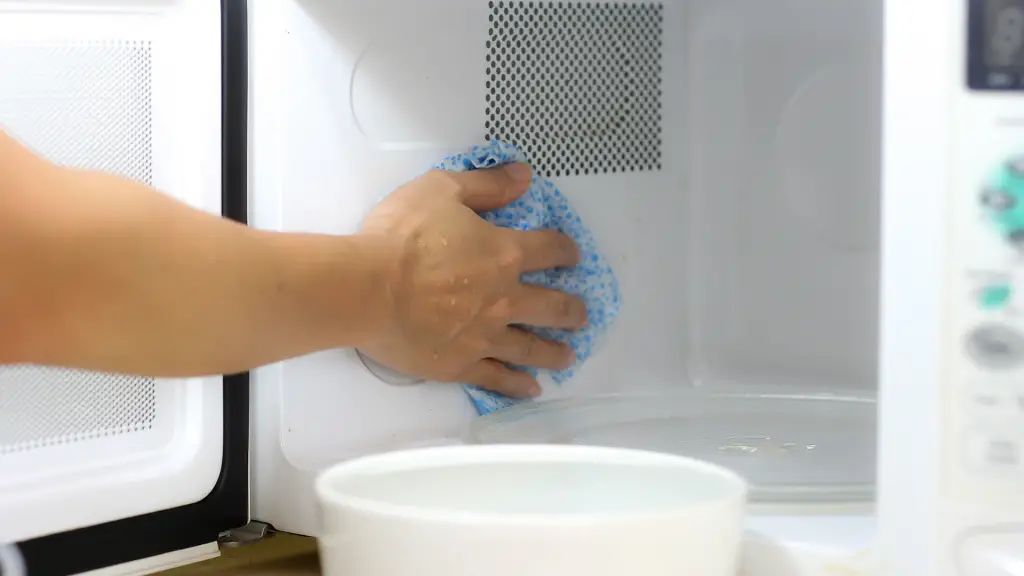
cleaning inside of a microwave with a vinegar soaked clothVinegar is a safe and useful product to use when cleaning, deodorizing, and removing stains. It can also be used as a bleach alternative at times, except that it’s way less harsh. Now in this case we are going to use vinegar to clean the inside of your microwave. Doing this will not only clean the microwave but will also make it smell way better as well.
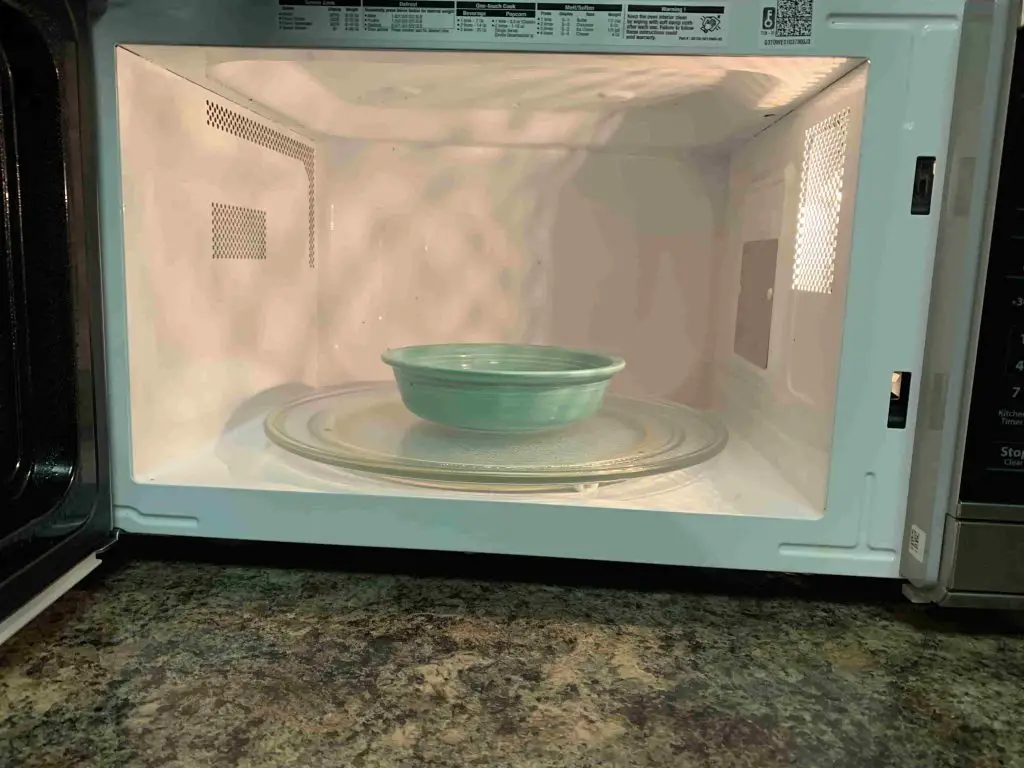
To clean your microwave with vinegar you need to do the following:

  • Get a measuring cup and fill it with 2 cups of vinegar and 2 cups of warm water.
  • Then place it in the microwave and turn it on for 4-5 minutes. After doing this do not open the door for another 12 minutes because you need the microwave to get steamy.
  • Now use a clean damp cleaning cloth or dry paper towel to wipe down inside of the microwave. Make sure to wipe everywhere but avoid the vents as you don’t want any liquid to go in them.


Another method you can do is  to:

  • Get a spray bottle and fill it halfway up with warm water and mix it with 3 cups of vinegar and 1 drop of your favorite essential oil (preferably a citrus one).
  • Then get a bowl and fill it with warm water.
  • Now spray inside of the microwave with the mixture. Make sure to pray everywhere except for the vents and any other holes.
  • Then place the bowl of water inside the microwave and turn it on for 6 minutes. After doing this do not open the microwave until the inside of it is really steamy. The longer you let the steam is in the microwave the easier it will be to clean.
  • After that use a clean cloth or paper towel to wipe down inside of the microwave.


Clean with dish soap

When using dish soap to clean anything I usually use dawn dish soap. This is because dawn dish soap is one of the best dishwashing liquids that have multiple purposes. Not only is it good at degreasing but it can also be used to remove burnt-on stains as well.

Here are the steps needed to clean inside of your microwave with dish soap:

  • Get a damp cleaning sponge or cloth and squeeze a few drops of dawn dish soap onto it.
  • THen clean inside of the microwave with the cloth or sponge. Make sure to remove all the food stains that were in it.
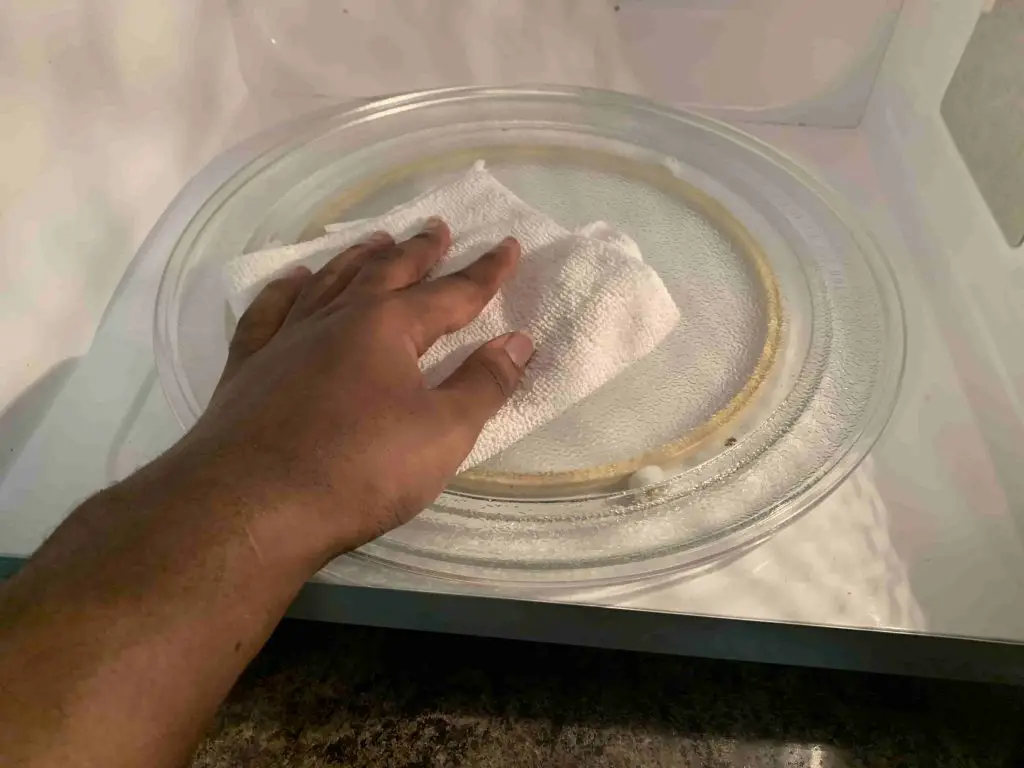
  • After that make sure to clean the turntable in it as well.
  • Scrub from top to bottom but avoid wiping the vents as the liquid from the sponge or cloth will affect some things inside of it.
  • Now use another wet cloth to wipe away the soap from inside of the microwave.

Another method you can use is the hand-off method. This method will show you how to clean your microwave with dish soap without scrubbing.


To clean your microwave with dish soap without scrubbing you need to:

  • Get a bowl filled with warm water and add 2-3 tbsp of dish soap into it.
  • Place it inside the microwave and turn it on for 6 minutes.
  • After that wait, another 10 minutes then use a clean sudsy cloth to wipe inside of the microwave. You don’t even have to scrub because the steam made it easier for most of the stains to be removed.
  • After removing all the stains Use another dry cloth or paper towel to wipe away the soap sud that’s inside of the microwave.


I will now show you another simple method you can use, which is the spray method:

  • The first thing you need to do is get a spray bottle and fill it halfway up with warm water.
  • Then add 2-3 tbsp of dish soap into it. Then shake it up.
  • Now turn on the microwave for 4 minutes.
  • After 4 minutes spray the microwave with the dish soap and water. Make sure to spray directly onto the stains so that they will be easier to remove. Also, be sure to spray everywhere in the microwave except for the vents.
  • After spraying everywhere wait 3 minutes for the dish soap and water to soak through the food stains.
  • Then use a sponge to clean the inside of the microwave.
  • Then use a damp cloth to wipe away the soap.


After doing this the inside of your microwave should be way cleaner than before


Make your own oven/microwave cleaner

Making a microwave purpose cleaner is very easy and not only that but it’s also effective as well.

To make your own oven/microwave cleaner just do the following:

  • Get a bowl or a small container and mix together 2 tbsp of dish soap, 1/2 cup of vinegar, 1 cup of Fabuloso disinfectant, and 3 cups of warm water.
  • Now pour the mixture into a spray bottle.
  • Spray the mixture inside the microwave.
  • Then wait a couple of minutes to let the mixture soak through the stains.
  • After that just use a damp cloth to scrub everywhere inside of the microwave


Clean with lemons.

dish with lemons being placed inside of a microwaveThis may come as a surprise but lemons are great for cleaning microwaves. This is why for a method I mentioned previously I stated that if you are going to use essential oils is best to use citrus-scented ones. There are three methods you can use when using lemons to clean your microwave.

I will now show you how to clean your microwave with lemons.


Method #1

  • Take a lemon and cut it into small slices.
  • Place the slices inside of a dish filled with water
  • Now put the dish with the lemon slices inside of the microwave.
  • Now turn on the microwave for 5 minutes.
  • After that use a clean cloth to wipe inside the microwave.


Method #2 lemon spray

  • You can either buy the multi-purpose lemon spray or make your own.
  • Spray the lemon spray in the microwave.
  • Then use a clean cloth to wipe down the microwave.
  • After that use another wet cloth to wipe inside the microwave again.


Method #3 lemon and baking soda

  • Get a bowl and add 2 cups of baking soda to it
  • Then squeeze lemons onto the baking soda until it gets thick.
  • Now dip a sponge into the baking soda and use it to clean inside of the microwave.
  • Then use a wet cloth to wipe away the baking soda and lemon residue.

If you want to know some more ways you can use lemons to clean then click here.


Remove the turntable and clean it

  • Remove the turntable and wash it with dish soap and warm water
  • After washing it, wipe it with a dry cloth.
  • Now place it back inside the microwave.


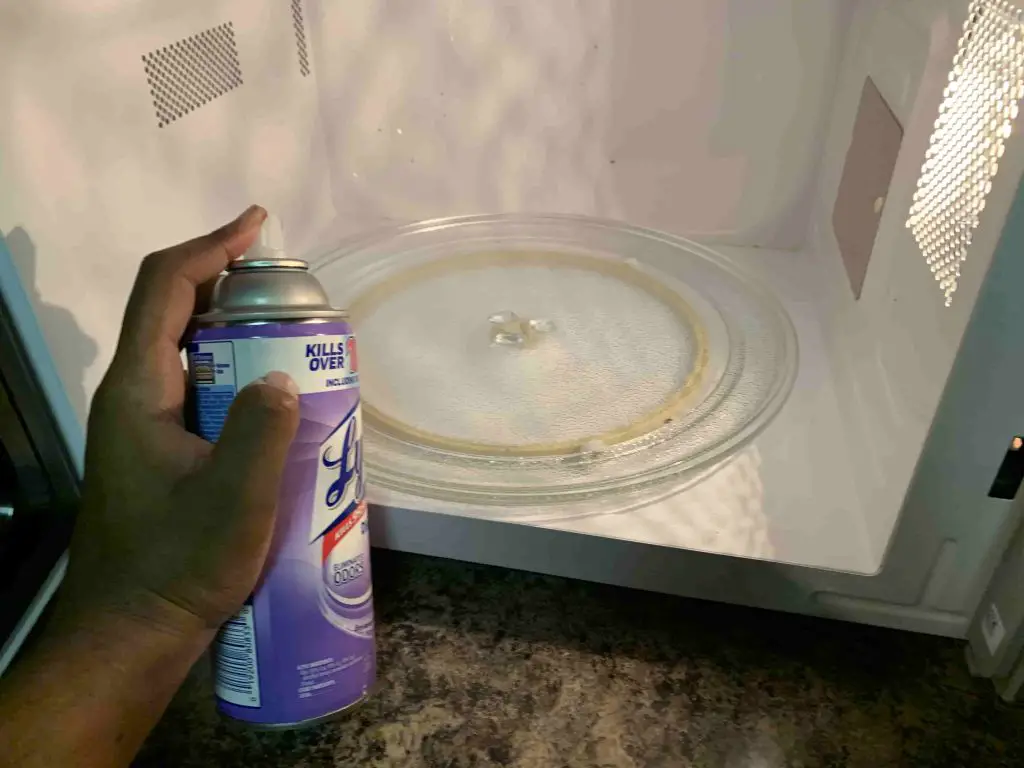
Clean with Lysol disinfectant spray

spraying lsyol disinfectant spray inside of a microwave

  • Spray everywhere inside of your microwave with Lysol disinfectant spray.
  • Then use a paper towel to clean inside the microwave

This is a great way to remove any stain from your microwave.


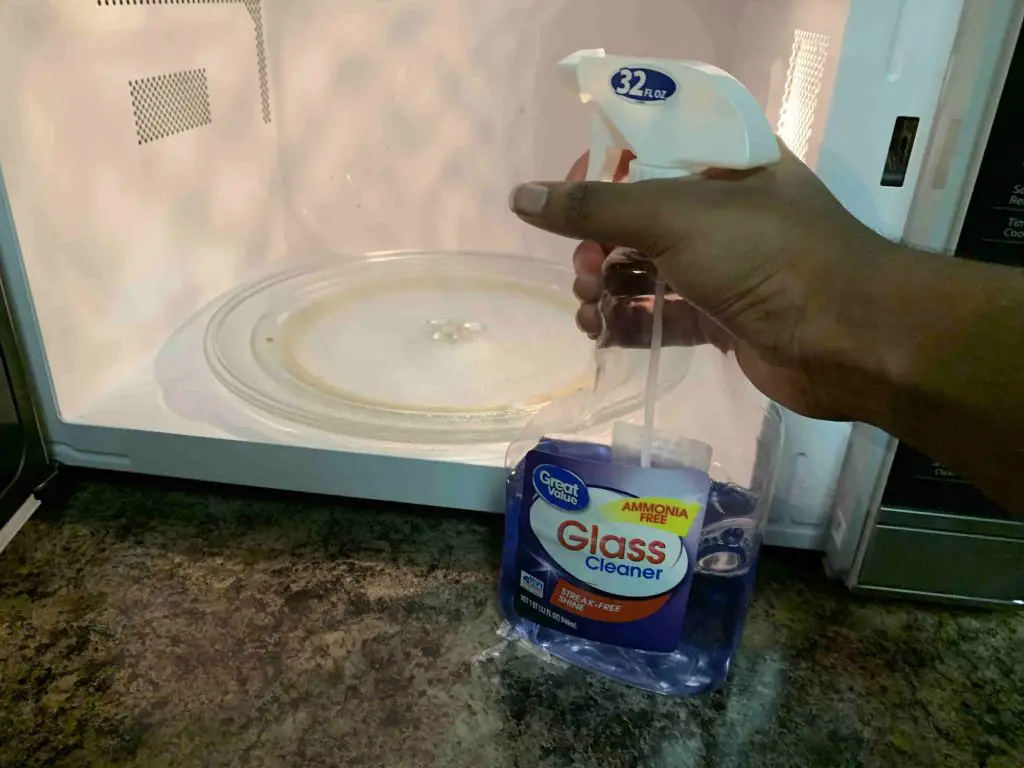
Clean with Glass cleaner

spraying glass cleaner inside of a microwave

  • Spray the inside of the microwave with Windex glass cleaner (you can use any glass cleaner you want but Windex works the best). Make sure to spray the baked-on food spills as well.
  • Then get a bowl and pour around 1 and a half-cup of glass cleaner into it.
  • Place the bowl inside the microwave and turn it on for 3 minutes.
  • Then wait another 3 minutes to remove the bowl. After removing the bowl use a sponge to clean inside of the microwave.


How to clean microwave doors

Sometimes microwave doors have a lot of grease and smudges on them. I will now show you a couple of ways to remove them.

  1. Clean the edges of the door with baking soda and a soft damp sponge. Doing this will remove the dirt and grime that was on the microwave door.
  2. If the window is greasy then spray it with Windex and use a paper towel to wipe away the grease and fingerprint smudges from it.
  3. You can also spray vinegar onto the door and wipe it down. Vinegar is known to clean glass and other clear things really well.


How to deodorize microwave (burnt odors etc)


Place baking soda inside of it

Get a bowl and add 3 cups of baking soda into it. Then place the bowl inside of the microwave. Let the bowl sit in the microwave for 1 hour or more. The baking soda will absorb the bad odors that were in the microwave.


Spray it with vinegar

Spray inside of the microwave with vinegar, then shut it close for 2-3 hours. After doing that make sure to wipe away the vinegar using a damp cloth. Vinegar is known for deodorizing areas so your microwave won’t be smelling like burnt food anymore.


Use an odor removing gel

If your microwave smells like burnt food, then it’s probably a good idea to use an odor removing gel. Just place the gel inside of the microwave until you are ready to use it again.


Use fabuloso disinfectant

Pour some Fabuloso disinfectant on a damp cloth and wipe it down inside of the microwave. Then open the microwave door so that the bad odor that was in it can leave.


When should you clean a microwave?

It’s always best to clean your microwave at least once every two weeks. If food is often spilled in it then you should clean it every week. The reason why you want to clean it very often is that it will start to smell again if you don’t.


How to keep microwave clean

I will now show you 2 ways to keep your microwave clean.


Cover your food or place it on something

Sometimes foods can pop when they’re in the microwave and this can cause spills. Oftentimes these spills are usually easy to clean but if you let them sit in the microwave for too long then it will be harder. Not only that but the more food stains you have in the microwave, the worse it smells.

To avoid this all you have to do is cover the foods you are heating up, especially any liquid food.


Always clean away any mess that happened while using it

As I mentioned above, if you don’t clean the mess that happens while using the microwave the food stains will cause it to have a bad smell. To avoid this all you have to do is clean up the food spills as soon you are finished using the microwave.


No one likes the smell of a dead mouse in their homes. Surprisingly a lot of people experience this a lot and most times getting rid of the scent can be infuriating, but don’t worry because in this article I will show you how to get rid of the dead mouse smell that’s in your home.


Before I get I tell you what to do, I just wanted to say that I’m no expert in things like this, but the reason why I know about this situation is that it used to happen to me a lot. So while the methods I show you might be useful, don’t take them as professional help.


What does it smell like?

When there is a foul smell in your house you can often times tell what it is. This is the same for the smell of a deceased mouse, this smell is usually way fouler and you can smell it from almost any area in the house. There are only two things that can give a similar foul odor compared to a dead mouse and that is a  garbage bin that hasn’t been washed or emptied in a while and also rotten cabbage.


How long does the smell last?

The smell usually lasts for 1 week or more depending on the size of the mouse and the temperature of the place it was in.


How to locate the smell

Trying to find the location of the smell is probably the hardest part but a necessary step when getting rid of the smell. The first thing you should do is go into the room where the foul odor is the strongest and look for any cracks or holes in the walls. Also, check everywhere in your house if you’re having a hard time finding it in the area where the smell is strong. Be sure to check under your furniture, cabinets, cupboards, walls, etc.


If you still haven’t found the location of the smell then you probably need to look for sunflower-sized droppings around your home. If you see these then it probably means the mouse is nearby.


After finding where the smell is coming from it is now time to show you how to get rid of it.


How to get rid of dead mouse smell

If you found the area where the dead mouse is but you can’t reach it because it may be inside your walls, well I have good news and bad news. The good news is that the smell will eventually go away over time. The bad news is that the smell will get really bad before it can get better and it will take up to a couple of weeks for the foul smell to be completely gone. But don’t worry I will still show you a way to mask the scent until it hoes away.


To do this you can use air deodorizers, such as air fresheners, etc. But some air fresheners don’t blend well with other foul odors. You can also place ground coffee around the area where the smell is coming from. Ground coffee is great at absorbing odors and it usually smells great. You can also use activated charcoal instead of ground coffee. Other things you can use includes:


  • Odor removing bags
  • Air ionizer machines
  • Pet odor sprays


While this is a good method it still mostly relies on the masking of the scent, which can be effective but most people just want to get rid of the scent and not have to wait for weeks to do so. But if you found the body of the mouse, getting rid of the scent will be much easier and faster.


Option 2

The first thing you want to do is to get rid of the mouse body. But before you do so make sure to wear a disposable glove, mask, and goggles to prevent cross-contamination. After that spray the area and the rodent with bleach and water. After that just place the mouse inside a plastic bag. You can double or triple the bag to make sure that the smell won’t come out of it. Throw away the mouse in the outside trash can. Now it’s time to get rid of the mask and gloves, also make sure to wash the goggles. After removing the gloves make sure to wash your hands properly.


Cleaning the area

After disposing of the mouse you have to make sure to clean the area where it was. There are different products and items you can use to clean the area and I will show you them:


Make sure you are wearing gloves when cleaning


Vinegar– Cleaning with vinegar will not only clean the area but also deodorize it as well. So make sure to spray some vinegar over the area where the mouse was and clean it with a clean cloth.  Make sure you are wearing gloves. I also do not recommend using that cloth again so maybe it’s best to use paper towels instead.


Bleach– Mix bleach and water together place it in a spray bottle and spray the area where the mouse was. Then use a piece of paper towel to clean the area.


Disinfectant– There are a lot of disinfectant products you can use. After picking which one you are going to use pour or spray some of it on the area and use a paper towel to clean.


After doing this make sure to dispose of the paper towels and the gloves. Then wash your hands with soap and warm water.


Make sure to air out your home

Make sure to open up all the windows and some of the doors in your home so that fresh air can come in.


How to prevent the smell

To prevent this smell from ever happening again you need to find out why mice are entering your home in the first place. One of the reasons can be that you live in an area filled with rats like new york. Another reason can be that you have a messy home with open food all over the place. Rodents love filth and food so be sure to always keep your home clean and get rid of any food on the ground and countertop such as crumbs and make sure to cover the ones that are in your cabinet and countertops as well such as sugar, rice, chips and anything else.


If you want to know some interesting ways to make your home smell good then you should check this out.

Conclusion

This article showed you how to get rid of the dead mouse smell and I hoped you found it useful.


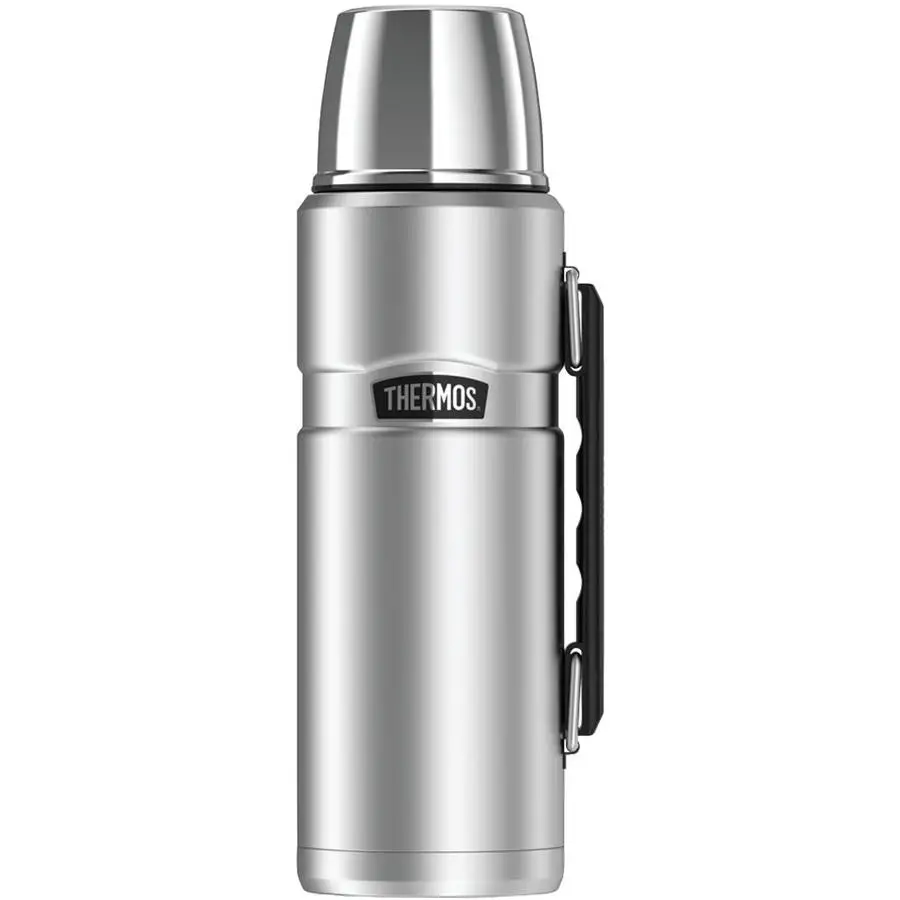
When a flask hasn’t been cleaned in a while they tend to have a weird odor coming from the inside and the mouth part as well. If your flask is dirty and you want to clean it, you came to the right place because I am going to show you how to clean a flask the right way.


Cleaning a flask with dish soap

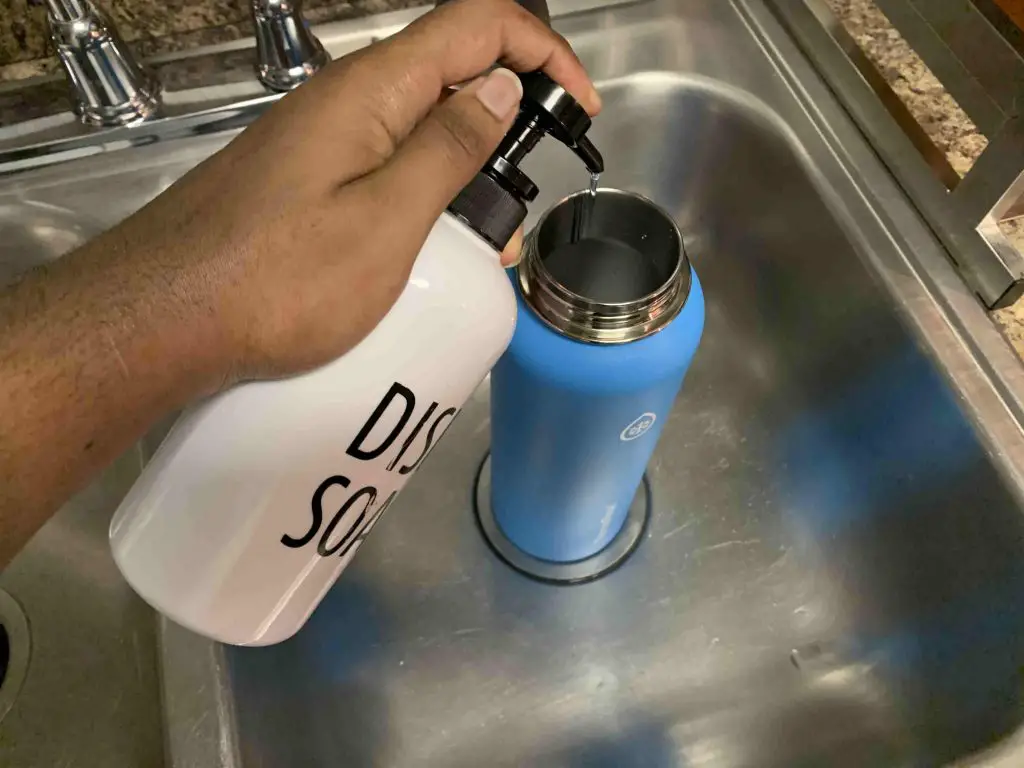
squeezing dishsoap inside of a thermoflaskIf you want to clean a thermos flask with dish soap then you need to do the following. Make sure that you empty the flask so that there is no more liquid inside of it. The next thing you should do is to get a clean damp sponge and squeeze a few drops of dish soap onto it. After that, you should clean both the interior and exterior of the flask.
 

Now a  problem most people run into when cleaning flasks is that it is way easier to clean the outside and harder to clean the inside.  But don’t worry there are a couple of ways to clean the interior of a flask. The first method you can use is to get a smaller sponge (one that is big but can still fit through the flask mouth) and place it inside the flask (make sure that the sponge is sudsy). Now use a fork and poke right through the sponge, now use twist the fork in a rotation so that the sponge can clean everywhere inside the flask. After doing that you should know to rinse out the flask.


For the second method, just fill up the flask with warm water then add 3tbs of dish soap and 1/2 cup of vinegar and let the interior soak for 10-20 minutes. After that just throughout the water and keep rinsing inside of the flask until there is no more soap left inside.


You can find some more dish soap cleaning tips here.


Cleaning a flask with rice

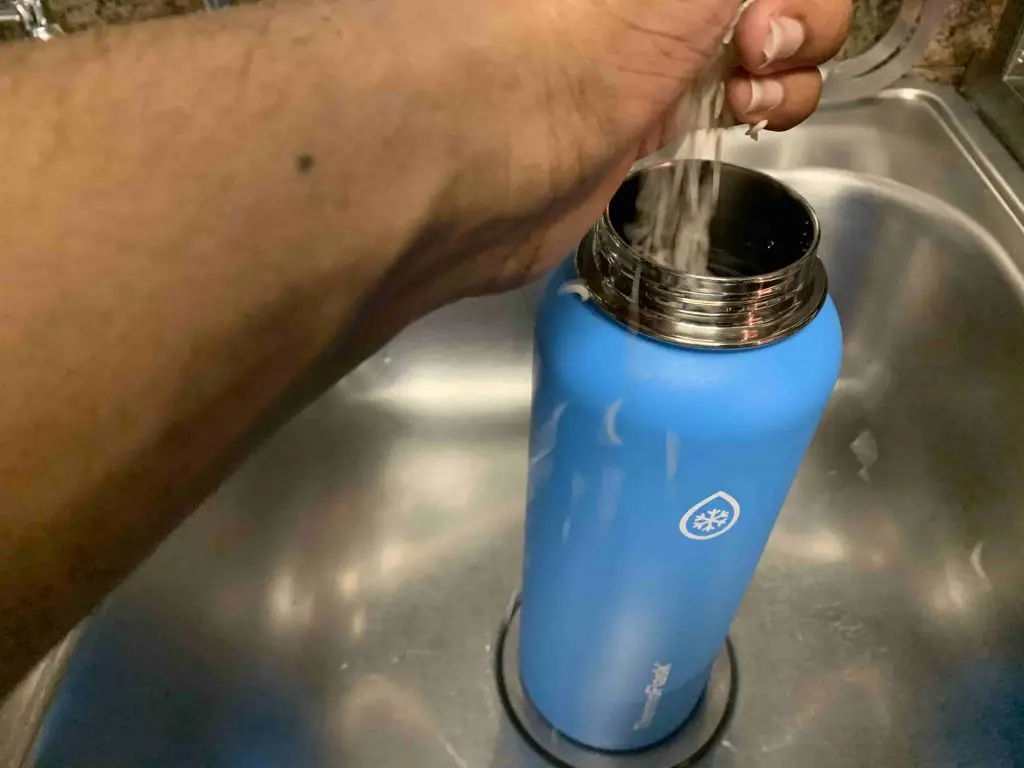
sprinkling rice inside of a thermoflaskCleaning a flask with rice may seem a bit strange at first but trust me it is very effective. When cleaning a thermos flask with rice you want to make sure that the rice is uncooked. Fill the flask halfway up with cold water then add a few tablespoons of rice into it (you can add some dish soap in it as well). Now shake the flask for a couple of minutes. After shaking, pour out the rice into a separate container to avoid blocking the drain then rinse out the flask.
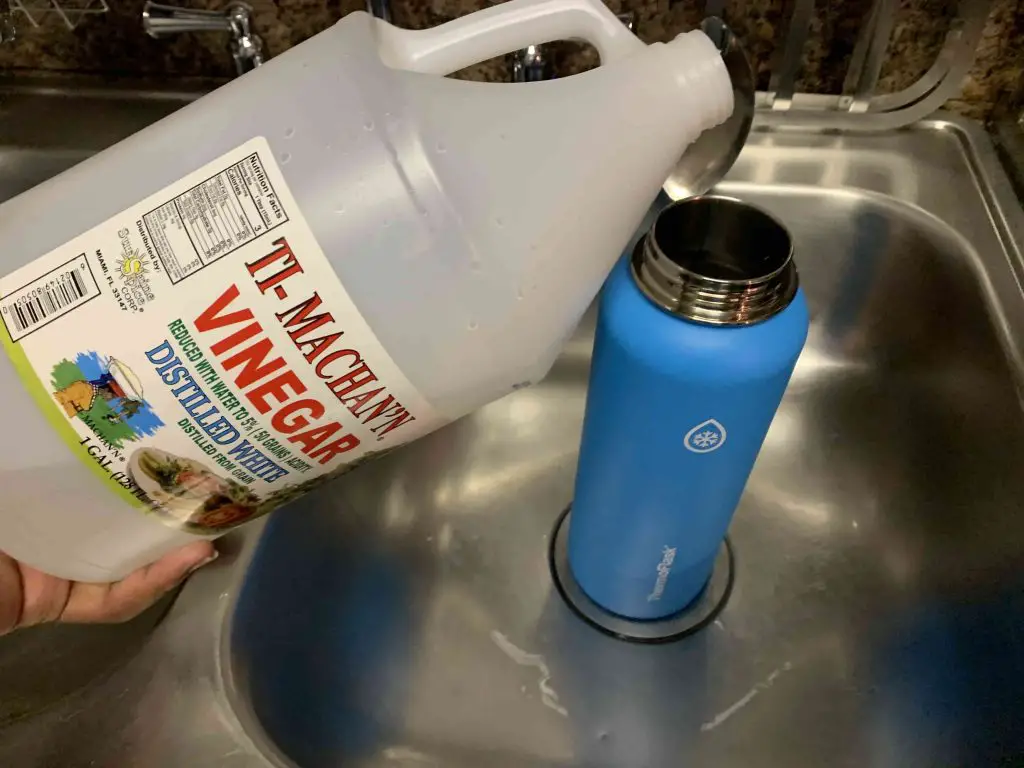


How to clean a flask with vinegar

pouring vinegar inside of thermoflaskWhite vinegar is great for cleaning and deodorizing areas. So if your flask is not only dirty but also has an unpleasant smell coming from it then you need to clean it with vinegar. To clean your flask with vinegar the first thing you want to do is to pour 1 cup of white vinegar into the flask shake it up and leave it for 30 minutes. Then pour out the vinegar and rinse out the flask. White vinegar is great at removing bad odors it itself carries a strong smell, so make sure to keep rinsing the flask until the smell is gone.
 

If you are interested in more ways to use vinegar to clean then click here.


Another way you can clean your flask is to mix warm water, vinegar, and dish soap into the flask and let it soak for 30 minutes then rinse it out.


Cleaning glass thermos flask

You can clean a glass flask with the previous methods I’ve listed above. But the best way to clean a glass flask is to use vinegar. So make sure to let the inside of the flask soak in vinegar and warm water. Then make sure to rinse it out properly.


Another way you can clean a glass flask is to put it in the dishwasher, but before you do that make sure that you read the cleaning instructions on the flask to make sure it is safe to do so. If it is safe then don’t use hot-boiling water as this may damage the flask.


How to get Limescale to build up off of the flask

To get limescale buildup off of your flask you need to get a clean damp cloth and add some dish soap to it. Then use the cloth to wipe everywhere on the flask including the mouth. After cleaning the exterior of the flask it is now time to clean the inside. To remove the limescale build-up from inside the flask you need to fill the flask with warm water then add 2 tsp of citric acid and leave it for 45 minutes. After 45 minutes, pour out the water and rinse both the inside and outside of the flask.


Cleaning flask with baking soda

Most Flasks usually start to develop stains especially when you keep drinks such as tea and coffee inside of them. If you have stains inside of your flask don’t worry because I will show you how to get rid of them using baking soda.


The first then you should do is fill the flask with vinegar and warm water. Then add 2 tsp of baking soda into the flask. Now let the mixture sit inside the flask for a couple of hours, then pour out the mixture and rinse the flask thoroughly.


Cleaning a Thermos flask stopper

To clean a flask stopper you need to get a small toothbrush (that your arent using) and add 1 tsp of dish soap onto the bristles. Then place the toothbrush under running water for 1 second and use it to clean the flask stopper. Make sure that you clean everywhere on the stopper. You don’t even have to use dish soap, you can use vinegar or baking soda as well. After cleaning the stopper, you should rinse it off and place it in an area where it can dry.


Another way of cleaning a flask stopper is to use the soaking method. To clean the stopper this way you have to get a small container like a dish or a small bowl and fill it up with warm water and vinegar. You can also add 1 tsp of dish soap to it as well. Now place the stopper inside the mixture and let it soak for 30 minutes. After that, if you see any build-up on the stopper then use a small toothbrush to scrub it off.


How to dry a thermos flask

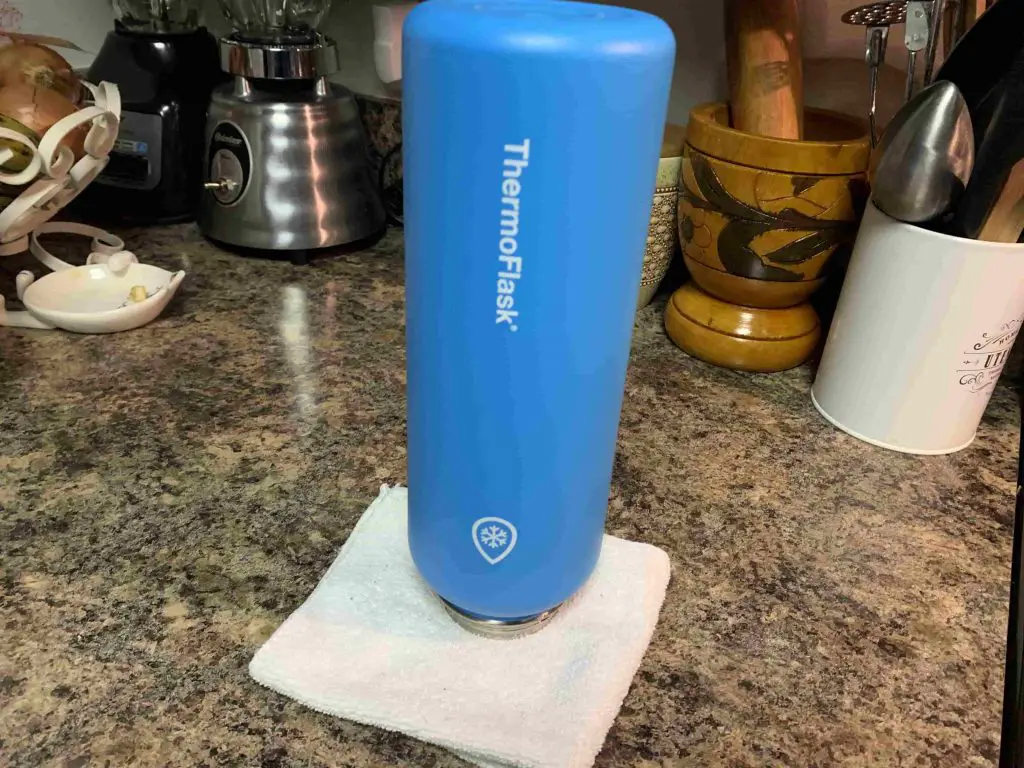
drying a thermoflask by setting it upside downWhen drying a flask make sure to set the bottle upside down on a thick piece of paper towel or cloth (for a couple of hours) so that the water from inside can drain out. Do the same for the stopper. After a couple of hours, use a paper towel to wipe away the excess moisture from the flask.
 

Cleaning garage floors is often times harder than most people think it is. This is because it isn’t just about sweeping and vacuuming, you have to do other things to deep clean it. The good thing about garage floors is that you don’t have to clean them often but when it’s time to clean you have to put a lot of energy into it. Now I am going to show you some simple ways to do so. In this article, I will show you how to clean garage floors.


Before you start cleaning

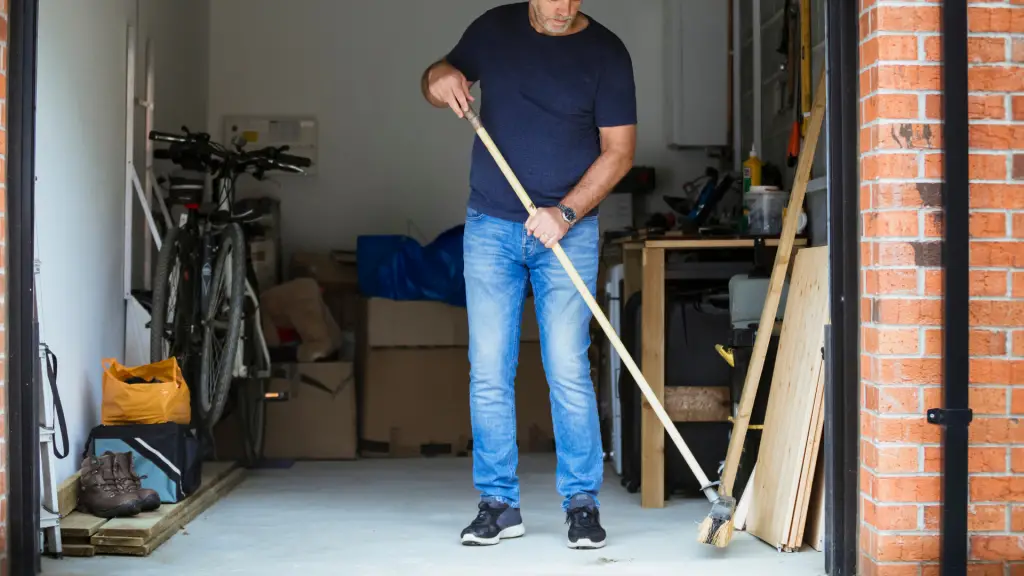
Before you start deep cleaning your garage floor, you have to sweep it first. The reason why you have to do this before you clean is that doing this will get rid of all the dust on the garage floor making it easier to clean.


1. Removing rust stains from concrete garage floors

If you are wondering where rust stains come from or why do they usually develop on your garage floor, well this is because when you leave tools such as nails, screw drives, wrenches, hammer any garden tools, or anything made of metal such as iron-on your concrete garage floor they will cause rust to form around them especially if the flooor or the tool is wet I now going to tell you how to remove rust from concrete garage floors.

To clean away the rust stain from your garage floor you need to mix vinegar and fresh lemon juice into a container and pour the mixture onto the rust stain. Then allow the mixture to sit on the stain for 15 minutes. After 15 minutes add 3-6 tbsp of baking soda and use a cleaning brush to scrub the floor.  After scrubbing the floor rinse the area with water.

Another trick you can do is mix baking soda (or a detergent that contains it) and water together to create a paste substance. Leave the mixture on the stain for 45mins to an hour. After that use a cleaning brush to scrub away the stain. The stain should be gone in no time. After scrubbing be sure to rinse that area of the garage floor.

This is one of the best ways you can Clean garage floor stains.


2. Removing oil and grease stains/build-up from garage floors

Cleaning stains off of garage floors isn’t easy especially when it has oil and grease stains on them. Oil stains usually form because of the vehicle being parked in the garage and it might have a leak, you working on the vehicle but didn’t clean up after finishing, or it could be an oil-related product that got spilled in your garage. Whatever it is don’t worry because I will show you how to remove oil and grease stains from your garage floors.

Using dawn dish soap on concrete is a good way to remove any stains from it. There are two things you can do when removing oil and grease stains from garage floors. The first method is to squirt the dish soap all over the stain on the garage floor. Make sure the dish soap is covering the stain. Then allow it to sit there for 20 minutes. Then use a brush to scrub the area and then allow it to sit for another 20 minutes. After that rinse the area and use a cleaning towel to wipe away the excess moisture.

If the first method didn’t work then get a bucket filled with water and add 3 tbsps of dish soap into it, then mix it around. Pour a little of the solution on the grease stain and use a push broom to scrub away the stain.


3. Removing stains with a store-bought degreaser

If you don’t have the time or patience to mix together dish soap and water but you still want to clean the stains on your garage floor, then just get a degreaser. A degreaser works the same way as to how you would use dish and water mixed together.

To remove any grease stains with a degreaser you should pour a little of it on the grease-stained area and let it sit there for 30 minutes. THen use a push broom or a brush to scrub away the grease stain. After that just rinse that area with water and then use a large towel to wipe away the moisture.


4. How to clean concrete garage floor by scrubbing it

I know throughout this article I mentioned different ways to scrub your garage floor but this one is a bit different. To clean your garage floors by scrubbing them you can either use a push broom or a cleaning brush that is good for scrubbing dirty areas. You also need a bucket as well.

Add water, dish soap, and vinegar into the bucket and mix them around. Now pour the solution onto the area of the garage floor that you want to clean. Now use a push broom or a cleaning brush to scrub that area of the floor until it’s clean. After that rinse the area.

If you have mold or mildew on your garage floor and you want to clean it then get a bucket and fill it up with warm water and add 2tbsp of dish soap and 2 cups of bleach. Remember when handling bleach makes sure to wear a face mask and gloves because while it may be good at cleaning and removing certain stains it is still made up of very harsh chemicals. Now use a broom or a brush to scrub the mildew area with the bleach solution. You can even leave the solution on the moldy area for 30 minutes then scrub it afterward. After that just rinse the area.


5. How to make a cleaning solution for concrete garage floors

There are a couple of differet garage floor solutions you can make with just regular products. One of the main products you can use is baking soda. Baking soda is great for cleaning and removing stains, it also has some other uses as well.

To create your own cleaning solution you have to mix 1 cup of baking soda with 1 gallon of warm water. Now use the mixture as an all-purpose cleaner. Now it’s time to clean the floor. Pour some of the cleaning solutions over the part of the garage floor that you want to clean and use a brush to scrub the area. After scrubbing, rinse the area with water and use a dry cloth to wipe up the excess moisture.

Another cleaning solution you can make involves vinegar. All you have to do is mix vinegar, warm water, and 2tsbp of dish soap together. You can use this mixture as an all-purpose cleaner. To clean your garage floor with it, you should pour it on the stains or any other part of the garage floor and let it sit there for 30 minutes. Then use a brush that’s good at scrubbing to clean that part of the floor. If you are cleaning the entire garage floor then it’s best to use a push broom instead. After scrubbing the garage floor use a power wash to rinse away the soap on it. THen use a large towel to wipe up the excess moisture. Open up the garage so that more air can circulate through it so that the floor will dry quicker.


6. How to clean garage floor with bleach

Cleaning the garage floor with bleach is something that I personally don’t do that often and the reason is mostly that bleach is made up of harsh chemicals that usually hurt my nose when I use it. That is why most times when I talk about using bleach I usually recommend people to wear a face mask and gloves so that it doesn’t affect their nose and skin. However, bleach is still a great product to use on your garage floors especially if it’s moldy. Mold usually grows in or on wet areas. If you want to know more about mold then click here.

Now I am going to show you how to clean moldy areas on your garage floor with bleach. The first thing you need to do is get a bucket filled halfway up with warm water and add 2 cups of bleach into it, and also 2tbsp of dish soap. Pour the mixture onto the moldy areas on the garage floor and let it sit there for 1 hour. After an hour pours more of the mixture onto the moldy area and uses a brush to scrub away the mold. Make sure to scrub every moldy area in the garage. After scrubbing just rinse the area and allow it to dry.


7. MRemoving paint from garage floors

Paint isn’t that easy to remove, but with this simple method, you’ll be able to get them off in no time. The first thing you need to do I use a putty knife to scrape off loose paint from the garage floor.

Now mix TSP and water together and then follow the directions/instructions on the bottle. Make sure that you are wearing gloves. Pour the solution onto the paint stains then use a brush to scrub that area. After scrubbing way the paint rinse the area and allow it to dry.

Conclusion:

Cleaning your garage floor doesn’t have to be a daunting task. With these 7 simple stain removal tips, you can tackle oil spills, grease spots, and stubborn grime with ease. Whether you’re using household items or specialized cleaners, maintaining a clean garage floor will not only improve its appearance but also extend its lifespan. Give these tips a try, and enjoy a fresher, more organized space that’s ready for anything!


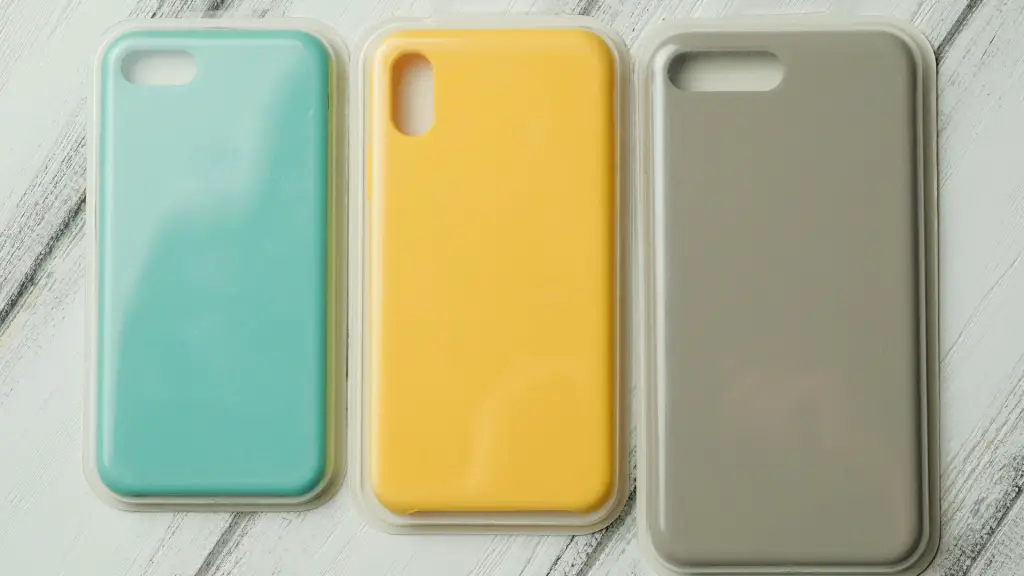
No one likes a dirty phone case. They can make your phone look very old and dirty. When phone cases start to get really dirty or old most people do three things, they either change them which is good but it can cost a lot of money, they don’t use it anymore and that can leave your phone vulnerable to physical damage or they don’t change it at all which will make your phone look dirty. But the one thing most people don’t do is clean their phone cases. Cleaning a phone case will save you money and also make the phone case look way better than it did before. In this article, I will show you how to clean a phone case whether it’s rubber, silicon, wooden, leather, or a clear one.


What to use when cleaning phone cases?

When cleaning phone cases it’s always best to use a microfiber cloth. Most phone cases usually come with one but those are specifically designed to clean screens. The ones that you need to use are the ones designed to clean everywhere on your phone.

The reason why it’s best to clean any phone case using a microfiber cloth is that they won’t scratch or leave any thread residue on your phone case when cleaning it.


How to clean rubber phone cases

To clean rubber phone cases you need to mix the dish and water into a small dish. Then use a toothbrush to clean everywhere on the phone case. Make sure you get in between the edges as well. Doing this will remove all the built-up dust that was on and in the rubber phone case. After cleaning it with a toothbrush rinse the phone case and use a microfiber cloth to dry it.

Another way to clean a rubber phone case is to use rubbing alcohol. To clean your phone case using rubbing alcohol you need to pour a little onto a clean damp microfiber cloth and use it to wipe everywhere on the rubber phone case. Doing this will make your phone case clean again.


How to clean silicone phone cases

To clean silicone phone cases, combine dish soap and water in a bowl. Let your phone case soak for several minutes in soapy water. The case may need to be weighted to keep it submerged.

Remove stains with a toothbrush, then scrub the edges and rinse your phone case with cold water. You can then dry your case with a microfiber cloth to blot up the water without scratching it. If there is still moisture on the case, let it air dry for about an hour before placing it back onto your phone.


How to clean wooden phone cases

Wooden cases tend to be more delicate than other phone cases because they usually get damaged by dust and dirt. To clean your wooden phone cases just make sure you use a dry microfiber cloth to wipe away the dust often. It is best to avoid getting your wooden phone case wet as this may damage it.


How to clean leather phone cases

You can use hand soap to clean leather phone cases. Just get a damp microfiber cloth and add a few drops of hand soap onto it and use it to wipe the leather phone case. After cleaning it make sure to use another damp cloth to wipe away the soap residue or you can just rinse it off.


How to clean a clear phone case

Most times clear phone cases usually start to turn yellow. This happens because the phone case might be getting old or it’s just really dirty, But don’t worry I will show you how to clean a clear phone case with some simple and easy-to-follow methods.


Why do clear phone cases turn yellow?

The reason why most clear phone cases turn yellow over time is that they are made up of silicon. Silicon is a type of polymer and polymers usually turn yellow over a certain period of time.

Now I will show you how to clean a phone case that has turned yellow.


Cleaning a clear phone case


  1. Clean it with baking soda

Baking soda is great for cleaning a lot of things not only that but it’s good at removing stains as well.

To clean a clear phone case with baking soda, the first thing you should do is sprinkle the baking soda all over the phone case and use a wet toothbrush to clean it. Make sure you focus on the stain when cleaning the phone case.

If the stain is still on the phone case then you need to do the following.


  1. Clean it with dish soap

To clean your clear phone case with dish soap you need to do the following:

  • Get a bowl and fill it with warm water
  • Add 1 tbsp of dish soap into it.
  • Now dip a toothbrush into the solution and use it to clean the phone case.
  • Make sure to clean everywhere in and on the phone case.
  • Rinse the phone case and dry it with a clean microfiber cloth


  1. Clean it with toothpaste

If all the previous methods/tips didn’t work then maybe it’s time to try this one.

Cover your phone case in toothpaste and use a microfiber cloth or toothbrush to clean it. When cleaning the phone case make sure to focus on the yellow stain. After that just rinse off the toothpaste from the phone case.

If you still have the same yellow stain on the phone case then maybe its time to try this method:


  1. Clean it Rubbing alcohol

Rubbing alcohol is not only good at cleaning this but it’s also good at disinfecting as well.

To clean your phone case with rubbing alcohol the first thing you need to do is attach a spray nozzle and the rubbing alcohol bottle. Then spray the phone case with rubbing alcohol. After that use a microfiber cloth to clean the phone case.

After cleaning the phone case let it air dry.

if you’re interested in other ways you can use rubbing alcohol then click here.


  1. Clean it with vinegar

Vinegar is great at cleaning a lot of things, not only that but it’s good at removing stubborn stains as well.

I don’t recommend using this method if you haven’t tried any o0f the previous ones.

There are two ways in which you can clean your clear phone case with vinegar.

Option 1

  1. Get a clean damp microfiber cloth and pour a little vinegar and dish soap on it.
  2. Use the cloth to wipe the phone case.
  3. After wiping the phone case rinse it under running water
  4. Then wipe it with another microfiber cloth and allow it to air dry.


Option 2

  1. Get a bowl and fill it up with warm water
  2. Then add 1-2 cups of vinegar into it
  3. Place the phone case into the bowl. If the phone case won’t sink to the bottom then place something heavy on it.
  4. Now leave the phone case in the solution for 30 minutes.
  5. After that just rinse it off and let it air dry.


Conclusion

Throughout this article, I showed you how to clean a phone case whether it’s white, silicon, clear, or wooden. But if you tried all of these methods and your phone case is really dirty or it still has yellow stains on it, then maybe it’s time to get a new phone case.