Category

tips

Category

As women age, their hair undergoes changes, becoming finer and often grayer. However, this transition opens up new possibilities for elegant and sophisticated hairstyles. Here are some of the best hairstyles for women over 70 that embrace natural beauty and showcase timeless grace.

1. Classic Bob

The classic bob is a timeless favorite for women of all ages, and it works wonderfully for those over 70. This hairstyle is versatile, easy to maintain, and adds a touch of elegance. Whether you opt for a straight bob or add soft waves, this look can be tailored to suit your face shape and personal style.

2. Soft Curls

Soft curls add volume and a youthful bounce to thinning hair. Using a curling iron or rollers, you can create gentle waves that frame the face beautifully. This style is perfect for special occasions and everyday wear, offering a glamorous yet natural look.

3. Pixie Cut

The pixie cut is bold, chic, and incredibly easy to manage. This short hairstyle accentuates facial features and can be styled in various ways—sleek and smooth or tousled and textured. It’s a great option for those who prefer a low-maintenance yet stylish look.

4. Shoulder-Length Layers

Shoulder-length layers are flattering and versatile, providing a balance between short and long hair. Layers add movement and volume, making this hairstyle ideal for those with fine or thinning hair. It can be styled straight, wavy, or with a slight curl to suit different occasions.

5. Elegant Updo

For more formal events, an elegant updo can be a stunning choice. A classic chignon, French twist, or a simple bun can add a touch of sophistication. These styles keep hair neatly in place and can be adorned with hair accessories for extra flair.

6. Natural Gray

Embracing natural gray hair is a growing trend that exudes confidence and authenticity. With proper care and the right haircut, gray hair can look vibrant and stylish. A sleek bob, a layered cut, or even long, flowing gray locks can be incredibly striking.

7. Short and Spiky

For those who like to keep things edgy, a short and spiky hairstyle offers a modern twist. This look is playful and full of personality, perfect for women who want to express their vibrant spirit. It’s easy to style with a bit of gel or mousse, making it a practical choice as well.

Tips for Maintaining Healthy Hair

  • Regular Trims: Keeping hair trimmed every 6-8 weeks prevents split ends and maintains the shape of your hairstyle.
  • Moisturize: Use conditioners and hair masks to keep your hair hydrated and soft.
  • Gentle Care: Avoid harsh chemicals and heat styling tools that can damage fine hair.
  • Diet and Supplements: A healthy diet rich in vitamins and minerals supports hair health from within.

Choosing the right hairstyle can enhance your natural beauty and boost your confidence at any age. Whether you prefer something classic, modern, or completely unique, there’s a perfect style out there for every woman over 70. Embrace your elegance and wear your hair with pride!


Farming is both an art and a science, requiring a balance of hard work, innovation, and efficiency. With the right strategies, you can make your farming operations more productive and enjoyable. This comprehensive guide will reveal some of the best farm hacks that can help you optimize your workflow, save time, and reduce costs. From clever tool organization to sustainable practices, these tips are designed to make your farm run like a well-oiled machine.

1. Optimize Tool Storage with Pegboards

One of the simplest yet most effective farm hacks is organizing your tools using pegboards. Pegboards allow you to keep your tools visible and accessible, reducing the time spent searching for them. Customize your pegboard with hooks and shelves to accommodate various tools, and outline each tool’s position to ensure they always return to their proper place.

2. DIY Automatic Chicken Waterer

Keeping your chickens hydrated can be a time-consuming task. A DIY automatic chicken waterer can save you hours of work each week. Use a five-gallon bucket and poultry nipples to create a gravity-fed waterer. Drill holes in the bottom of the bucket, insert the nipples, and suspend the bucket at an appropriate height. Your chickens will enjoy clean water, and you’ll enjoy the convenience.

3. Use Pallets for Easy Compost Bins

Composting is essential for sustainable farming, and creating compost bins from pallets is an inexpensive and efficient solution. Arrange four wooden pallets in a square, securing them with screws or zip ties. This structure provides excellent airflow, essential for effective composting. Plus, using recycled pallets is an environmentally friendly choice.

4. Solar-Powered Electric Fencing

Protecting your crops and livestock from predators is crucial. Solar-powered electric fencing is a sustainable and cost-effective way to keep your farm secure. These systems use solar panels to charge batteries, ensuring your fences remain electrified even in remote areas. They are easy to install and maintain, offering long-term savings and peace of mind.

5. Implement Crop Rotation Strategies

Crop rotation is a time-tested technique that improves soil health and reduces pest problems. Plan your planting schedule to rotate crops that consume different nutrients and support soil fertility. For example, follow nitrogen-fixing legumes with nitrogen-demanding crops like corn. This method enhances soil structure, increases yields, and minimizes the need for chemical fertilizers.

6. Rainwater Harvesting Systems

Conserve water and reduce utility costs by installing a rainwater harvesting system. Collect rainwater from your roof using gutters and store it in large barrels or tanks. This water can be used for irrigation, livestock, and even household needs. Ensure your system includes a filtration component to keep the water clean.

7. Repurpose Old Tires for Planters

Old tires can be transformed into durable and practical planters. Cut the tires in half, fill them with soil, and plant your crops. These tire planters are particularly useful for growing potatoes and other root vegetables. They are resilient, retain heat well, and help recycle materials that would otherwise end up in a landfill.

8. Create a Mobile Chicken Coop

A mobile chicken coop, or chicken tractor, allows you to move your chickens around your farm, providing them with fresh grazing areas and natural pest control. Construct a lightweight coop on wheels, ensuring it is secure and has adequate ventilation. Moving the coop regularly helps fertilize your soil and keeps your chickens healthy.

9. Mulch to Suppress Weeds and Retain Moisture

Mulching is an excellent way to control weeds, retain soil moisture, and improve soil health. Use organic materials like straw, wood chips, or grass clippings as mulch around your plants. This practice reduces the need for chemical herbicides and irrigation, promoting a healthier and more sustainable farm ecosystem.

10. DIY Drip Irrigation System

Efficient water usage is critical in farming. A DIY drip irrigation system ensures your plants receive water directly at the roots, minimizing waste. Use inexpensive materials like PVC pipes or hoses, punch small holes along the length, and connect them to your water source. This method saves water, reduces evaporation, and improves plant health.

11. Utilize Cover Crops for Soil Health

Cover crops, such as clover or rye, play a vital role in maintaining soil health. Plant cover crops during off-seasons to prevent soil erosion, improve soil structure, and add organic matter. These plants also suppress weeds and provide habitats for beneficial insects. Incorporating cover crops into your farming routine enhances long-term soil fertility.

12. DIY Raised Garden Beds

Raised garden beds are perfect for maximizing space and improving soil quality. Build your own using materials like wood, bricks, or cinder blocks. Raised beds offer better drainage, reduce soil compaction, and make it easier to manage weeds. They are also ideal for farmers with limited space or poor soil conditions.

13. Recycle Greywater for Irrigation

Recycling greywater from household use (such as water from sinks, showers, and washing machines) can significantly reduce water usage on your farm. Install a greywater system to filter and redirect this water to your fields or garden. This sustainable practice not only conserves water but also lowers utility bills.

14. Use Vinegar as a Natural Herbicide

Chemical herbicides can be harmful to the environment and expensive. Vinegar is an effective, natural alternative for weed control. Use a spray bottle to apply vinegar directly to weeds on sunny days for the best results. This method is particularly effective for small-scale weed management in garden beds and pathways.

15. DIY Hydroponic Systems

Hydroponic systems allow you to grow plants without soil, using nutrient-rich water instead. DIY hydroponic setups can be created with materials like PVC pipes, plastic containers, and aquarium pumps. This method is highly efficient, using less water and space compared to traditional soil farming, and can produce higher yields.

16. Install Owl Boxes for Natural Pest Control

Encouraging natural predators is a great way to manage pests on your farm. Owls are effective at controlling rodent populations. Install owl boxes around your property to attract these nocturnal hunters. This eco-friendly pest control method reduces the need for poisons and traps, promoting a balanced farm ecosystem.

17. Create a Seed Starting Station

Starting your plants from seeds can save money and provide stronger, healthier plants. Set up a seed starting station with shelves, grow lights, and heat mats. This controlled environment ensures optimal growing conditions for your seedlings, leading to a successful growing season.

18. Utilize Solar Power for Farm Operations

Harnessing solar power can significantly reduce your farm’s energy costs. Install solar panels to power electric fences, water pumps, and lighting systems. Solar energy is renewable, environmentally friendly, and can provide reliable power even in remote locations. This investment pays off in long-term savings and sustainability.

19. Homemade Fly Traps for Livestock Areas

Flies can be a nuisance in livestock areas. Create homemade fly traps using plastic bottles, bait (like sugar water or apple cider vinegar), and dish soap. Cut the top off the bottle, invert it into the bottom section, and fill with bait. Flies are attracted to the bait and get trapped, reducing their population naturally.

20. Plant Native Species for Low-Maintenance Landscaping

Incorporate native plants into your farm’s landscaping to reduce maintenance and water usage. Native species are adapted to local conditions, requiring less water, fertilizer, and pest control. They also support local wildlife and promote biodiversity, contributing to a healthier farm environment.

Conclusion

Implementing these farm hacks can lead to a more efficient, sustainable, and enjoyable farming experience. Whether you’re a seasoned farmer or just starting out, these tips can help you maximize productivity while minimizing costs and environmental impact. Embrace these innovative strategies to take your farm to the next level.

By integrating these farm hacks into your daily routine, you can enhance your farm’s productivity and sustainability. Remember, the key to successful farming is continuous improvement and innovation. Start with a few of these tips and gradually incorporate more to see a significant difference in your farm’s operations. Happy farming!

DIY Fly Trap: Get Rid of Pesky Flies the Natural Way

Flies, the tiny winged nuisances, seem to find their way into our homes at the most inconvenient times. Whether you’re enjoying a summer picnic, trying to relax on your porch, or simply going about your daily chores, the presence of flies can be irritating, not to mention the potential health hazards they pose. Instead of resorting to chemical-laden sprays and expensive commercial fly traps, why not consider a more natural and cost-effective solution? In this article, we’ll guide you through the process of creating your very own DIY fly trap, and we’ll explore different types of traps and techniques to help you keep your space fly-free.

Materials and Tools You’ll Need

Before we dive into the details of creating your DIY fly trap, let’s start with the basics. You’ll need a few simple materials and tools, most of which you probably already have around the house:

Materials:

A plastic soda bottle (2-liter works well)
A pair of scissors or any utility knife
A piece of string or twine
Some bait (more on this later)
Tape
A small dish or container
Tools:

A drill (optional)
A funnel (optional)
Step 1: Preparing the Soda Bottle

Start by rinsing out the soda bottle thoroughly and allowing it to dry. Once it’s dry, you can remove the label to make it easier to see what’s going on inside the trap.

Step 2: Cutting the Bottle
Use pair of scissors or a utility knife to carefully cut off the top third of the soda bottle. This will leave you with two pieces: the top, which resembles a funnel, and the bottom, which serves as the collection container.

Step 3: Preparing the Bait
Now, let’s talk about bait.Flies are drawn towards different types of substances, and can be found buzzing around them. you can choose from several options to lure them into your trap. Some effective bait choices include:

Fruit: Overripe fruit like bananas or apples is a favorite of flies.
For best results, you can use either white vinegar or apple cider vinegar. due to its strong odor.
Sugar Water: Create a solution by mixing sugar and water.
Meat: For those persistent, carnivorous flies, a small piece of meat can be used.
Place your chosen bait in the bottom part of the bottle. You don’t need much; a few tablespoons will do.

Step 4: Inverting the Funnel
Here’s where the magic happens. Take the top part of the bottle (the funnel-shaped section) and insert it into the bottom part, but invert it so that the neck of the funnel points downward into the container. This creates a funnel entrance for the flies, but they will struggle to find their way out.

If you have a drill, you can make the process even easier by drilling small holes near the rim of the funnel to allow flies to enter more easily.

Step 5: Secure the Trap
To keep your DIY fly trap intact, use tape or glue to seal the edges where the two parts of the bottle meet. Make sure there are no gaps or openings where flies could escape.

Step 6: Hanging Your Fly Trap
Now that your fly trap is ready, it’s time to find the perfect spot for it. Hang the trap by attaching a piece of string or twine to the neck of the bottle, making a loop to hang it from a hook or a branch. Alternatively, you can place the trap on a stable surface, but hanging it tends to be more effective as it keeps the bait closer to eye level for the flies.

Types of DIY Fly Traps

While the basic soda bottle fly trap is highly effective, there are other DIY options you can explore based on your preferences and available materials. Here are a few alternatives:

Paper Cone Trap:

Create a cone from a sheet of paper with a small hole at the tip.
Place it in a jar or glass with bait at the bottom.
Flies will be drawn in but will have difficulty escaping.
Homemade Fly Paper:

Coat strips of paper or cardboard with a sticky substance like honey or glue.
Hang these strips around your kitchen or outdoor area.
Fruit Fly Trap:

For smaller fruit flies, use a small container with a piece of ripe fruit at the bottom.Cover the top surface with plastic wrap and make small holes in it. small holes for entry.
Benefits of DIY Fly Traps
Now that you have your DIY fly trap in place, let’s discuss why this natural approach is beneficial:

Cost-Effective: DIY fly traps cost virtually nothing to make, using items you likely have at home.
Environmentally Friendly: Unlike chemical sprays, DIY traps are non-toxic and won’t harm the environment.
Effective: These traps can significantly reduce the fly population in your home or outdoor space.
Customizable: You can experiment with different baits to target specific fly species.
Tips for Optimal Results
For the best results with your DIY fly trap:

Choose the Right Location: Hang or place your trap near areas where flies congregate, such as near garbage cans or outdoor dining areas.
Refresh the Bait: Replace the bait regularly, especially if it becomes less effective or starts to rot.
Clean Regularly: Empty and clean the trap when it becomes full to prevent a buildup of flies.
Maintenance and Troubleshooting
Maintaining your DIY fly trap is relatively simple. Just follow these guidelines:

Empty Regularly: Check the trap regularly, and empty it when it’s filled with flies.
Clean Thoroughly: Rinse the trap with water and Use a mild detergent to eliminate any persistent odors.
Replace as Needed: If the trap gets damaged or loses its effectiveness, it’s easy and inexpensive to make a new one.
If you encounter any issues with your fly trap, such as flies not entering the trap or escaping too easily, review the steps above to ensure it’s set up correctly.

Conclusion
With your DIY fly trap in place, you can enjoy a fly-free living space or outdoor area without resorting to chemical solutions. It is an easy, affordable and eco-friendly method.”tackle a common nuisance. Give it a try, and you’ll be amazed at the results.


How to get smoke smell out of a car

If your car smells like smoke then it could mean a lot of things. But the main reason why a lot of people’s cars smell like smoke is due to cigarettes. However, if you don’t smoke and the inside of your car smells like smoke then you need to go to a mechanic to inspect it. However, in this article, I will show you how to get the smoke smell out of a car using some simple tricks.


Clean the carpets

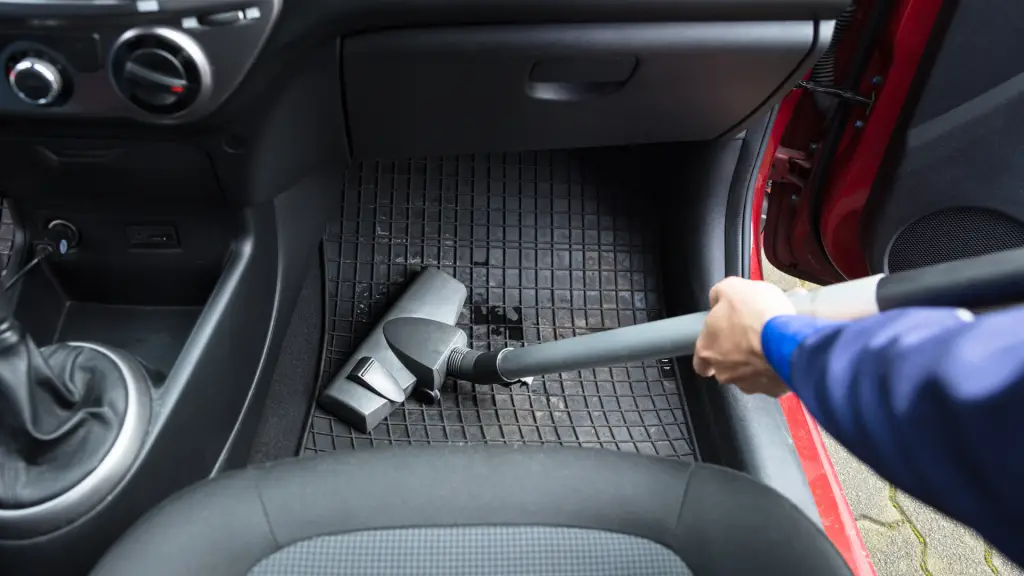
This is the first place you should focus on when deodorizing your car. This is because apart from the seats they absorb all the bad smell especially if they are made out of cloth. When cleaning your carpet the first thing you need to do is vacuum it. When vacuuming your car carpet make sure to use a portable vacuum. After that it’s best to sprinkle some baking soda and vinegar all over the carpets to make sure the smell is gone. The next thing you should do Is rinse the carpets, after rinsing them make sure to air dry them.

A simpler way to deodorize and clean your carpet is to wash it with dawn dish soap and warm water.


Airing out the car

This is the simplest way to get the smoke smell out of your car. All you have to do is open up the car doors and roll down the windows. Since the smoke smell might take some time to leave the car it’s best to move on to the next thing in this article while the car is still airing out.


Wipe down the dashboard and other areas with disinfectant

Wiping down your dashboard is very important when deodorizing your car especially when you are trying to get rid of the cigarette smell. The best way to wipe down your dashboard is to use disinfectant wipes. But first, you need to remove all the dust that was on it by using a duster. Make sure to wipe not only the dashboard but also places like the seat belt buckles, car doors, and any other hard areas.

You can also use fabuloso disinfectant if you don’t have any disinfectant wipes but make sure to use a clean microfiber cloth if you are going to use that type of disinfectant.


How to clean seats that smell like smoke?

Removing the cigarette smoke smell from car seats can be a bit tricky especially if your car seats are wrapped in cloth instead of leather however I will show you how to do it.


Cleaning leather seats

Cleaning and deodorizing leather seats are very easy because all you have to do is wipe them down. To do so you need to get some disinfectant wipes and wipe them down. After doing this the smoke smell should no longer be on them.


Cleaning cloth car seats

Now this is a tricky one or so you might think, but it’s actually as simple as cleaning leather seats, sure there might be a few extra steps but it’s still easy. The first thing you need to do is to vacuum the car seats. Doing this will get rid of the cigarette smell from them. After that, you need to spray the seats with an air freshener.


Other necessary things to do


Replace air filter

If you realize that even after you cleaned inside of the car that it still smells like smoke then it’s best to just replace the air filter as sometimes there can be smoke trapped inside of it. However, you should do this at your own risk and it’s best to get someone professional to do it.


Wipe windows and windshields

Wiping windows and windshields is a very important thing to do when you want to get cigarette smoke smell out of your car, but you might be wondering why would cleaning the windows and windshield help with that. The thing is that smoke usually leaves residue on surfaces and your windows and windshields are no exception. So make sure to clean them both with a glass cleaner and a microfiber cloth.

If you are interested in how to clean mirrors then you should check this out.

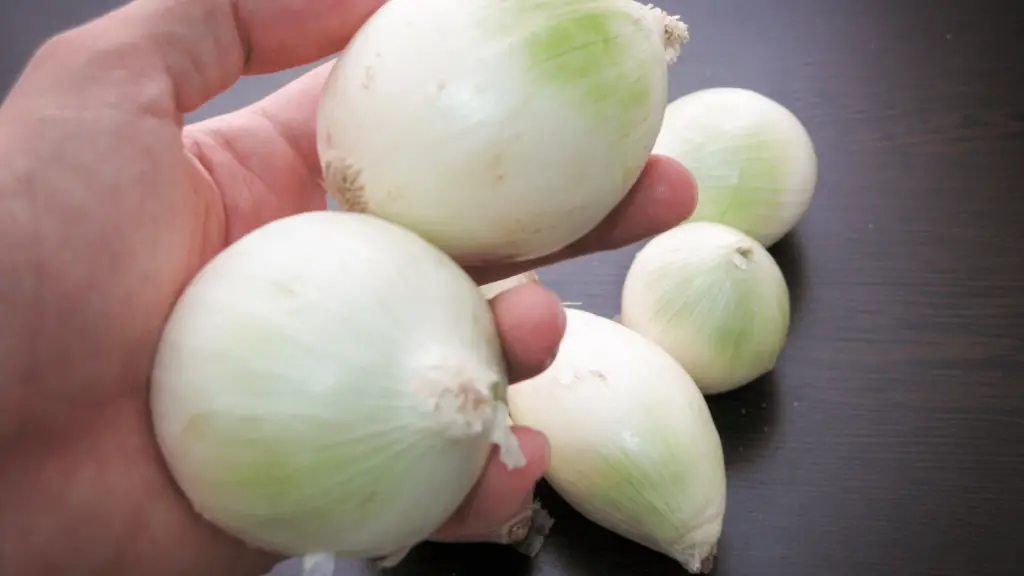
We all know that cutting onions can cause a few tears here and there but what most people don’t talk about is how it makes your hand smell. Now I’m not saying that onion is bad-smelling because it is the main reason why some of our food dishes smell so delicious but no one wants their hands to smell like it. So in this article, I will show you how to get onion smell ff your hands. This will work for garlic as well.


How to get onion smell off hands


Hand sanitizer

First, wash your hands with warm water and then dry them with a clean cloth or paper towel. After doing that squeeze a few drops of hand sanitizer onto your hands and rub it all over This will not only clean your hands but will make them smell way better as well.


Wash with toothpaste

Squeeze some toothpaste into the palm of your hands and then rub it all over. Let the toothpaste sit on your hands for 5 minutes. After that use some warm water to rinse it off.


Mouth wash

Pour some mouth wash onto your hands and rub it all over. Then use warm water to rinse your arm.


Scrub your hands with coffee beans

This may be somewhat surprising to some people but you can indeed use coffee beans as a way to deodorize your hands. Just rub some of the coffee beans between your hands for 1 minute. Doing this will get rid of the onion odor.


Rub your hands against stainless steel

This is rather a strange but simple method. Rubbing your hands against stainless steel materials can quickly get rid of the onion smell that’s on your hands. Just get a stainless steel utensil and rub your hands all over it and then rinse them under warm water and the onion odor should be gone in no time.


Wash hands with regular hand soap

Just wash your hands with hand soap, it’s that simple.


Scrub with lemons

I know some people say that lemon juice will remove any odor from your hands but I find it way easier to just rub the lemon slices all over my hand. For this method, all you have to do is cut a lemon in half and use one of the halves to scrub your hands. Make sure you scrub for 3 minutes. If your hands start to burn too much then it’s best to stop. After rubbing the lemon all over your arms you should then rinse them off with warm water.


The bar soap and baking soda method

First, wash your hands with a bar of soap under running water (make sure your hands are still soapy when finished) then sprinkle some baking soda all over your hands. Now rub the soap and the baking soda together for around 1 minute after that just rinse your hands.


How to prevent hands from smelling like onions

To prevent your hands from smelling like onions all you have to do is wear gloves every time you are handling them.

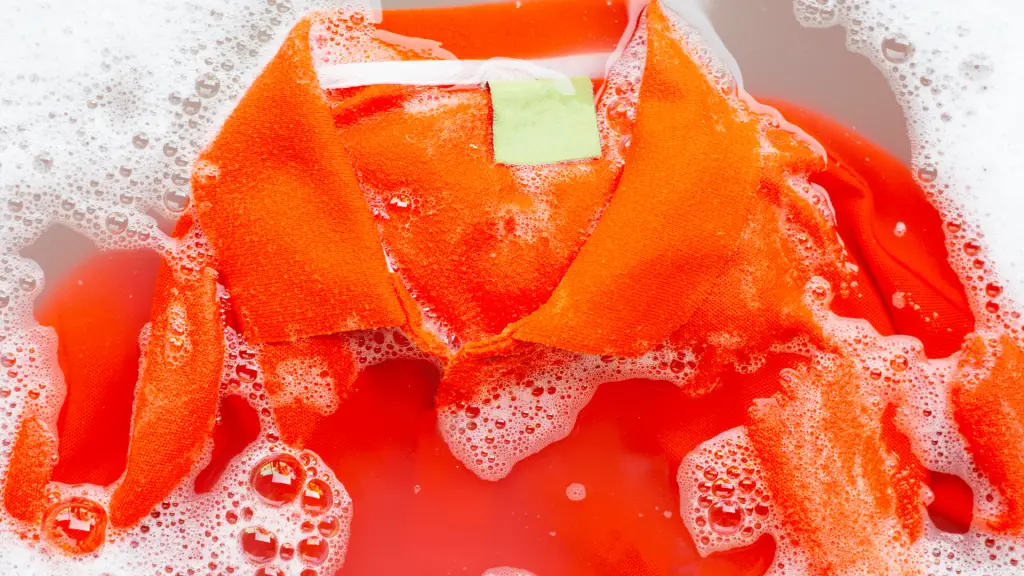
A lot of outdoorsy types of people love the smell of a campfire. Whether it reminds you of the outside or food, you cannot deny that it is a somewhat pleasant smell; unless it’s on your clothes. Sure campfire smell might be nice but no one wants their clothes to smell like that. This burnt smell is a bit harder to get out, than you might think, but don’t worry I will show you how to get rid of campfire smell from your clothing using 4 simple but effective methods.


Use baking soda

Using baking soda is a great way of deodorizing anything whether it’s drains, fabric, etc. It can even remove the worst scent from any clothes. To remove the campfire smell of your clothes you need to place the clothes into the washer (only the ones that smell) and add your favorite laundry detergent and half a cup of baking soda. Now wash the clothes regularly.


White distilled vinegar

This is another product that’s surprisingly good at deodorizing. What makes vinegar so good is the fact that you can use it for cleaning or for food, and also because it’s very inexpensive. You can get a bottle of vinegar at almost any local supermarket or even online.

To clean your campfire clothes with vinegar you first need to place the clothes into the washer and add laundry detergent then add 1 cup of vinegar into it as well. After washing the clothes they will no longer have the scent of a campfire on them. If the clothes now smell like vinegar, all you have to do is give them a second wash (without using the vinegar).


Warm water

Warm or hot water will definitely remove a lot of odors from clothes since it opens up cloth fibers. To remove any bad odor from your clothes using warm water, you’ll need to place the clothes into a large bucket and fill it up with hot water. Then let them soak for an hour before placing them inside the washer.


Sundry

This is the simplest method in this article. To do this you’ll just need to place your clothes directly under the sunlight whether you hang them or lay them down on a flat surface. After doing that you’ll need to place them in the washer.


Ever had a shirt that was too big for you? Most times when people have extra-large shirts like that, they hardly wear them but that doesn’t have to be the case. There are a couple of ways in which you can make extra-large shirts fit properly. This is called shrinking. I mean we all know what shrinking is but you might be wondering how you do it to T-shirts. Well, that’s why I made this post because today in this article I will show you how to shrink a shirt so that it can fit properly.


How to shrink a shirt

There are two main ways how to shrink a shirt. The first method is the boiling method and the second one is the washer/dryer method. Both of these methods are really easy and simple to do.


Boiling water method

The boiling water method is pretty simple and easy to follow. Most people who don’t have access to a washer and dryer might find this method to be the most useful.


Steps for this method:

  1. Boil a large pot of water on the stove.
  2. When it is boiling remove the pot from the stove.
  3. Now wait five minutes and then place the shirt inside the boiling water.
  4. Then let the shirt soak for 5 minutes. The longer the shirt is in the water the more it will shrink.
  5. Drain the water and let the shirt cool off.
  6. Then wring the shirt out and let it air dry.


There is something you need to know when it comes on to the shrinking process. The longer you wait for the boiling water to cool down the less the shrinkage will be. For example, if I let the boiling water cool down for 15 minutes before placing the shirt into it then the shirt will most likely only shrink down to 1/2 size, but if I place the shirt inside the boiling water immediately then it will shrink down 1 to 2 sizes instead. The reason why I recommended waiting 5 minutes is that it’s somewhat in the middle ground where the shirt will most likely shrink down 1/2 to 1 in size.


Washer/dryer method

The washer and dryer method of shrinking a shirt is by far the easiest method. While I do believe the boiling method is still a bit more effective; the washer/dryer method allows you to place multiple shirts or even cotton sweaters inside of them.


Here is how you shrink a shirt using the washing machine and dryer:

  1. Place the T-shirt inside the washing machine and use the warmest water option.
  2. After washing the shirt place it inside the dryer and set it on medium heat. And let it dry 2 times for 60 minutes.
  3. Repeat the process if you want more shrinking.


Conclusion

Throughout this article/post I showed you two incredibly easy but also effective ways how to shrink a shirt. I hope you found this useful and if it helped you please share it with more people.

By the wat if you are interested in how to unshrink a shirt then you should check this out:

How to unshrink clothes


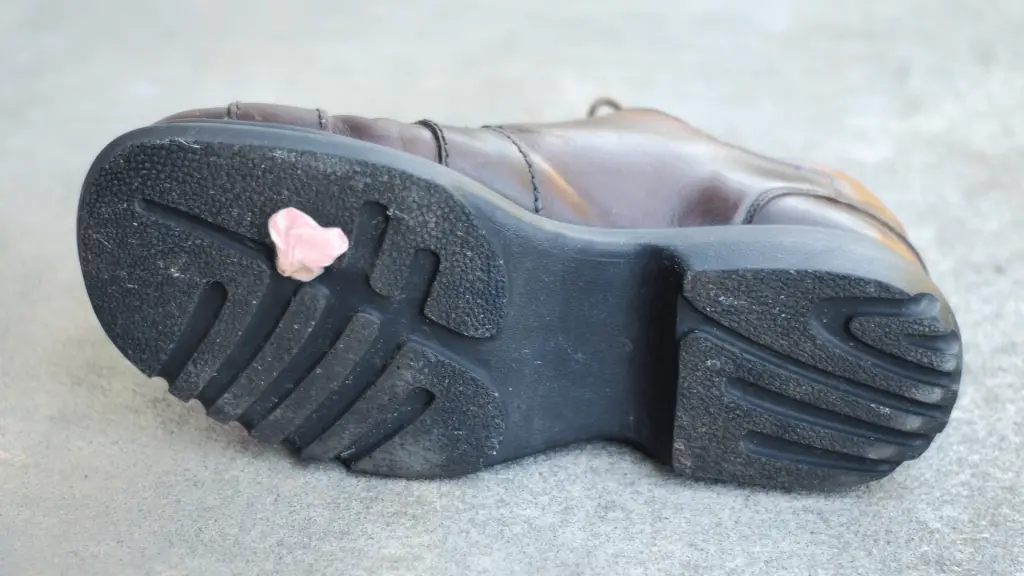
Stepping on chewing gum might be one of the most infuriating things when walking or running. I’ve stepped on gum countless times back when I was younger and I used to accidentally mess up the car carpets because of it. However, there are a couple of ways in which you can get gum off your shoes and I will show you them.


Spray with wd-40

Wd-40 is made up of different types of lubricants. So it’s best to use it if you want to remove something sticky from a surface and in this case we are dealing with gum. Just spray the gum with wd-40 for 30 seconds to 1 minute and then use a paper towel to remove it. It should be easy to remove because of the wd-40.

‘14 incredible wd-40 hacks’


Place the shoe in the freezer

This might seem weird but it is a really effective way to get rid of gum off of your shoe bottom. TO do this you will need to wrap a plastic bag tightly around the shoes. THen place it in the freezer for 45 minutes. After 45 minutes you’ll realize that the gum is now on the plastic bag instead of the shoes. Even if the gum is still on the bottom of the shoe, it should be way easier to remove now since it isn’t warm anymore.


Scrape it off with something flat

Get a thin flat utensil such as a spatula or a butter knife and drench it in oil. You should also pour a little oil on the gum as well. Then use the flat item to scrape off the gum.


Remove the gum using peanut butter

Place a large scoop of peanut butter onto the gum and leave it there for 15 minutes. Then use a wire brush to rub the area and remove the gum. After removing the gum rinse the shoe bottom with water.


Use ice cubes

Place the shoes in a plastic bag filled with ice cubes. Make sure that it’s only the bottom of the shoes that’s touching the ice cubes. If you expose the other parts of the shoes to ice cubes for too long this may damage the shoes. Now press the shoe down on the ice cubes. While doing this, the gum should be pressed against the ice cubes. What we are trying to do is to freeze the gum quickly so that it can be removed easily. When the gum is frozen you should use a knife or a flat utensil to remove the gum.

If you are into arts and crafts or maybe you were just writing something with a sharpie, you’ll most likely get the ink on your skin. Most times this isn’t a bad thing as you can easily wash it off but in some cases, the marker is permanent, and using water alone won’t work. So is that it? Do you have to live with the sharpie ink on your skin from now on? Well, obliviously not as most permanent marker ink usually fades off the skin in about 3 days, but if you want to remove the ink faster I’ve listed some methods that you can try.


Can ink damage your skin?

Most inks from markers and pens aren’t too toxic. They aren’t even toxic enough to cause ink poisoning. So you won’t damage your skin if it is exposed to ink.


How to remove permanent sharpie ink off of skin

Now I will show you some methods you need to know when removing permanent marker ink off of your skin.


Hand sanitizer

Hand sanitizer should be the first product you use when trying to get ink off of your skin. This is because it is simple to use and not dangerous for your skin. When removing ink with hand sanitizer make sure you use a cloth to rub away the ink.


Rubbing alcohol

Rubbing alcohol is another great way to remove ink stains from the skin. To be honest, a lot of alcohol-based products are good to use when getting rid of ink stains, however, rubbing alcohol isn’t toxic so it can be used on the skin. To remove the ink stain from your skin, all you need to do is pour some of the rubbing alcohol onto the sharpie ink and use your fingertips or a clean cloth to rub away the ink. Keep rubbing until the ink fades away. After doing this, rinse your hands with warm water and dry them with a clean cloth or a piece of paper towel.


Shaving cream

Apply shaving cream onto the ink-stained area and use your fingers to rub it into the ink. Keep rubbing for around 1 minute and the ink should no longer be visible. If you still see the ink, then just keep trying this method.

You can also try sunscreen as well.


Coconut oil

Before you use the coconut oil to remove the ink stain you first need to wash your hands and dry it, then apply the coconut oil onto the stained area. Then rub the coconut oil into the ink-stained area of the skin until the ink starts to fade away. Make sure to rub in a circular motion.


Baby wipes

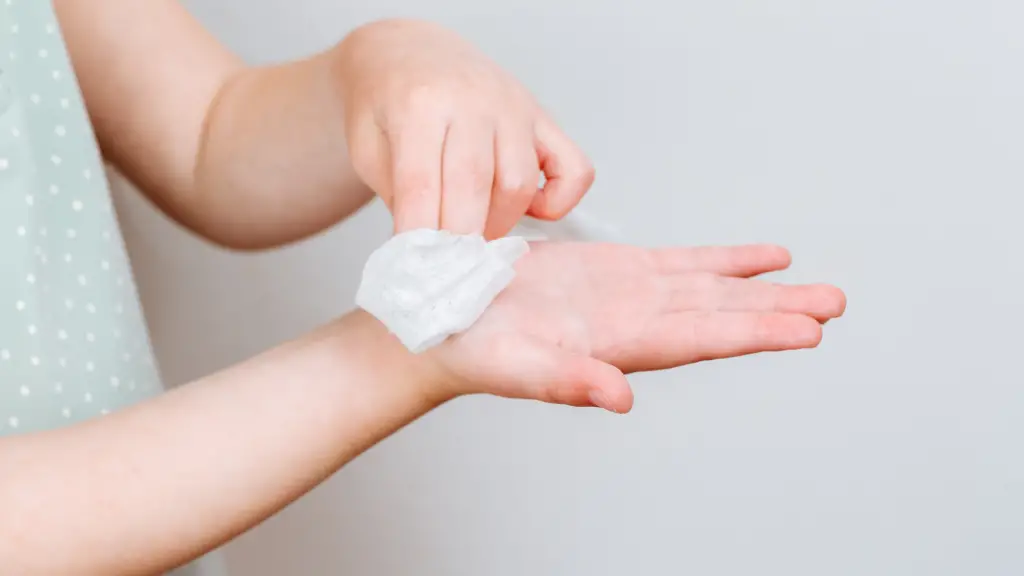
Baby wipes are great for removing stains off of skin. To remove permanent marker ink stain off your skin with baby wipes all you need to do is dab the stain with the wipes until the ink has faded away.


Baby oil

Baby oil works in the same way as coconut oil if you want to remove the sharpie ink off of your skin. All you have to do is pour a little baby oil onto the stained area and use a cloth or cotton gauze to rub the skin.


Nail polish remover

If you don’t have a bottle of rubbing alcohol don’t worry because you can use nail polish remover to remove permanent ink off of your skin. To do this you just simply need to get a cotton gauze and pour some nail polish remover onto it and then use it to rub away the sharpie ink.


Makeup remover wipes

Simply use the makeup remover wipe to rub away the ink stain off of your skin.


Whitening toothpaste

This may come as a surprise but toothpaste is actually great for removing certain stains, and this includes some ink stains. To remove permanent marker stains from your skin all you have to do is squeeze some toothpaste onto the stained area and wet your finger under running water and use it to rub the toothpaste all over the ink-stained area. Now wait 3 minutes and after that rub the ink stain again. Now rinse off the toothpaste and use a dry cloth to dry your skin and the ink stain should be no longer visible.


Conclusion

Permanent marker ink will eventually fade away from your skin in a couple of days so if you don’t want to use any of these products on your skin then you don’t have to worry.

In this article, I showed you how to remove sharpie ink off of your skin using some simple methods. I hope this was helpful.


This is an issue that a surprising amount of people seem to have and let’s be honest no one wants to drive a car that’s filled with ants. So in this article, I will show you how to get rid of ants in your car and also how to prevent them from entering.


Why are there ants in your car?

Ants usually look for food and water and they do this by finding scents. Oftentimes people usually park over ant nests and sometimes the vehicle and be filled with a lot of leftover food and garbage. So the ants will smell the food directly above them and try to look for it. So this is why they are in your vehicle.


Different types of ants

Before you do anything, the best thing to do is to find out what type of ants you are dealing with. The crazy ants or carpenter ants are usually the ones inside of cars searching for food, but it’s not uncommon if you see other species of ants doing the same thing.


Can ants damage a car?

The answer for this is a bit tricky because most times ants will bite humans but it usually isn’t fatal, you’ll only feel a sting that lasts for a couple of seconds. But there are some ants ( red ants, carpenter ants, and fire ants)  that usually bite on wood, tires, and also foam.


How to get rid of ants in your car


Clean inside the car


Remove trash

 This is one of the best ways to prevent ants from entering your vehicle. If you have a lot of trash in your car you are just asking for an ant infestation. What’s worse is that the ants may be less of you issue if cockroaches start to infest it as well. So you have to make sure that you remove any trash you see that’s inside or outside the vehicle. The right way to remove all trash from your car is to dispose of things such as snack bags, drink cups, any open food bags, etc. If you even have non-food-related garbage in your car you should still dispose of them.


Vacuum

 Vacuuming the interior of your car is a must if you don’t want an ant infestation. You might be wondering why is it important to vacuum inside your vehicle? Well, it’s important because many times when we eat inside of our cars, the crumbs from the food usually get spread all over. Some of the places where the crumbs are usually are are the seats, under the seats, on the floor, under the car mat, between the seats, and the door crevices. You may find food crumbs and other things in other areas of the car but that’s where they usually are. So make sure you use a powerful portable vacuum to get rid of all the small dirt particles and the food crumbs from inside your car. Doing this will make the inside of your car way cleaner than before.


Wash the car mats 

You might be wondering if there’s a point in washing the car mats if you’ve already picked up all the trash and vacuum everywhere inside the car; and trust me it is necessary to do so because sometimes when we have a drink inside of our vehicle, the drink can spill on our car mats and this will attract ants inside your car.

When washing your car mats you have to fill a bucket with water and dish soap and use a brush or a sponge to clean them. You can also just use a hose and wash them. After washing the mats you need to let them air dry. After letting them air dry place them back inside of the car.


Clean tires

Cleaning tires may seem like an odd way to prevent ants from entering your vehicle but most times it’s necessary to do so. The reason is that that’s where most of the ants usually climb to enter the car. So a good way to clean your car tires is to chemically treat them so that the ants will refuse to climb them. You can use insect repellant and spray the car tires, just make sure that the chemicals that you are using arent too strong and won’t damage the tires or anywhere else on the car.


Places to check-in car

Now before we get rid of the ants we have to know where their hiding spots are. The thing is about ants is that they are so small, that anywhere in your car could be their hiding spot. But some places you should search are under the seats, under the mats, the door frame, wheels, the trunk, etc. Ants usually hide in a bunch of different places so I will now show you how to get rid of them.


Getting rid of the ants

The best way to get rid of ants in your car or home is to use bait or pesticides. These are a  great way not only to draw out ants but also to kill them. There are two types of baits and pesticides you can use. You can either use natural ones or non-natural ones. I will show you how to use both of them.


Synthetic


Using regular ant killer bait

 You can find these baits and traps in your local supermarket or online. After finding the one that you are going to use place it in your car and wait for the ants to get caught. Keep doing this every day until all the ants that are in your car are gone.


Use ant spray

 Ant sprays are a good way to get rid of ants but the only problem with them is that you have to wear a mask and the only effective method of killing the ants is to spray when you see them. You don’t always have to spray the ants as you see them, you can also spray places like under the seats, trunk, etc. Don’t spray directly onto the seats as the fabric will absorb the spray and this can be toxic to children, pets, and even adults as well. So to avoid any issues make sure to open your car for a couple of hours after spraying inside. You should also clean the seats and other areas as well.


Natural


Dawn dish soap

 Natural products are usually safer to use so you don’t have to worry about wearing gloves and a face mask. One of the best natural ant killer/repellants you can use is dawn dish soap. Now if you have seen my other articles you’ll know that I talk about dawn dish soap a lot and this is because it has so many uses. You can use it to clean your dishes, toilet, bathtub and now you can use it as an ant killer.

The reason why dawn dish soap works well as an ant killer is because it breaks down the ant’s exoskeleton by removing the lipids that will eventually make them dehydrated. This will also make most ants drown instead of floating on water.

The best dawn dish soap to use is the blue one. I don’t know if the other ones are all made the same but the blue dawn is the one that I see most people using when they are getting rid of ants.

To make your own ant killer with dawn dish soap your need to mix 2 cups of warm water, 4tbsp of dawn dish soap, 1tsp of salt into a spray bottle. Now spray the mixture directly onto the ants when you see them in your car.

After spraying the ants and getting rid of them. It is now time to clean the car. All you have to do is wipe away the soap that was sprayed inside the car, then use a dry cloth to dry the area. It’s best to do this because if you let the moisture sit in the car for too long it will later cause mold/mildew to form from it.


Essential oils

 To some people, this may come as a surprise but you can actually use essential oils as a way to repel ants and other insects. Essential oils have many uses some are more believable than others but this one can actually be trusted.

Most essential oils have an aroma that causes most insects to keep away.


Borax

 Borax is not only good for laundry, because it has so many other uses. The crazy thing about borax is that most people don’t really know about the other uses it has. You can use it to clean a lot of areas around your home and in this case, you can also use it as an ant killer.

To use borax as an ant killer you need to get a small bowl or container and add 2 cups of borax and mix it with a lot of sugar, preferably brown sugar. After mixing them together place the container inside the car. You can place multiple containers of the mixture in different areas of the vehicle if you want to. Now wait as the smell of the sugar will attract the ants and the borax will kill them when they start eating. It might take some time for the borax to kill them.

If you are interested in some other ways you can use borax then click here.


Vinegar

 Did you know that you could use vinegar to kill and repel ants? Well, now you know. Vinegar is a cheap yet effective ant killer and repellant. To kill ants with vinegar you first need to mix vinegar with equal parts warm water and pour the mixture into a spray bottle. You can even add a little dish soap as well. Then spray the ants as soon as you see them. If the ants won’t come out you can use a piece of a candy bar to bait them out.

To repel the ants with vinegar you need to spray the tires with vinegar and also place vinegar-soaked cotton balls around inside of your car.


Boric acid

 Before you use boric acid make sure to wear a face mask and gloves. To kill ants with boric acid you need to mix together 1-2 cups of boric acid, 5tbsp of salt, and 2 cups of brown sugar and place the mixture into an open container. Now place the container inside of your car and then all you have to do is wait until the boric acid kills the ants. Now you won’t have to worry about the ants inside your vehicle.


How to prevent ants from entering your car

While getting rid of the ants is a good thing, you still have to think about where they’re coming from and why are they inside your vehicle. I will now show you some ways how you can prevent ants from entering your car.


Clean car regularly

 This is probably the main reason why you have ants in your vehicle. Ants like places where there is a lot of food and junk and when your car is filled with this, they will be attracted to the smell and want to enter your vehicle. Remember that ants are really small so they can fit through in almost any tight holes and crevices. What’s even worse is that ants aren’t the only thing you should be worried about if the inside of your car is very filthy. Cockroaches and other pests such as small mice will try to sneak into your vehicle if they smell a lot of food in it.

When cleaning your car it’s best to start by getting rid of the food crumbs you see. Most of the food crumbs are usually from chips, bread, sandwiches, cakes, and pastries. Food crumbs are usually under your seats, on the dashboard, in between the seats, on the floor, and under the car mat. Make sure to use a vacuum to remove all of them.

After getting rid of all the food crumbs be sure to wipe down the dashboard as well. Sometimes sweet substances usually stick to the dashboard so you have to make sure to always clean it. When cleaning your dashboard you have to use a disinfectant, such as a Lysol disinfectant spray/wipes, or a liquid disinfectant such as fabuloso.

Also, be sure to clean your car mats. This is because car mats are one of the dirtiest things in the car apart from the seats. Not only that but cleaning your car mats will get rid of the dead ants and eggs that have been on it. When cleaning the car mats be sure to use a citrus soap. This will repel any remaining ants in the vehicle. After washing the car seats let them air dry.

Now it’s time to wipe down the car doors and seats with a citrus spray. Not only will this repel ants away from your car it‘s also a great way to clean it and make it smell way better than before.


Change parking spots

If you did everything I told you to do but ants are still infesting your vehicle then it might be time to change parking spots. After doing this be sure to spray the car wheels with ant repellant so that the smell can discourage them from wanting to enter your vehicle. If you don’t have ant repellant you can spray the wheels with vinegar or essential oils instead.


Destroy nearby nests 

While ants are usually attracted to food and the filth that was probably in your car was one of the reasons why they were infesting it. The problem is still not over, even if you did every method I listed in this article. Most times when the car is directly parked over an ant nest, it can be a big issue because now they are so close to the car, that they can even smell almost any food from inside.


So the first thing you need to do is move your vehicle and now it’s time to take out the ant nest. When dealing with an ant nest you have to be careful because they will try to attack you in self-defense so it’s best to wear shoes and pants. You should also wear a face mask and gloves because you’ll be handling ant killer products which can be somewhat harmful to humans if you arent using them carefully. If you are using a spray then be sure to spray the ant nest directly and also every ant as well. The good thing is they will be evading in a large group so it will be easy to eliminate them. If you cant see them then it’s best to place baits near the nest. Doing this will definitely poison them.


Contact pest control services

While all the methods I listed throughout this article should work for a lot of people, it still might not work for some maybe because the issue is overwhelming.

If this is the case then you don’t have to worry because all you have to do is go on google and search for pest control services near you and you’ll find tons of them willing to help for a fee.


Conclusion

In this article, I told you some effective ways how to get rid of ants in your car. The reason why I made this was that I know a lot of people go through this same issue. So be sure to clean the inside of your car regularly and dispose of any trash you see in it.