You are in a rush, your home is a mess, how will you get this chaos of a home deep clean in 24 hours! Is it really practical to deep clean your home in a day? Yes, and these cleaning hacks from the experts will walk you through the process with a simple step by step guide to getting this done.
If you look at the facts, when you call in a house cleaning company there is no way on earth they are going to take a week to deep clean your home. Normally within a few hours they are done. So, what are their secrets? here they are. Continue reading to end to find their secrets and to get your free printable checklist.
Does the Size of the Home Matter?
Yes, and no” For a large home to be deep cleaned in a day you will need to call in a friend who knows how to clean. For smaller homes , yes, it is possible for one person to tackle the task and have the same results as if 10 of you had cleaned. All you need to do is to follow the tips and instructions below and you’ll be all good.
Deep Clean Your Home in a Day Checklist
Morning Tasks (Start Fresh)
1 Let in some air or natural light by opening the windows. If this is not possible go ahead an open the blinds or draw the curtains. Doing this will make the room brighter so you can see what you are doing.
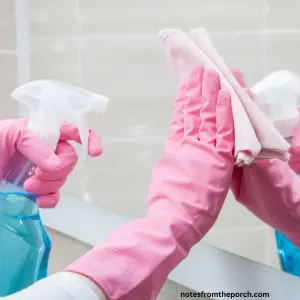
2. Have your cleaning tools ready…vacuum, broom with dust bin, duster for dusting, microfiber cleaning cloths, cleaning supplies, trash bags and a pair of gloves.
3. Before you begin cleaning pick up the large particles off the floor and the couches and toss them into a trash bag.
6. If you have a dishwasher now would be the best time to place the dishes in (if any)
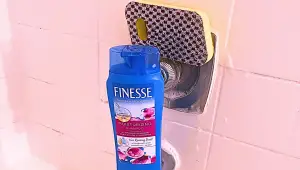
4. Now, a clean home doesn’t have dirty laundry. So, yes, doing the laundry falls into deep cleaning your home. Example: Bed linen, drapes, curtains, shower curtain, towels etc. Get the washer running then move on to the next step. By the time you are through cleaning these will be ready to replace.
5. Next, is dusting…First start with the higher places like the ceiling. If you do the ceiling last the dust will fall back onto the lower surfaces you have already cleaned making your job way harder. The best thing to keep in mind is not to repeat what you’ve done before.
Here is a secret, to dust the ceiling you can use an expandable broom or better yet use a ladder /strong chair.
Move on the the furniture and lighting fixture like bulbs and fans using the duster.
Extra Tip. Always dust before wiping with a damp cloth. If you don’t do this the moist cloth will cause the dust to stick to the wooden furniture and it won’t have that shiny look at the end of the day.
Afternoon Tasks (Get into the Details)
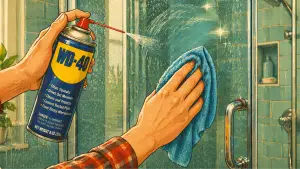
Now, its in the afternoon and you have taken a meal break. Its time to clean the windows and doors. Be careful of the product you use to clean your glass windows and doors as these could leave streaks.
1. Windex glass cleaner is highly recommended for cleaning glass. However, avoid using it on wooden doors. Use a lint-free paper towel to clean the window. I found that Sparkle cleans without leaving lint behind.
Extra Tips: If you are a DIY freak like me you may opt for rubbing alcohol and instead of using paper towel utilize those mailbox news paper your glass door and windows will look amazing!
For cleaning wood or even panel doors, Murphy’s oil soap is excellent, but, also dust these before cleaning with a liquid solution for best results.
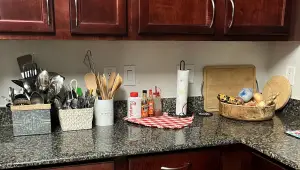
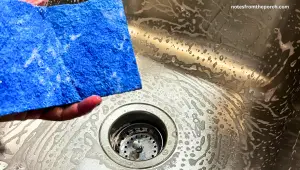
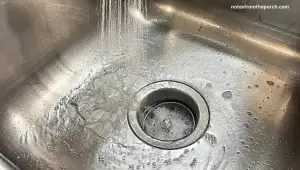
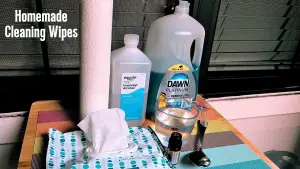
2. Deep clean the Kitchen…Simply clear the countertops. By now all dishes should be in the dishwasher. If not, go ahead and wash them with your hands. If extra greasy, Dawn dish soap has just become your best pal with some warm water. Lastly, clean the stove and the floor then empty the trash bin.
Check in the fridge. Quickly remove all out dated food even the cooked ones that has been there for more then a week. Grad hold of a thick sheet of paper towel damp with warm water and distilled vinegar and wipe down the shelves. Do the same for the microwave oven.
Extra Tips: Dawn dish soap is powerful all-purpose cleaner which is good for cleaning grease off stove tops, cabinets, appliances and countertops. The perfect (grease terminator) Go light as it suds easily, but gets the job done fast.
Mist the trash bin…If the trash bin smells simply mist it with diluted household bleach or ‘Lysol disinfectant spray this should keep the odor down and kill any bacteria there may be. The best thing to do if time is available is to wash it.
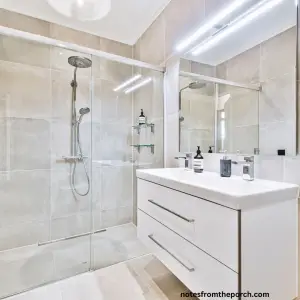
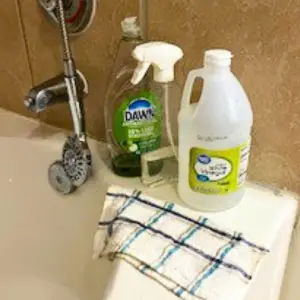
3. Tackling the Bathroom... Before you begin, clear the countertop and mist the sink, toilet and shower. First, clean the sink, next the shower lastly the toilet. You don’t need 4 different cleaners to clean your bathroom, All you need is one cleaner that cleans every thing EXCEPT FOR THE WOODEN CABINETS.
Clorox Bleach Foamer can be used to clean the sink, toilet and shower/ bathtub also= Dawn dish soap. To clean the countertop use a softer cleaner like Mr Clean Surface Cleaner (NOT RECOMMENDED FOR CLEANING VARNISHED OR PAINTED WOOD)
Evening Tasks (Final Touches)
1. For the finale, replace the sheets, drapes and curtains if you had remove them
2. Place new trash bags in all the bins
3. Vacuum the sofa getting in all the creases. A hand vacuum will work for this.
4. Vacuum the floor then clean with a damp mop. A solution of one cup white distilled vinegar into a gallon of warm water will work magic on any type of floor.
5. Deodorize: A clean home should smell good. Use your favorite air freshener to do so
6. Take a look around and see if you miss anything.
Next, brew a cup of herbal tea, grab a book turn on some relaxing music and relax in your most comfortable chair while you enjoy your spotless home.
BEST CLEANERS FOR DEEP CLEANING YOUR HOME IN A DAY:
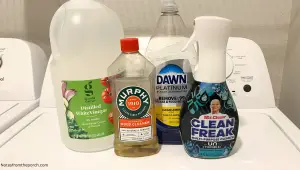
1. Distilled white vinegar…Cleans the fridge , toilet, bathroom and floors( dilute with warm water for the floor)
2. Mr Clean Magic Erase…Remove stubborn dirt, grease and soap scum
3. Dawn Dish Soap…Cleans every thing etc shower, toilet, stove, fridge, sinks and mirrors
4. Murphy’s Oil Soap…Use on wooden cabinets, tables and countertops
5. Mr Clean Surface Cleaner Spray…Use on vinyl countertops, sinks, bathtubs and shower
OTHER CLEAN TOOL YOU’LL NEED:
1. Lint-Free Microfiber Cleaning Cloth
2. Sparkle Paper Towel
3. Duster
4. Empty Spray Bottle
5. Broom and Dust Bin
6. Bucket
7. Mop
8. Trash Bags
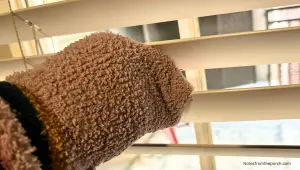
9. Sock for cleaning blinds
Tips for Cleaning Blinds:
To clean the blinds blades use the duster to remove excess dust. Next step, simply pull a thick sock over your fingers. Next, mist the sock with warm water mixed with vinegar then slowly slide your fingers from one end of the blind to the other.
FREE PRINTABLE DEEP CLEANING CHECKLIST
CONCLUSION:
A s you can see deep cleaning your home is not as hard as it seem. With this printable checklist and the instruction in this article you will be able to to deep clean your home in a day.
By for now, see next time! Snippets


")

")