
Category

Household Hacks

Category

Waking up to a fresh-smelling bedroom sets the tone for a great start to your day. Unfortunately, bedrooms can sometimes develop an unpleasant “sleep smell” overnight. This guide will help you understand why this happens and provide practical steps to get rid of sleep smells and maintain a pleasant aroma in your bedroom.

1. Why Does My Bedroom Smell After Sleeping?

Your bedroom might smell after sleeping due to several factors:

  • Sweat and Body Oils: During the night, your body naturally sweats and releases oils. These substances can seep into your bedding and mattress, leading to an unpleasant odor over time.
  • Breath and Saliva: Your breath and any saliva that might get on your pillow can contribute to morning odors. The buildup of bacteria in your mouth during the night can also produce a noticeable smell.
  • Closed Environment: If your bedroom is not well-ventilated, air circulation is limited. This can cause smells to become trapped and intensify.
  • Dirty Bedding: Not washing your sheets and pillowcases frequently enough can lead to an accumulation of odors from sweat, body oils, and bacteria.

2. How Do You Get the Smell of Sleep Out of a Room?
To effectively remove the sleep smell from your bedroom, follow these steps:

  • Ventilation: Open your windows every morning to allow fresh air to circulate. This helps to remove stale air and replace it with fresh, outdoor air. If possible, keep a window slightly open overnight to maintain air circulation.
  • Air Purifiers: Use an air purifier with a HEPA filter to remove particles and odors from the air. Air purifiers can significantly improve the air quality in your bedroom.
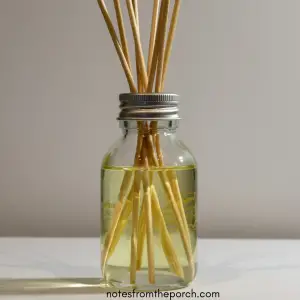
  • Essential Oils: Use an essential oil diffuser with scents like lavender, eucalyptus, or citrus. These oils can help neutralize odors and leave a pleasant fragrance.
  • Baking Soda: Sprinkle baking soda on your mattress and carpets. Let it sit for at least 15 minutes before vacuuming. Baking soda is excellent at absorbing odors.
  • Activated Charcoal: Place activated charcoal bags around your bedroom. Activated charcoal naturally absorbs and neutralizes odors, keeping the air fresh without adding any scent.

3. How to Deodorize a Bedroom?

How do you deodorize a bedroom? Deodorizing your bedroom involves several simple steps to ensure it stays fresh and inviting:

  • Regular Cleaning: Dust and vacuum your bedroom at least once a week. Pay special attention to areas where dust accumulates, such as under the bed and in the corners. Clean surfaces with a mild cleaner to remove any lingering odors.
  • Wash Bedding Frequently: Wash your sheets, pillowcases, and blankets at least once a week. Use a detergent with a pleasant scent or add a few drops of essential oil to the rinse cycle will make your laundry smell good.
  • Clean Your Mattress: Vacuum your mattress regularly to remove dust and allergens. For a deeper clean, sprinkle baking soda on the mattress, let it sit for a few hours, and then vacuum it up.
  • Odor Neutralizers: Use odor-neutralizing sprays on fabrics and upholstery. These sprays can help freshen up curtains, rugs, and upholstered furniture.
  • Keep Pets Clean: If you have pets that sleep in your bedroom, ensure they are clean and groomed regularly. Pet odors can contribute to the overall smell of your room.

4. How to Keep a Bed Smelling Fresh?

Keeping your bed smelling fresh requires regular maintenance and a few helpful products:

  • Regular Linen Changes: Change and wash your bed linens at least once a week. Fresh linens can make a significant difference in how your bed smells.
  • Mattress Protector: Use a mattress protector to prevent sweat and body oils from seeping into your mattress. Wash the mattress protector regularly to keep it clean.
  • Pillow Care: Wash your pillows every few months, or replace them if they are old and have absorbed too many odors. Use pillow protectors to keep them clean longer.
  • Essential Oils on Linens: Add a few drops of essential oil to a spray bottle filled with water and lightly mist your sheets and pillowcases. This adds a fresh scent and can help with relaxation.
  • Sunlight and Air: Occasionally, take your mattress and pillows outside to air out in the sun. Sunlight can kill bacteria and remove odors naturally.
  • Fabric Fresheners: Use fabric fresheners or homemade sprays made from water and essential oils to keep your bed smelling pleasant between washes.

Conclusion

Getting rid of the sleep smell in your bedroom and maintaining a fresh environment requires a combination of good hygiene, regular cleaning, and proper ventilation. By following these steps, you can enjoy a pleasant-smelling bedroom that enhances your comfort and contributes to better sleep and overall well-being. With these tips, waking up to a fresh and inviting room will become a delightful daily experience.
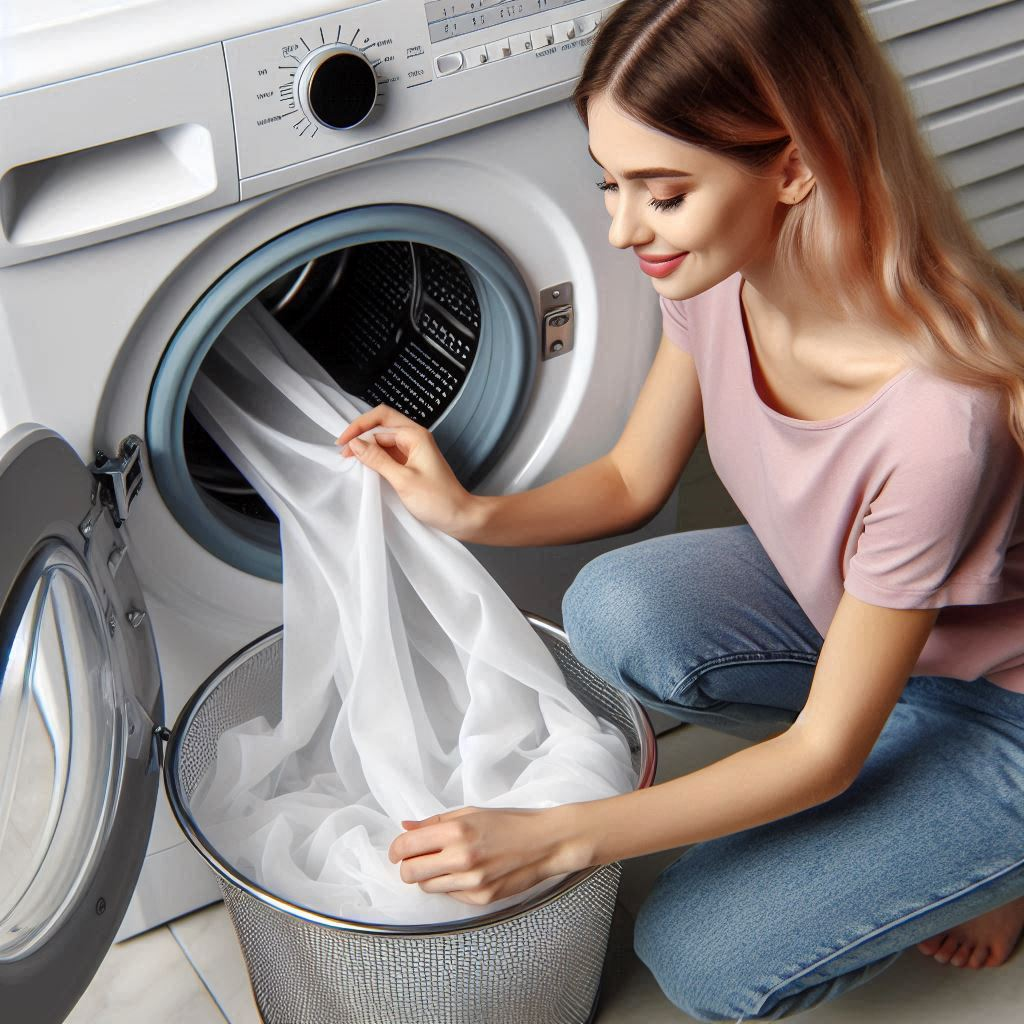
In this post I’ll be showing you how to clean a shower curtain liner in a washing machine and, also how to keep it clean while its still hanging there without removing it. Lets check  out the tips below to find out how!

I used to think that if I put my plastic shower curtain liner in a washing machine in would totally ruin it. Maybe a front loader washer but, not a top loader as these washers has those helicopter- like blades in them.

Its not until recently I found out that cleaning shower curtain liners in a washer is possible as the material (vinyl, polyester, nylon) they are made from is not that fragile. As of now I keep my shower curtain liner clean with the following methods . Here is how!

Tips#1:

The Best Way to Clean a Shower Curtain Liner:

Washing shower curtain liner in a washing machine
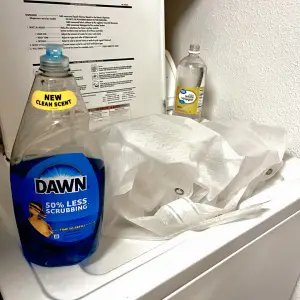
Using vinegar and Dawn dish soap to clean dirty shower curtain liner

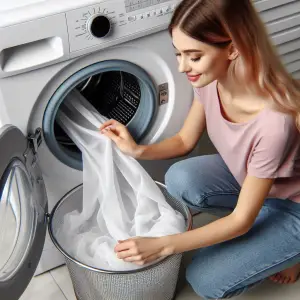
1. Turn on the washing machine on warm water then turn the knob to light wash

2. Add 1 cup white distilled vinegar and 1/2 cup laundry detergent. You can add bleach if the shower curtain liner is white. This will help to remove stubborn stains.

3. Use your hands to make a semi-circle with the liner

4. Next, place it in a circle around the blades

5. When it is done, carefully remove the liner from the washer. Be careful doing this as it may not be completely drained so while removing it gently lift so the remaining water runs out.

6. Let it hang for a while on the washer (lid open) so that it can finish draining. If you are in a hurry you can quickly take it back to the bathroom and replace in the shower. Either way its a shower curtain liner so its not expected to be dry.

Tip#2:

How to Wash a Shower Curtain Liner in a Front loader Washing Machine

Washing shower curtain liner in a top loading washing machine
Cleaning shower curtain liner

1. Simply place the shower curtain liner in the washer… Using warm water

2. Add 1 cup while distilled vinegar in the liquid compartment and laundry detergent in its given area

3. Wash on regular or whites

4. When it done washing, shuffle the liner  around in the washer while shaking it to remove any excess water.

5. Take it back to the shower and continue to use.

Tip: If the the liner is crushed simply hang it back in place in the shower and use your hands to flatten the wrinkle. Eventually the material will return to its normal look in around an hour or 2.

Tip#3:

How to Clean a Shower Curtain Liner without removing it:

Not all the time you can remove a shower curtain liner to get it cleaned, I must admit, its kind off a tedious task even though it looks simple. However, one way to keep a shower curtain liner clean without washing it is listed below.

  1. During a shower before leaving splash warm water on the shower curtain liner to remove any soap residue. If you let this remain it becomes what is called soap scum that will without a doubt  make the shower curtain look really disgusting.
  2. Make a mixture of vinegar and Dawn dish soap in a spray bottle. Use this to mist the curtain daily then splash warm water all over to rinse. This is a quick and easy way to keep your shower curtain clean without removing it.

Extra Tip: Clean your shower at least once per week or keep a cleaning cloths nearby  so  you can quickly wipe down the tiles to prevent watermarks and soap scum build-up. Here are 20 amazing shower cleaning tips you may like.

Conclusion:

Now that you know how to wash a shower curtain in a washing machine and without using a washing machine and the products to use your shower curtain is guaranteed to remain clean all the time. Don’t forget to clean the shower tiles this way you’ll have a totally clean shower.


Your front yard is the first impression of your home, and the right bushes can add both beauty and practical benefits. Whether you’re looking to enhance curb appeal or create a functional landscape, here are some must-have bushes to consider for your front yard.

1. Boxwood (Buxus sempervirens)

Beauty: Boxwoods are classic evergreen shrubs known for their small, dense leaves and ability to be shaped into hedges or topiaries. Their lush green foliage provides a formal and polished look to any front yard.

Benefits: Boxwoods are incredibly versatile and low maintenance. They can withstand heavy pruning and grow well in both full sun and partial shade. Their dense structure makes them excellent for privacy screens and windbreaks.

2. Hydrangea (Hydrangea macrophylla)

Beauty: Hydrangeas are celebrated for their large, vibrant flower clusters that bloom from late spring to fall. They come in various colors, including pink, blue, white, and purple, and their flowers can even change color based on soil pH.

Benefits: Hydrangeas thrive in both full sun and partial shade, making them adaptable to different yard conditions. They also attract pollinators like butterflies, enhancing the biodiversity of your garden.

3. Lilac (Syringa vulgaris)

Beauty: Lilacs are beloved for their fragrant, cone-shaped flower clusters that bloom in spring. They come in shades of purple, pink, and white, adding a burst of color and a pleasant aroma to your yard.

Benefits: Lilacs are relatively low maintenance and can grow well in most soil types as long as they have good drainage. They are also resistant to deer, making them a great choice for areas with wildlife.

4. Rosemary (Rosmarinus officinalis)

Beauty: Rosemary bushes have needle-like leaves and produce small, pale blue flowers. Their aromatic foliage and upright growth habit add a Mediterranean touch to any landscape.

Benefits: Beyond its ornamental appeal, rosemary is a culinary herb that you can use in your cooking. It’s drought-tolerant and can thrive in poor soil conditions, making it an excellent choice for xeriscaping.

5. Forsythia (Forsythia x intermedia)

Beauty: Forsythias are known for their striking yellow flowers that bloom in early spring before the leaves appear. They provide a bright, cheerful splash of color after a long winter.

Benefits: These shrubs are fast-growing and hardy, requiring minimal care once established. They can be used as hedges or standalone focal points in your yard. Forsythias also signal the beginning of spring, bringing seasonal joy to your landscape.

6. Butterfly Bush (Buddleia davidii)

Beauty: As the name suggests, butterfly bushes attract butterflies with their long, cone-shaped flower clusters that come in various colors, including purple, pink, and white. Their fragrant blooms add a vibrant and dynamic element to your yard.

Benefits: Butterfly bushes are low maintenance and can tolerate drought once established. They are perfect for pollinator gardens and can grow well in most soil types. Pruning after blooming encourages more flowers and helps maintain a manageable size.

7. Azalea (Rhododendron spp.)

Beauty: Azaleas are prized for their profuse blooms in spring, offering a wide range of colors from pink and red to white and purple. Their glossy green leaves provide year-round interest.

Benefits: These shrubs thrive in acidic soil and partial shade, making them suitable for a variety of yard conditions. Azaleas also support local wildlife, providing nectar for pollinators and shelter for small animals.

Tips for Choosing the Right Bushes

  • Consider your climate: Ensure the bushes you choose are suited to your local climate and soil conditions.
  • Think about maintenance: Some bushes require more pruning and care than others. Choose plants that fit your gardening style and time commitment.
  • Plan for growth: Be aware of the mature size of the bushes to avoid overcrowding and ensure they have enough space to thrive.
  • Mix and match: Combining different types of bushes can create a diverse and visually appealing landscape. Consider a mix of evergreen and deciduous plants for year-round interest.

By selecting the right bushes, you can enhance both the beauty and functionality of your front yard, creating a welcoming and attractive environment for your home.

Decorating a small bedroom can be a challenging yet rewarding endeavor. With the right strategies, you can transform even the tiniest of spaces into a cozy, functional, and stylish retreat. Here are 30 creative ideas to help you maximize your small bedroom’s potential.

1. Opt for Light Colors

Light colors like white, pastels, and soft neutrals can make a small room feel larger and more open. Consider painting your walls and ceiling in these hues to create an airy ambiance.

2. Multi-Functional Furniture

Invest in furniture that serves multiple purposes, such as a bed with storage drawers underneath or a desk that doubles as a vanity.

3. Mirrors

Mirrors reflect light and create the illusion of more space. Place a large mirror on one wall or incorporate mirrored furniture.

4. Vertical Storage

Utilize vertical space by installing shelves, hooks, and wall-mounted storage units. This keeps the floor area free and makes the room feel less cluttered.

5. Floating Shelves

Floating shelves are a sleek and stylish way to add storage without taking up too much space. Use them to display decor, books, or plants.

6. Fold-Down Furniture

Fold-down desks or beds (Murphy beds) can be tucked away when not in use, freeing up valuable floor space.

7. Built-In Storage

Custom-built storage solutions like built-in wardrobes or under-bed storage can maximize every inch of space.

8. Loft Beds

If ceiling height allows, consider a loft bed to free up space underneath for a desk, seating area, or additional storage.

9. Under-Bed Storage

Use bins or boxes to store items under the bed. This is a great way to keep seasonal items or extra linens out of sight.

10. Sliding Doors

Replace traditional swinging doors with sliding or pocket doors to save space and add a modern touch.

11. Minimalist Decor

Embrace minimalism by keeping decor simple and uncluttered. A few well-chosen pieces can make a small room feel stylish without overwhelming it.

12. Wall-Mounted Lights

Free up bedside table space by opting for wall-mounted sconces or pendant lights instead of table lamps.

13. Daybeds

A daybed can serve as both a seating area and a sleeping area, making it a versatile option for small bedrooms.

14. Lightweight Furniture

Choose lightweight and low-profile furniture to prevent the room from feeling cramped.

15. Transparent Furniture

Acrylic or glass furniture pieces can make the room feel more open because they take up less visual space.

16. Accent Wall

Create an accent wall with a bold color or wallpaper to add interest without overwhelming the space.

17. Plants

Incorporate a few small plants to add life and color. Hanging plants or wall-mounted planters are great options for small rooms.

18. Smart Storage Solutions

Think creatively about storage—like a headboard with built-in shelves or a bed frame with hidden compartments.

19. Compact Nightstands

Opt for compact nightstands or even floating shelves next to the bed to save space.

20. Coordinated Color Scheme

A coordinated color scheme can make the room feel cohesive and larger. Stick to a palette of two or three colors.

21. Art and Decor

Limit the amount of wall art and decor to avoid a cluttered look. A few statement pieces can have a big impact.

22. Rugs

Use a large area rug to define the space and make it feel larger. A rug that extends under the bed and furniture can unify the room.

23. Bed Nooks

If your room has an alcove or nook, consider placing your bed there to create a cozy, defined sleeping area.

24. Mirror Closet Doors

Replace closet doors with mirrored doors to add light and make the room feel more spacious.

25. Light Curtains

Opt for light, airy curtains or blinds that let in natural light while providing privacy.

26. Bedside Caddy

A bedside caddy attached to the bed frame can hold essentials like books and glasses, saving space on a nightstand.

27. Canopy Bed

A canopy bed can add height and drama to a small room, making it feel more spacious and luxurious.

28. Mix Textures

Mix different textures to add depth and interest. Think plush throws, smooth bedding, and textured rugs.

29. Declutter Regularly

Regularly declutter and organize to keep the space feeling fresh and open.

30. Personal Touches

Add personal touches like photos, artwork, or mementos to make the space uniquely yours while keeping it minimal.

By implementing these ideas, you can transform your small bedroom into a stylish and functional haven. Remember, the key to making the most of a small space is creativity and smart planning. Happy decorating!

Are you tired of living in a cluttered home? Did you know that a clutter-free space can positively impact your mental well-being? If you’re ready to transform your home and say goodbye to chaos, join us in the 7-Day Organization Challenge! In this blog post, we will provide you with simple yet effective organization hacks to declutter every corner of your home.


7-Day Organization Challenge: Declutter Your Space with These Genius Hacks!

Day 1:

Begin your home organization journey by starting with the entryway. Dedicate a specific area for keeping things like keys, shoes, and mail. You can consider adding wall hooks and a stylish shoe rack to keep everything in order. A tidy and uncluttered entryway will create a positive atmosphere for the rest of your home.

Day 2:

The Closet Overhaul: Dive into your closet on the second day. Donate or sell items you no longer need. Organize your clothes by type or color. Invest in space-saving hangers and storage bins to maximize your closet space.

Day 3:

Kitchen Chaos Control: The heart of the home requires special attention. Declutter your kitchen by organizing your pantry, discarding expired items, and investing in clear storage containers. Arrange pots, pans, and utensils for easy access and a streamlined cooking experience.

Day 4:

Living Room Bliss: Simplify your living room by removing unnecessary items, organizing entertainment centers, and arranging furniture for optimal flow. Consider using storage solutions like ottomans and baskets to quickly and easily tidy up, and create a cozy, clutter-free space.

Day 5:

Home Office Harmony: Declutter your home office to boost productivity. Clear your desk, file paperwork, and organize cables. Invest in shelves and bins for storage.

Day 6:

Serene Bedrooms: Create a calming bedroom atmosphere by decluttering surfaces and investing in under-bed storage for linens or off-season clothing.

Day 7:

Bathroom Retreat: Finish the challenge by organizing your bathroom. Dispose of expired toiletries, organize drawers, and invest in storage solutions like shelves or baskets. A tidy bathroom enhances your daily routine.

Conclusion:

Congratulations on completing the 7-Day Organization Challenge! By dedicating a little time each day to decluttering, you’ve transformed your space into a more organized and enjoyable environment. Use these hacks regularly to maintain a clutter-free home and enjoy the benefits of a well-organized living space.

It’s fun and creative to decorate your home since it gives you the chance to express your individuality and sense of style in your living areas. Here are 35 creative home decorating ideas to get you motivated, whether you’re starting from scratch or want to update your present setup.

1. Use décor that is inspired by nature

By combining organic components like plants, wood, and stone, you can bring the outside within. For a dynamic touch, think about adding a statement indoor garden or a variety of potted plants.

2. Make the most of vertical space

Make the most of the space you have while enhancing the aesthetic appeal of the room by using wall-mounted hooks, shelves, and vertical storage options.

3. Build an exhibition wall

Create a striking focal point in any space by collecting works of art, images, or even wall-mounted plants.

4. Play around with textures

To give your area depth and character, use various textures like velvety rugs, shiny glass, and rough stone.

5.Include statement lighting in

Transform your lighting fixtures into interesting, eye-catching items that are both ornamental and useful.

6. Add a Colorful Accent

Bright elements, such throw cushions, artwork, or even a strikingly painted accent wall, will breathe life into your room.

7. Add Rug Layers for Depth

Try out various rugs with various sizes, textures, and designs to produce a warm and visually interesting environment.

8. Use mirrors to create illusions

Mirrors should be placed in strategic locations to reflect light and give the impression of more space in smaller spaces.

9. Spend money on bespoke furniture

Take into account pieces that are produced to order to suit your unique tastes and look great in your home.

10. Combine old and new

For a distinctive and eclectic look, combine old-world charm with modern aesthetics.

11. Select Open Shelves

Open shelves can be used to exhibit your favorite dishes, books, or decorative things instead of conventional cabinets.

12. Use fabrics to keep warm

Cozy blankets, drapes, and pillows in plush, appealing textiles can add softness and warmth.

13. Play around with wall decor

To give a room character and depth, choose wallpaper with textured or strong patterns.

14. Construct a Reading Corner

Create a quaint area with a chair, dim lighting, and a bookcase for the ideal reading nook.

15. Use area rugs to define spaces

Rugs can be used to divide off several spaces in an open-concept living area, giving visual clues for various uses.

16. Integrate metallic accents

Add elements made of gold, silver, or copper for a hint of glitz and refinement.

17. Create a symmetrical arrangement

By proportionally placing furniture and accessories in a room, you can achieve balance and harmony.

18.Install Floating Shelves .

Floating shelves serve as both storage spaces and places to display your favorite collectibles.

19. Customize using Family Pictures

Making a gallery wall with family photos is a beautiful way to transform precious memories into art.

20. Select Furniture With Multiple Uses

Pick furniture with various uses, such as a sofa bed or a coffee table with storage underneath.

21. Use one color only

To achieve a crisp, coordinated aesthetic that is both contemporary and classic, stick to a single color scheme.

22. Establish an Indoor Eden

Create a little indoor garden with plants, stones, and water features to turn your area into a tranquil hideaway.

23. Try out some wall decals

Temporary wall decals offer a flexible and simple approach to update the individuality of your place.

24. Create a Comfortable Breakfast Nook

Build a lovely breakfast nook with built-in seating in a corner of your kitchen or dining room.

25. Display a Statement Item

Make a special piece of furniture, art, or décor the focal point of your space.

26. Complement home automation systems

For convenience and a touch of modern style, incorporate smart speakers, lighting, and thermostats.

27.Include geometric patterns

Geometric patterns on fabrics, wallpaper, or decor objects add aesthetic appeal and a dash of modernism.

28.Design a Home Office Nook

Establish a dedicated workstation with a chic desk, a cozy chair, and sufficient lighting.

29.Layer Window Treatments

Utilize sheers, blinds, and curtains together to create depth and texture to your windows while regulating lighting levels.

30. Showcase Collections

Displaying collections of miniatures, novels, or other sentimental artifacts will help you to showcase your interest.

31. Include Statement Carpets

Select a dramatic, patterned carpet to inject personality and flair into any space.

32. Construct a chalkboard wall

Make a wall into a collaborative area for organizing and creativity.

33. Design a bathroom that feels like a spa

With relaxing hues, fluffy towels, and serene decor, you can turn your bathroom into a peaceful retreat.

34. Create a Useful Entrance

To prevent clutter, arrange your foyer with hooks, a bench, and storage options.

35. DIY Projects to Give Your Home a Personal Touch

Add handmade decorations, furniture, or artwork to your interior to make it your own.

Conclusion

With these 35 original home decorating ideas, you have a plethora of inspiration to craft a space that reflects your unique style and personality. Remember, the key to successful decorating is to experiment, have fun, and make your home a place that feels truly yours. Happy decorating!

Flies, the tiny winged nuisances, seem to find their way into our homes at the most inconvenient times. Whether you’re enjoying a summer picnic, trying to relax on your porch, or simply going about your daily chores, the presence of flies can be irritating, not to mention the potential health hazards they pose.

Instead of resorting to chemical-laden sprays and expensive commercial fly traps, why not consider a more natural and cost-effective solution?

In this article, we’ll guide you through the process of creating your very own DIY fly trap, and we’ll explore different types of traps and techniques to help you keep your space fly-free.

Materials and Tools You’ll Need

Before we dive into the details of creating your DIY fly trap, let’s start with the basics. You’ll need a few simple materials and tools, most of which you probably already have around the house:

Materials:

A plastic soda bottle (2-liter works well)
A pair of scissors or any utility knife
A piece of string or twine
Some bait (more on this later)
Tape
A small dish or container
Tools:

A drill (optional)
A funnel (optional)
Step 1: Preparing the Soda Bottle

Start by rinsing out the soda bottle thoroughly and allowing it to dry. Once it’s dry, you can remove the label to make it easier to see what’s going on inside the trap.

Step 2: Cutting the Bottle
Use pair of scissors or a utility knife to carefully cut off the top third of the soda bottle. This will leave you with two pieces: the top, which resembles a funnel, and the bottom, which serves as the collection container.

Step 3: Preparing the Bait
Now, let’s talk about bait.Flies are drawn towards different types of substances, and can be found buzzing around them. you can choose from several options to lure them into your trap. Some effective bait choices include:

Fruit: Overripe fruit like bananas or apples is a favorite of flies.
For best results, you can use either white vinegar or apple cider vinegar. due to its strong odor.
Sugar Water: Create a solution by mixing sugar and water.
Meat: For those persistent, carnivorous flies, a small piece of meat can be used.
Place your chosen bait in the bottom part of the bottle. You don’t need much; a few tablespoons will do.

Step 4: Inverting the Funnel
Here’s where the magic happens. Take the top part of the bottle (the funnel-shaped section) and insert it into the bottom part, but invert it so that the neck of the funnel points downward into the container. This creates a funnel entrance for the flies, but they will struggle to find their way out.

If you have a drill, you can make the process even easier by drilling small holes near the rim of the funnel to allow flies to enter more easily.

Step 5: Secure the Trap
To keep your DIY fly trap intact, use tape or glue to seal the edges where the two parts of the bottle meet. Make sure there are no gaps or openings where flies could escape.

Step 6: Hanging Your Fly Trap
Now that your fly trap is ready, it’s time to find the perfect spot for it. Hang the trap by attaching a piece of string or twine to the neck of the bottle, making a loop to hang it from a hook or a branch. Alternatively, you can place the trap on a stable surface, but hanging it tends to be more effective as it keeps the bait closer to eye level for the flies.

Types of DIY Fly Traps

While the basic soda bottle fly trap is highly effective, there are other DIY options you can explore based on your preferences and available materials. Here are a few alternatives:

Paper Cone Trap:

Create a cone from a sheet of paper with a small hole at the tip.
Place it in a jar or glass with bait at the bottom.
Flies will be drawn in but will have difficulty escaping.
Homemade Fly Paper:

Coat strips of paper or cardboard with a sticky substance like honey or glue.
Hang these strips around your kitchen or outdoor area.
Fruit Fly Trap:

For smaller fruit flies, use a small container with a piece of ripe fruit at the bottom.Cover the top surface with plastic wrap and make small holes in it. small holes for entry.
Benefits of DIY Fly Traps
Now that you have your DIY fly trap in place, let’s discuss why this natural approach is beneficial:

Cost-Effective: DIY fly traps cost virtually nothing to make, using items you likely have at home.
Environmentally Friendly: Unlike chemical sprays, DIY traps are non-toxic and won’t harm the environment.
Effective: These traps can significantly reduce the fly population in your home or outdoor space.
Customizable: You can experiment with different baits to target specific fly species.
Tips for Optimal Results
For the best results with your DIY fly trap:

Choose the Right Location: Hang or place your trap near areas where flies congregate, such as near garbage cans or outdoor dining areas.
Refresh the Bait: Replace the bait regularly, especially if it becomes less effective or starts to rot.
Clean Regularly: Empty and clean the trap when it becomes full to prevent a buildup of flies.
Maintenance and Troubleshooting
Maintaining your DIY fly trap is relatively simple. Just follow these guidelines:

Empty Regularly: Check the trap regularly, and empty it when it’s filled with flies.
Clean Thoroughly: Rinse the trap with water and Use a mild detergent to eliminate any persistent odors.
Replace as Needed: If the trap gets damaged or loses its effectiveness, it’s easy and inexpensive to make a new one.
If you encounter any issues with your fly trap, such as flies not entering the trap or escaping too easily, review the steps above to ensure it’s set up correctly.

Conclusion
With your DIY fly trap in place, you can enjoy a fly-free living space or outdoor area without resorting to chemical solutions. It is an easy, affordable and eco-friendly method.”tackle a common nuisance. Give it a try, and you’ll be amazed at the results.

Whether it’s by smoking or being in an area filled with smoke like a campfire, your clothes will eventually smell like it too. It’s even worse if its smells like cigarettes. Cleaning smoke-scented clothes are way easier than you think. In this article, I will show you how to get the smoke smell out of your clothes.


How to get smoke smell out of clothes


Wash with Baking soda

Place the cigarette-smelling clothes inside the washer and add the best laundry detergent you have. Then add 1 cup of baking soda inside the washer onto the clothes., then wash them normally. After washing them place them inside the dryer for 60 minutes.


Air out your clothes

This is one of the best and easiest ways to get the smoke smell out of your clothes. All you have to do is hang the clothes outside so that they can air dry for a couple of hours. Doing this will get rid of the smoke smell of the garments.


Soak them

This is yet another easy method in this article. The first thing you need to do is get a bucket filled with warm water and add liquid detergent to it. Then place the cigarette-smelling clothes inside the bucket of water and let them smoke for 1-2 hours. After the time has passed place them inside the washer and wash them normally.


Wash them with vinegar

This is very similar to the baking soda method, but instead of using baking soda, you are going to use vinegar. Place the garments inside the washer and add 1/2 cup of distilled vinegar into the water (not directly onto the clothes). Then add some laundry detergent into the washer and wash using warm water.

Here is an article you might be interested in “click here


Wash with lemon extract

This might seem weird but it’s a great way of getting rid of nasty smoke odors out of almost any clothing. Just squeeze some lemons into a cup until you have around 1/4-1 cup of lemon juice. Now pour the lemon juice into the washer with the clothes inside of it and wash on a regular cycle. The lemon juice will even get rid of any other bad odors that were coming from the clothes.


Use Dryer sheets and fabric softener

Place the clothes inside the washer and add 2 cups of fabric softener. After washing them place them in the dryer and use around 4 dryer sheets. This will definitely get rid of the smoke odor that was in your clothes and also makes them smell ten times better than before.


 Steam the Clothes Before Washing

Before tossing smoky clothes into the washer, hang them in the bathroom while running a hot shower or use a handheld steamer. The steam helps loosen smoke particles trapped in the fibers so they wash out more easily. This is especially helpful for thick fabrics like hoodies, winter coats, and denim.

2. Use a Vodka Mist to Neutralize Odor

Mix plain vodka (not flavored) with equal parts water and lightly mist the clothing. Vodka evaporates quickly and breaks down odor-causing compounds without leaving a scent behind. Let the item air dry completely before washing or wearing. This works great for clothing you can’t wash immediately.

 Add a Few Coffee Filters Inside Pockets

Pockets hold onto smoke more than people realize. Slide 1–2 unused coffee filters inside each pocket before letting clothing air out. The filters absorb trapped odor from tight areas that washing sometimes misses.

Freeze Delicate Items Overnight

For delicate garments that can’t be washed frequently, place them inside a sealed bag and freeze them overnight. The cold helps break down and neutralize the bacteria that hold onto smoke odor. Follow up by airing the item out in a warm room.

 Hang Clothing in the Sun for 20 Minutes, Then Shade-Dry

Direct sunlight naturally breaks down odor molecules — but too much sun can fade clothes. A smart method is to let clothes sit in direct sun for 15–20 minutes, then move them to a shaded, breezy spot to finish airing out. This gives you the deodorizing benefits of sun without color damage.

 Conclusion

Getting smoke smell out of clothes is completely manageable when you use a mix of smart techniques that neutralize odors rather than just masking them. With methods like steaming, vodka misting, pocket deodorizing, freezing, and sun-air cycling, you have multiple ways to restore freshness to your clothing no matter how strong the smoke odor is. By combining the tips from the original article with these new strategies, you can confidently remove even the toughest smoke smells and keep your wardrobe smelling clean and fresh.

Ever had a shirt that was too big for you? Most times when people have extra-large shirts like that, they hardly wear them but that doesn’t have to be the case. There are a couple of ways in which you can make extra-large shirts fit properly. This is called shrinking. I mean we all know what shrinking is but you might be wondering how you do it to T-shirts. Well, that’s why I made this post because today in this article I will show you how to shrink a shirt so that it can fit properly.


How to shrink a shirt

There are two main ways how to shrink a shirt. The first method is the boiling method and the second one is the washer/dryer method. Both of these methods are really easy and simple to do.


Boiling water method

The boiling water method is pretty simple and easy to follow. Most people who don’t have access to a washer and dryer might find this method to be the most useful.


Steps for this method:

  1. Boil a large pot of water on the stove.
  2. When it is boiling remove the pot from the stove.
  3. Now wait five minutes and then place the shirt inside the boiling water.
  4. Then let the shirt soak for 5 minutes. The longer the shirt is in the water the more it will shrink.
  5. Drain the water and let the shirt cool off.
  6. Then wring the shirt out and let it air dry.


There is something you need to know when it comes on to the shrinking process. The longer you wait for the boiling water to cool down the less the shrinkage will be. For example, if I let the boiling water cool down for 15 minutes before placing the shirt into it then the shirt will most likely only shrink down to 1/2 size, but if I place the shirt inside the boiling water immediately then it will shrink down 1 to 2 sizes instead. The reason why I recommended waiting 5 minutes is that it’s somewhat in the middle ground where the shirt will most likely shrink down 1/2 to 1 in size.


Washer/dryer method

The washer and dryer method of shrinking a shirt is by far the easiest method. While I do believe the boiling method is still a bit more effective; the washer/dryer method allows you to place multiple shirts or even cotton sweaters inside of them.


Here is how you shrink a shirt using the washing machine and dryer:

  1. Place the T-shirt inside the washing machine and use the warmest water option.
  2. After washing the shirt place it inside the dryer and set it on medium heat. And let it dry 2 times for 60 minutes.
  3. Repeat the process if you want more shrinking.


Conclusion

Throughout this article/post I showed you two incredibly easy but also effective ways how to shrink a shirt. I hope you found this useful and if it helped you please share it with more people.

By the wat if you are interested in how to unshrink a shirt then you should check this out:

How to unshrink clothes


Smelly shoes? Don’t panic ! In this article, I will show you how to remove bad odors from your shoes using some easy tricks. Lets dive in!

Baby powder

Baby powder is surprisingly good at deodorizing a bad-smelling shoe. To remove any bad odor from your shoes with baby powder you need to sprinkle some of it inside the shoes. Then let the shoes sit overnight with the baby powder inside of them. The next morning you should throw the excess powder out of the shoes, after doing that your shoes should be smelling way better than before.


Another thing you can do is to sprinkle the baby powder inside the shoes and let them sit under the sun for a couple of hours. Then after that, you should leave them somewhere inside the house overnight.


Baking soda

Baking soda is a great product to have in your home because it has many uses. One of the uses that baking soda has is that it can be used as a way to deodorize your shoes.

Deodorizing your shoes with baking soda is rather simple, all you have to do is sprinkle the baking soda inside the shoes and let it sit in them overnight. Then the next morning all you have to do is throw the baking soda out of the shoes.


Freeze them

This is the strangest method on this list but it is definitely one of the most effective. Freezing your shoes will kill any bacteria that was in them, which will make the shoes smell better.

To remove the bad odors from your shoes by freezing them you’ll need to place them in a Ziploc bag and put them in the freezer and let them sit in there for the whole night.


Wash the inner soles with vinegar, dish soap, and fabric softener

First, remove the inner soles of the shoes and place them under warm running water. After that add a few squirts of dish soap onto the inner soles and pour some vinegar onto them as well.

After that, you should pour just a little fabric softener onto them as well.  Now use a toothbrush to scrub the shoe soles. After scrubbing them you should rinse them and then place them in the dryer.

After doing this your shoe will no longer smell bad.


Spray inside of them with rubbing alcohol

This is a very simple trick however it won’t last very long. To do this all you need to do is spray the inner sole of the shoes with rubbing alcohol. This is mostly for people in a hurry as the smell of the shoe will resurface in a couple of hours.


USING ESSENTIAL OILS

Essential oils offer another powerful method to refresh shoes—especially if you want a longer-lasting, pleasant scent. Oils like tea tree, lavender, peppermint, or eucalyptus not only smell amazing but also contain natural antibacterial and anti-fungal properties.

Add a few drops to cotton balls or small pieces of tissue and place them inside your shoes overnight.

Alternatively, mix a few drops with water in a spray bottle and lightly mist the inside of each shoe. This helps neutralize odors at the source while leaving a clean, uplifting scent.


How to prevent shoes from smelling bad

There are many ways to prevent your shoes from smelling bad. However, I’m only going to tell you the most important methods.


Natural Air

For shoes that just need light refreshing, sometimes all they require is simple airflow. Leaving them in a well-ventilated area, preferably outdoors in the shade, allows moisture and trapped odors to escape naturally.


 Moisturize your feet regularly

This means you should put on some lotion on your feet an hour before you wear your shoes. This will make your feet smell good for the rest of the day, which will also prevent your shoes from having any bad odor.


Wear moisture-wicking socks

These are the best type of socks to wear when you are about to work for a long time. These types of socks will prevent your shoes from smelling bad due to how they don’t absorb sweat that easily.

Conclusion

Keeping your shoes fresh doesn’t require expensive products—just the right combination of simple, effective methods. Baby powder absorbs moisture, essential oils neutralize odor and add fragrance, and proper airing out prevents smells from building up in the first place. When used regularly, these easy habits can extend the life of your shoes and keep them smelling clean and comfortable every day.