Category

Household Hacks

Category

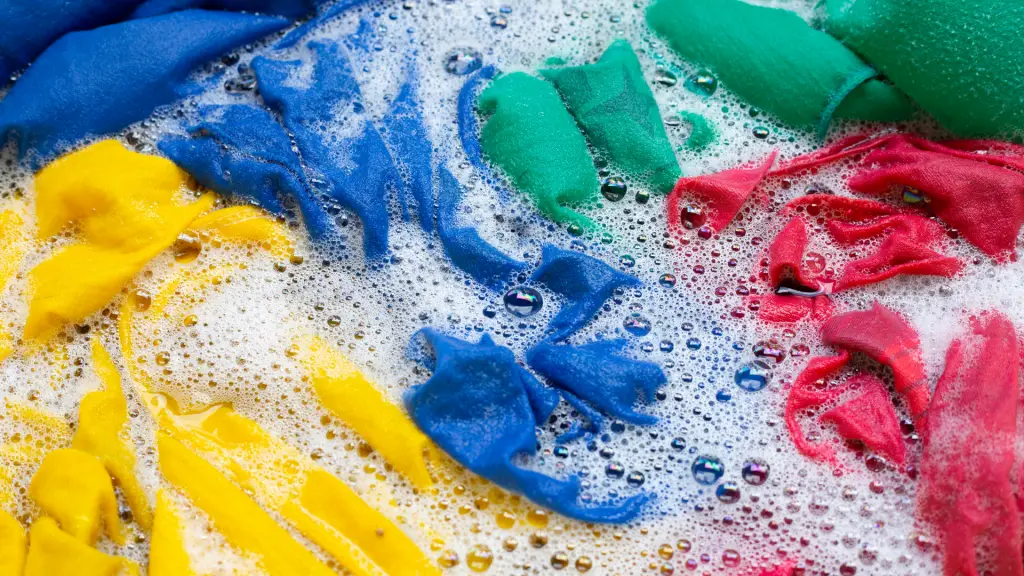
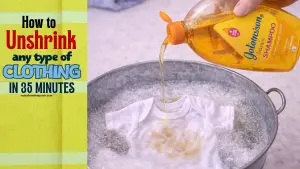
Most people hate when their clothes shrink. Oftentimes when this happens it can ruin the look of the clothes and if you decide to wear it you have to pull it down to your waist over and over again especially if it’s a shirt or blouse. But don’t worry because in this article I will show you how to unshrink your clothes using some simple methods.


What causes clothes to shrink

Most clothes usually shrink when we wash them. Especially if we wash them in warm water. However, this does not mean that if you wash your clothes in cold water they won’t shrink. Most clothes are made out of different types of fabric and often times when that fabric comes in contact with water they usually relax and when this happens the yarns retract and shrink.


What you should know:

When un-shrinking your clothes you have to think about the different types of fabric you are dealing with. Some clothes that are made out of cotton will most likely be easier to un-shrink than clothes made out of wool. However, un-shrinking them still uses the same method it just depends on how long you do it.


STEP 1:

Pour lukewarm water into your sink or bucket. Pour in enough warm water to completely submerge the clothing you’re stretching. To relax the fabric’s fibers, make sure the water is at room temperature or slightly warmer.

The fabric fibers will shrink and become more difficult to stretch if you use cold water. Avoid using really hot water as well because it might cause garments to shrink and get damaged.

Clothing made of knit materials, such as cotton, wool, and cashmere, reacts better to this technique than other kinds of fabric. Tighter-woven materials like polyester, rayon, or silk could be more difficult to reshape.


Step 2:

Add conditioner or baby shampoo to the water. For every 1½  gal  of water you use, add around 1 tbsp of baby shampoo or hair conditioner. Mix the shampoo or conditioner thoroughly into the water by stirring it in.

The fibers of clothing are relaxed without being harmed by soft shampoos and conditioners. Don’t risk using the product on an item of clothes you enjoy if you wouldn’t use it on your hair.

TIP:
Regular shampoo won’t help your garments shrink because it lacks the softening elements found in conditioner and baby shampoo.


STEP 3:

Submerge Your garment in water and allow it to soak for 35 minutes. To give the fabric time to soften, let your garments soak for the full 35 minutes.  Begin restructuring the garment by gently tugging on it while it’s soaks in water. After 35 minutes, simply remove your clothing from the water to prevent further deterioration.


METHOD 1:

Unshrinking regular clothes

If you are confused by what I mean by “regular clothes” I’m mostly talking about clothes like T-shirts, blouses, underwear, etc.

To unshrink these clothes just do the following:

  1. Get a large container of warm tap water filled halfway up ( a large bucket )
  2. Add 3-4 tablespoons of conditioner  (add more depending on the amount of water)
  3. Now place the clothes into the bucket of water.
  4. Use your hands and stretch the clothes by gently pulling on each end. Do this for 5 minutes. Yes it takes patience.
  5. Now let the clothes soak in the bucket of water for 45 minutes. After this, the fibers should be loose enough to make the shrinkage go away.
  6. Rinse the clothes with fresh warm water and hang them to dry. Do not dry in the dryer. Air dry instead to prevent shrinkage again.


METHOD 2:

Unshrinking clothes made out of animal fabric

Clothes made out of animal fibers such as wool require a slightly different process to get them to unshrink.

Instructions:

To unshrink clothes made out of animal fibers, just do the following:

  1. Get a bucket and fill it up with lukewarm water
  2. Add 1/2 cup of vinegar, 1 cup of borax, and 4 tablespoons of conditioner. If you don’t have conditioner you can use baby shampoo instead.
  3. Place the clothes inside the bucket and gently stretch them for around 1-2 minutes.
  4. After stretching them let them soak for 30 minutes.
  5. After 30 minutes stretch them with your hands again.
  6. Now rinse and let them air dry


QUICK SUMMARY:

  1. Soak clothes in a solution of 1 tablespoon (15 ml) of baby shampoo or hair conditioner and warm water for 25 minutes. This works great for to woven materials like wool and cotton.
    2. To get rid of extra water, squeeze the clothing and roll it in a big towel.
    3. To help the fabric keep its shape, gently stretch it by hand  weighing it down.
    4. Allow your clothing to return to its normal shape by letting it air dry. This can be done be pining it to a hanger with 2 clothes pins.


Conclusion

After following all these steps your clothes whether they are made out of cotton, wool, etc, should be able to fit you better now.


In this article, I will show you some ways how to get rid of water bugs. I will show you how to prevent them from showing up and also how to exterminate them.

What are water bugs?

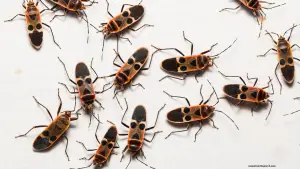
Several cockroach species are known as waterbugs, but the true water bug is an aquatic insect classified under the order Hemiptera. Bugs that live in water include water boatmen and water scorpions.

Water bugs are also members of the Gerridae family, which includes pond skaters, water striders, and water spiders. To remain afloat, they use surface tension instead of paddles.


Step 1- Study their movements

By this I mean before you try to eliminate them, you should try to observe them first. Study their behavior and where they usually hide.

Since most waterbugs usually come from outside you will probably need to look for their nest and any entry point that they might use.

These entry points are usually located at your windows, cracks, pipes, and doors. After studying their behavior you can know move on to the next step.

If you cannot find a nest during the day, go into a dark newly-lit room at night. This will allow the bugs time to become active. You should turn on the lights in all the rooms you suspect they are living in.

They will probably shatter if they’re present. Pay attention to where they go, and focus your eradication efforts there.


Step 2- Know your pesticides

Now since you know where they hide it is now time to eliminate them. But before I can get into that, I need to let you know that there are two types of pesticides you can use, these are natural and synthetic.


Natural pesticides

These usually include vinegar, sugar (brown), borax, baking soda, and some essential oils. While these pesticides are great because they can be made from simple household items and they aren’t as toxic as other pesticides, most people say that they aren’t as effective as synthetic pesticides.


Synthetic Pesticides

These pesticides are usually the ones you buy. Most of these pesticides don’t require any form of mixing to be effective which makes them somewhat simpler to use.

However, while they might not require any additional work they are still way more toxic than natural pesticides.

This may sound like a good thing which in a way it kinda is because they might be more effective than natural pesticides, however, they are toxic to humans as well, and not only that but they cost a good amount of money too.

So if you are going to use synthetic pesticides make sure you wear a face mask and other protective covering depending on what type of pesticide you are using.

Most synthetic pesticides can be found in the following forms:

  • Traps- Most of these act as bait. This one doesn’t have any harsh chemicals in it.
  • Gels- Using gel pesticides is great because they usually come in syringes which makes them easier to apply onto hard-to-reach areas.
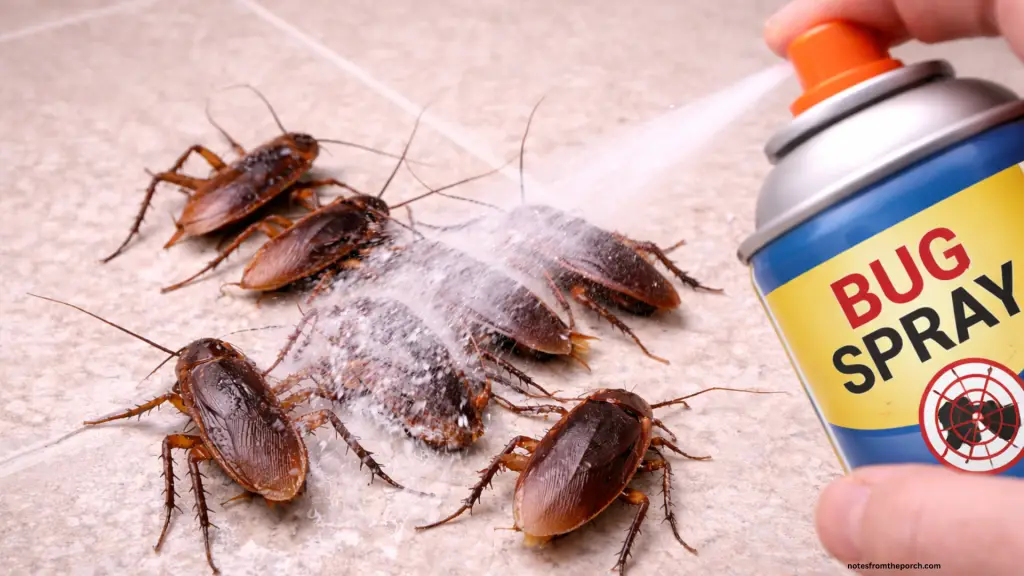
  • Sprays- Pesticide sprays are probably the most common form of pesticide for the average household. This is because all you have to do is spray and not do anything else.


Step 3- Its time to eliminate the waterbugs

Now that you know the different types of pesticides it is now time to take action. I will show you how to get rid of waterbugs using the different types of pesticides starting with natural pesticides.

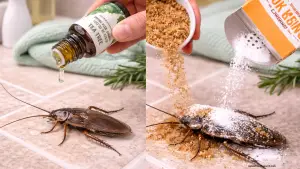
Making your own natural pesticide is very easy just mix baking soda, brown sugar, borax together and sprinkle the mixture where the nest is or near the entrances that the waterbugs use such as windows, cracks, pipes, etc.

Synthetic pesticides it is way easier to use because you don’t have to mix anything. However, you do need to wear a face mask and protective coverings (if you are using a spray).

Personally, I would use all the synthetic pesticides such as gel, sprays, and traps but not a lot of people can afford to use all of them so if I had to choose the best one, I would probably say the spray.

This is because I’ve used it so many times a long time ago and it worked the best for me.

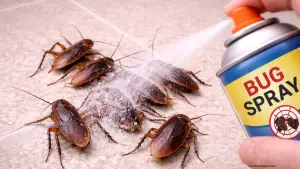
To use the pesticide spray to prevent waterbugs all you have to do is spray the bugs individually, spray the nest, and the entrances as well (cracks in walls, pipes, windows, doors, etc.)


If you are using a trap then place it near the nest or entrances where the waterbugs usually hide and place food onto it. Doing this will draw the bugs to the trap and they will get stuck and can’t move. If you are using the gel then do the same thing minus the food.


Step 4- GET PROFESSIONAL HELP

If the previous step didn’t work then you should probably get professionals to help. While pest control services may be expensive, they are usually very effective. This means you won’t have to call them again after they get rid of the water bugs in your home.


How to prevent water bugs

After exterminating the waterbugs, you should follow these steps so that you won’t have to deal with them again.

  • Seal every food item in your cupboards, and cracks/wholes in your home.
  • Make sure to empty your bins at least once a week and remove garbage daily (from bins).
  • Fix any leaks you have. Most leaks usually occur at pipes under the cabinets.
  • Remove crumbs and other food particles by vacuuming your kitchen and the rest of your house very often.


5. How to lure water bugs out of hiding?

There are a couple of ways in which you can lure water bugs out of hiding. Most waterbugs are drawn to food and dark unpopulated areas.

So if you place food (something sweet) on the ground and turn off the lights after some time the water bugs will come out of hiding to eat the food.


What are water bugs attracted to?

Water bugs are attracted to food, dark areas, and wet places as well. So they will most likely be in your kitchen under the sink or in your cabinets/cupboards.


What is the best water bug killer?


I personally would just recommend any bug spray or traps to use. Traps (bait) work the best.


Will bleach keep waterbugs away?

While I’m not sure how effective bleach is when it comes on to scaring away waterbugs, I do know that bugs such as cockroaches, bed bugs, and other insects usually hate the smell of bleach. So you can test it out to see if it works against water bugs.

If you want to know how to get rid of cockroaches as well then click here.

conclusion:

In this article, I showed you how to get rid of waterbugs using some simple and effective methods. I hope you found this post useful.


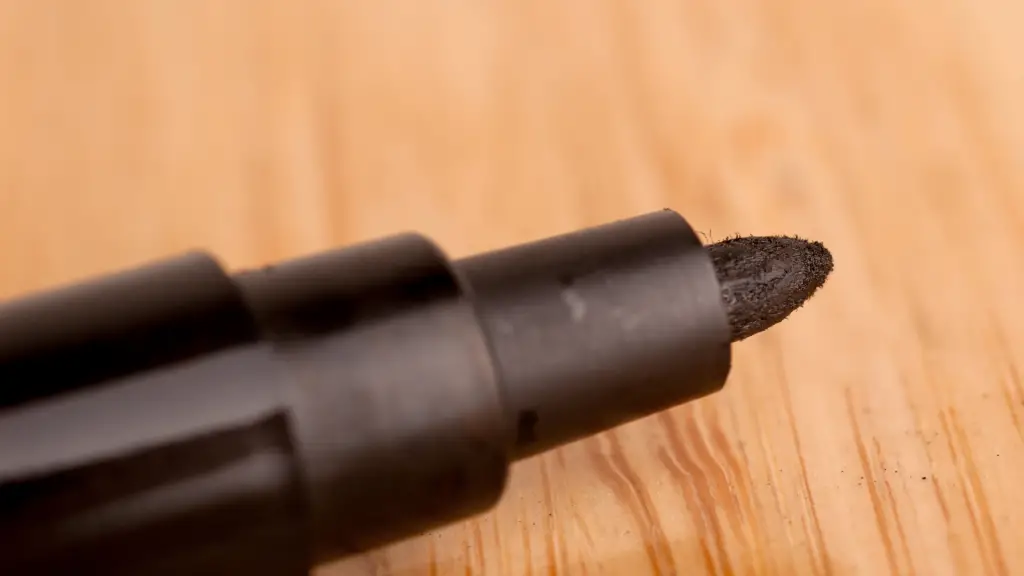
If you have a lot of dry erase markers lying around and you also have kids that like to play with a lot of items, then you know that eventually, your walls will have marks on them made by the markers you had laying around. In this article I will show you how to get dry erase marker off your wall.


Easy way to get dry erase marker off your walls


Things you’ll need:

  • Cotton balls
  • Rubbing alcohol
  • Clean damp rag
  • Hair spray
  • Office/magic eraser
  • Nail polish remover


Rubbing alcohol/cotton ball method

Rubbing alcohol is one of the best things you can use to clean certain stains around your home. SO it will do a really good job of getting dry erase markers off your walls. It doesn’t matter whether if its, writing, drawings, or simple lines, rubbing alcohol will get rid of it.


Instructions:

  1. Get a small container or dish and pour about 1/4 to a half cup of rubbing alcohol into it. Then dip a cotton ball into the rubbing alcohol.


  1. Gently wipe the area on the wall (with the cotton ball) that has the dry erase marker lines.


  1. Use the damp rag to wash off the rubbing alcohol residue that’s on the wall. The reason why you do this is because you don’t want the paint on the wall to get damaged over time.


This is just one of the methods you can use to get dry erase markers off walls. Here is another method that includes hairspray.


Hairspray method

Using hairspray to get dry erase markers off walls may sound a bit unusual but a lot of people said that this method worked for them. So if the previous method didn’t work for you I suggest you try this one.

Before you do this make sure to spray another wall in your house with hairspray to see if it will remove the paint. If not then it is safe to use.


Instructions:

  1. The first thing you need to do is to spray the area where the marker was used and leave the hairspray residue on that same area for 5-10 minutes.


  1. After that just use a dry cloth to wipe the area in a circular motion.


  1. Then use a damp cloth to wipe the same area again.


This method will definitely make your wall spotless.


Magic eraser method

Magic eraser is great for cleaning a lot of things and getting rid of stains, so I’m pretty sure it would do a good job of getting dry erase marker off of walls.


Instructions:

  1. Get a magic eraser sponge and dip it under running water.


  1. After doing that just squeeze out the excess water and use it to gently scrub the marker ink off the wall.


  1. If this method doesn’t work just repeat it over and over until you see results.


If this still didn’t work for you then maybe the next method will.


Acetone free Nail polish remover method

This method may seem weird but trust me it will work. Most Nail polish removers have rubbing alcohol in them. This is great for dissolving nail polish and removing them. it should do the same for the dry erase marker ink.

Before you try to follow the steps below, make sure to test the nail polish remover on a different wall where no one will see it. If the paint is being removed by the nail polish then I suggest not to use it.  However, if the paint isn’t being removed then I think it’s ok if you proceed with the following steps.


Instructions:

  1. Get a cotton ball or swab and pour a little nail polish remover onto it.


  1. Then use the cotton ball to lightly scrub the area on the wall that has the marker ink on it. If the marker stain is old you will probably have to repeat this step a couple of times.


  1. After wiping the wall with the nail polish remover, use a damp cloth to rinse off the wall.


Toothpaste method

This method is probably the simplest one to follow. Just follow the instructions.


Instructions:


  1. Apply a small amount of toothpaste onto a toothbrush


  1. and use it to gently scrub the marks on the wall.


Fabric stain remover spray method

Using a fabric stain remover spray like oxi clean or resolve is a surprisingly effective way of getting dry erase marker ink off your walls.


Instructions:

  1. Spray the marks with the fabric stain remover


  1. After spraying the wall allow the spray residue to remain on it for a couple of minutes.


  1. Then use a soft cloth to blot away the marks on the wall.


These are the best methods you can use to get dry erase marker off your wall. Now I am going to answer some questions that a lot of people seems to ask when it comes on to dry eraser marker cleaning.


Some other cleaning related articles you might be interested in:


Questions related to dry eraser marker cleaning


How to erase dry erase markers out of clothes?

Just pour a little rubbing alcohol on the stained area of your clothe and dab the area with a piece of paper towel.

How to get dry erase marker off of skin?

 Pour a little rubbing alcohol on a damp clean cloth and use it to remove the dry erase marker off of your skin. You

How to clean dry erase marker from carpet? 

To remove the dry erase marker from the carpet; what you need to do is to dampen a sponge with rubbing alcohol and use it to blot and absorb the stains out of your carpet.


I hoped you find this article on how to get dry eraser marker off your wall helpful.

Maggots are very disgusting. They tend to be in areas where there is a lot of bacteria and this includes your trashcans/garbage bins. If your trash can has maggots and you don’t know how to deal with them don’t worry In this article I will show you how to get rid of maggots in trash can.


What are maggots and where do they come from?

Maggots are larvae of flies; in particular, they are houseflies, cheese flies, and blowflies, rather than mosquitoes and crane flies, which are Nematocera flies.


Flies usually like to find places where there is food and your trash can is one of these places. When flies find an area with the food they usually lay their eggs there and their eggs become maggots. So it’s always best to keep your trashbags sealed because if you keep flies away from your garbage bins/trash cans you will be less likely to have a maggot infestation.


Will garbage man take garbage with maggots?

This question has been asked a good amount of times and all I have to say to this is yes, the garbage man will still empty your garbage even if you have a lot of maggots in the trash can. When the garbage collector disposes of trash they arent looking inside of your trash can, depending on where you live the truck usually picks it up so no one will see inside of it ( and even if they did, they would still have to dispose of the trash).


So while the garbage man will still dispose of your garbage even if you have maggots in your trash can, this doesn’t mean that your maggot infestation problem will be solved. You still have to get rid of the maggots or prevent them from showing up. Below I’ve listed a couple of ways you can get rid of maggots in your trash can.

Different Ways to get rid of them

  1. Use bleach-Mix bleach with equal parts of water and use this to spray the maggots inside the trash can. After spraying them close the trash can and wait for 30 mins. The harsh bleach fumes will suffocate the maggots. You can also use a hose and fill the bottom of the garbage bin with water and then pour some bleach into it. Make sure that you put enough bleach so that it’ll be enough to get rid of the maggots. Now close the lid of the trash can and wait 20-30 mins and then open it and wash the inside with bleach.


  1. boiling water- Boiling water is a simple yet effective method of getting rid of maggots. All you need to do is boil a pot or kettle filled with water and pour it all over the maggots inside the trash can. This will definitely eliminate all the maggots that were in it.

While this is a good method there are still more ways to get rid of maggots in your trash can.


  1. Use Vinegar– Attach a spray nozzle onto a bottle of vinegar and spray the maggots. Do this until all the maggots are eliminated. You can also fill the bottom of the garbage bin with water and pour a lot of vinegar into it and close the lid. Then after an hour, all the maggots should be dead.


  1. Mix the all-purpose cleaner with boiling water– For this, all you have to do is mix the all-purpose cleaner with equal parts boiling water and pour the mixture onto the maggots. This will get rid of all the maggots that were inside your trash can.


  1. Use insecticide– Insecticides works well on maggots. You can get insecticide at your local store online. If you are using a spray insecticide all you have to do is spray the maggots with it and also everywhere inside the trash can, then close it. Remember to wear a mask as insecticide can be very toxic to humans as well.


Ways to prevent maggots

Throughout this article, I’ve listed ways on how to get rid of maggots in trash cans but now I am going to tell you how to prevent them. There are three incredible methods you can use to prevent maggots from showing up in your trash can,


  1. Clean your trash can-cleanliness is a good way to prevent maggots. So if you want to avoid maggots from showing up inside your trash can just make sure you clean inside of it very often. It’s also best if you use bleach as its fumes will get scared away from flies from going inside your bin.


  1. Use big cart liner trash bags– Let’s say you have already cleaned inside your trash can and you want an additional way to prevent maggots. Just use jumbo garbage bags and place them inside the trash can/garbage bin. This is a great method because even if the maggots do appear in they are only inside the garbage bag.


  1. Seal garbage/trash– Make sure that you double your garbage bags so that if the one with the garbage rips there is still another bag to hold everything. This is good because when garbage bags (filled with garbage) rips and tears it allows flies to go inside and find any food-related things inside of it and lay their eggs witch becomes maggots. So it’s always best to double your garbage bags.


Conclusion


These are the best ways on how to get rid of maggots in trash can. I hope you find the method that worked best for you.


If you’ve ever noticed big black bees hovering around your deck, porch, or wooden railings — and then spotted neat little round holes drilled into the wood — you’re probably dealing with carpenter bees. They look harmless (and honestly, kind of cute), but the damage they leave behind can add up fast if they keep nesting in the same spots year after year.

Carpenter bees don’t eat wood — they tunnel into it to build nests for their eggs. Over time, those tunnels weaken boards, attract more bees, and turn solid wood into a hidden mess inside. The problem isn’t the bees themselves — it’s the repeated nesting that slowly destroys your structure.

That’s why a lot of homeowners look for fast, accessible solutions — and one surprisingly common household product people use is WD-40.


Why WD-40 Is Used for Carpenter Bees

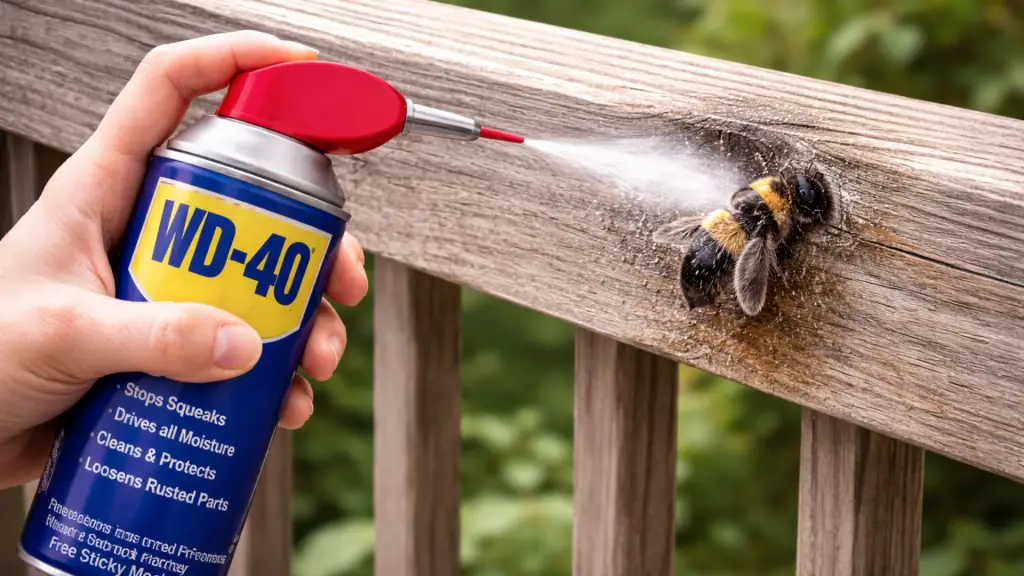
WD-40 isn’t an insecticide, but it does work on carpenter bees when used directly. The spray is strong, penetrating, and suffocates insects on contact. When sprayed into carpenter bee holes, it can reach deep into their tunnels and drive them out or kill them inside the nest.

People like using it because:

  • It’s already in most garages

  • It’s inexpensive

  • It works immediately

  • It reaches deep into drilled holes

  • It’s easy to apply with the straw nozzle

It’s not a perfect long-term solution by itself — but it’s very effective as a quick-action treatment when bees are actively nesting.

If you want to know some more wd-40 uses you can check this article out “14 unusual wd-40 household hacks”.


How to Use WD-40 to Get Rid of Carpenter Bees

Here’s the simple, practical way to use it:

Step 1: Find the Active Holes

Look for small round holes in wood, usually under decks, porch railings, eaves, fascia boards, and outdoor furniture. You’ll often see fine sawdust beneath them.

Step 2: Choose the Right Time

Early morning or evening works best, when bees are more likely to be inside the tunnels instead of flying around.

Step 3: Use the Straw Nozzle

Attach the thin red straw to the WD-40 can. This lets you spray directly into the hole instead of just on the surface.

Step 4: Spray Into the Tunnel

Insert the straw into the hole and spray for a few seconds. This pushes the product deep into the nest chamber.

Step 5: Repeat Over a Few Days

Not all bees will be inside at the same time. Repeating the process helps catch any that return.


How to kill carpenter bees with wd-40

To get rid of carpenter bees with wd-40 is pretty simple just make sure to do the following:


  • Wear protective gear– It’s pretty obvious why it’s important to wear protective gear while getting ready to exterminate bees.
  • Find the bee’s nest–  Check for small holes that are about 1/2 to 1 inch deep. These holes usually have sawdust below them and you may see some yellow stains around the holes.
  • Spray the nest– Spray the nest with wd-40. Use the straw of the wd-40 bottle and place it inside the holes and spray. Do this for 3 days until all the bees are dead.
  • Cover the holes- Cover the nest holes with caulk.

This is the best way to use wd-40 to kill carpenter bees.


Other Simple Options That Help

If you want to strengthen your defense, you can combine WD-40 with:

✔ Carpenter Bee Traps

They lure bees in and trap them without chemicals.

✔ Repellent Sprays

Strong scents like peppermint, citrus, or eucalyptus can discourage nesting.

✔ Wood Protection

Painting, staining, sealing, or wrapping exposed wood edges.

✔ Preventative Maintenance

Filling old holes before spring starts stops new nesting cycles.

Important Safety Notes

WD-40 is a petroleum-based product, not a pest control spray. That means:

  • Use it outdoors only

  • Avoid spraying near pets, kids, or plants

  • Wear gloves

  • Avoid breathing in the fumes

  • Don’t use near flames or heat

It’s a targeted solution, not something to spray everywhere.


How to get rid of carpenter bees without killing them

This is more of a way to prevent carpenter bees from making nests inside the wooden areas of your home. To do this all you have to do is spray any wooden areas you think that bees will want to build a nest in.

The strong scent of wd-40 will definitely keep the carpenter bees away.


How to Prevent Carpenter Bees Long-Term

This is what actually keeps them away year after year:

  • Seal all old holes

  • Paint or stain bare wood

  • Repair soft or rotting boards

  • Inspect wood every spring

  • Protect exposed edges and corners

  • Don’t leave raw wood untreated outdoors

Carpenter bees are creatures of habit — if a spot feels safe, they’ll keep coming back.

What Most People Miss (And Why Bees Come Back)

Spraying alone isn’t enough.

This is the part most people skip — and it’s why carpenter bees return the next season.

Once the bees are gone:

Seal the Holes

Use wood filler, caulk, or wooden dowels to plug the tunnels completely.

Sand and Paint or Seal

Carpenter bees love bare, untreated wood. Painting or sealing the surface makes it far less attractive to them.

If you don’t seal the holes, new bees will reuse the same tunnels — even years later.


Final Thoughts

WD-40 can absolutely work for carpenter bees when used correctly — especially as a fast, direct solution for active nests. But the real fix isn’t just spraying — it’s sealing, protecting, and preventing.

Think of WD-40 as the first step, not the only step.

When you combine treatment + sealing + wood protection, you don’t just get rid of the bees — you stop the cycle entirely.

And that’s how you protect your porch, deck, and home for good 🐝🏡


If there is a lot of cockroaches in your kitchen cabinets and you don’t know how to get rid of them. Don’t worry this article will show you some simple ways on how to get rid of cockroaches in kitchen cabinets and from your cupboards. I will also tell you what causes roach infestation, how to prevent it, and some dangers of having roaches around in your home.

What causes roaches to be in cabinets?

Here are some reasons why roaches are probably in your kitchen cabinets:


  • They love places with food and water– Most cabinets have a lot of food and also under the sink usually has water as well.
  • They like dark and enclosed spaces- So it’s only natural they would choose to live inside your cabinets.
  • Unclean cabinets/cupboards-Make sure that you deep clean inside your kitchen cabinets and cupboards at least every week. This will help to prevent roaches from showing up. If you want some kitchen cabinet cleaning hacks to clean the outside of your kitchen cabinets you can check out his artilcle “Fast and easy wood cabinet cleaning methods”.
  • Too much exposed food– sometimes when we have too much-exposed food in our kitchen cabinets it can attract a lot of pests and roaches are one of them.


Cockroaches love the things I mentioned above so it’s best to avoid doing some of those things.


Ways on how to get rid of cockroaches

Bay leaves- Bay leaves don’t eliminate cockroaches but it keeps them away. So spread out a couple of them in your kitchen cabinets and the roaches won’t show up anymore.

Borax- Borax seems to be really deadly to cockroaches so all you have to do is sprinkle some in different areas inside your kitchen cabinets.

Insect sprays- Insect sprays are a great way to repel and eliminate cockroaches from your kitchen cabinets. But I do have to warn you that they are very toxic to inhale and they should not be sprayed where there is a lot of food. A great way of doing this is to wear a mask and a glove and remove everything from the cabinets and put them away from the kitchen. Then spray inside the cabinets (don’t spray too much). After spraying let the cabinets air out for almost a day (until it’s ok to put back your stuff in them).

Seal or block holes- Cockroaches are very small so they can fit through a lot of holes and crevices. So it’s best to seal any holes you see in your kitchen cabinets.

Dish soap and water spray– Just mix together a lot of dish soap or any other soap with water. After mixing them together spray every cockroach you see. Spray it onto the cockroach until it starts to slow down. This is a great way of clogging the cockroaches’ breathing pores. While this method will eliminate them it’s still not a permanent solution.


These are the best ways to get rid of roaches in kitchen cabinets. I hope at least one of these methods helped you.


Contact pest control if none of those tips I mentioned above works

If you realize that what you are doing isn’t getting rid of the cockroaches you might need to call pest control. Especially if there is a lot of them roaming around your house and kitchen cabinets. Pest control is always the best option because they have experience, the right equipment, and when you contact pest control you know that there will no longer be an infestation in your home.


How to prevent roach infestation

Throughout this article, I talked about how to get rid of cockroaches but now I will show you a couple of ways on how you can prevent them from being inside your kitchen cabinets.

  • Remove any open/exposed food – It is never good to keep exposed food inside your kitchen cabinets or anywhere at all. Cockroaches will go to any enclosed areas where there are a lot of food sources. I would recommend that you store any dry food you have in a plastic container. If you don’t have any plastic containers then just store some of them in the refrigerator and use a Ziploc bag to store the rest.
  • Block or seal any small entry points- I mentioned this earlier in this article, all you have to do is find any small holes and crevices in your cabinets and use something to block them.
  • Make sure there aren’t any water leaks- Cockroaches like areas where there is water so it’s best to check everywhere in your kitchen to make sure there isn’t any leaking water. Check the cabinet under the kitchen sink because that’s where the leakage is usually found. Getting rid of leaks is a good way of preventing roaches from being in your kitchen.


Some Dangers of having roaches in your cabinets

Now I will be telling you 2 dangers of what having roaches inside your kitchen cabinets for too long may cause.

  • They can contaminate your food-Cockroaches carry a lot of bacteria and if you have exposed/open foods in your kitchen cabinets and they go near it or in it. I would recommend you to get rid of that food item. This may cause, staphylococcus, salmonella, and streptococcus according to the EPA.
  • They may cause allergies–  When cockroaches shed body parts, excrete and lay eggs this can cause allergic reactions (for a lot of people).


Throughout this article, I showed you how to get rid of cockroaches in kitchen cabinets and I hope you found it helpful.


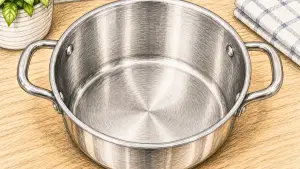
Pots are always prone to get burnt. This is because most people cook a lot. So if the inside/outside of your pot is burnt terribly. Don’t worry because today I will show you how to clean a burnt pot.


HOW DO YOU CLEAN A BURNT POT?

Cleaning a burnt pot can be difficult if you don’t know what to do. There are several ways in which you can clean a burnt pot.

The first way is to use baking soda and vinegar


 How to clean a burnt pot with vinegar and baking soda?

To properly clean the pot you need to soak inside the pot with 2 cups of vinegar and 5tbsp of baking soda. When you mix the vinegar and baking soda together the mixture starts to bubble up, then add 3 cups of hot water into the burnt pot.

Let the mixture sit inside for a couple of hours. After that use steel wool to scrub inside of the pot. This will make your pot look great again.

If you want to know some more amazing vinegar and baking soda  hacks and uses you can check out these two articles “10 unbelievable baking soda household cleaning hacks” and “8 amazing vinegar cleaning hacks/uses

If the outside of the pot is burnt just mix the vinegar and baking soda together into a dish then dip steel wool into it and use it to clean the burnt area on the pot.

If you don’t want to use any vinegar or baking soda there is no need to worry because I will show you how to clean the burnt pot/pan without baking soda and vinegar.


How to clean a burnt pot/pan without baking soda and vinegar?

Who said you only need vinegar and baking soda to clean your burnt pots?. You can clean your pot with just dish soap.

All you need to do is fill inside of the pot with hot water and squeeze a few drops of dish soap into it (make sure the water is really soapy).

Let the pot sit for a couple of hours then after that just use steel wool to scrub inside of the pot. Doing this will definitely make your pot/pan look brand new.


How to clean a burnt pan/pot with salt?

This may sound unusual but trust me it works. So the first thing you want to do is fill the pot or pan with water then add 4 tbsp of regular salt in it, then mix around.

Now place the pot/pan onto the stove and let the water boil for around 12 minutes. After that pour out most of the water and leave about an inch of it in the pan/pot.

Then add some more salt into the pot and use steel wool or a sponge to scrub inside of the pot/pan (before you do this be sure you are wearing a dish glove). Now rinse the pot and it should be looking way better than before.


HOW DO YOU GET BURNT FOOD OFF THE POT?

Getting rid of burnt food from a pot is not as difficult as you might think.  Well, it depends on the type of food and how badly it was burnt.

Something that was liquid will not be that hard to clean but if it was solid or grainy well it might be just a little bit harder to clean.

To get rid of burnt foods from pots all you need to do is soak the pot in 3 cups of vinegar  3 cups of warm water and let it soak for several hours. After that just use a scrubbing sponge to scrub the pot.


That was the best way to get rid of most brunt foods in a pot. But they are two main foods that are a nightmare to clean when they are burnt. These are rice and sugar. But don’t worry I will show you how to get rid of both of them.


How do you get burnt rice off the pot?

This is really easy just soak inside the pot with warm water and 2 cups of vinegar for a couple of hours. Then scrub inside the pot with the scotch Brite.

This will get rid of all the burnt rice that was in the pot. If the scotch Brite isn’t doing a good job, just use steel wool instead.


How to clean burnt sugar from stainless steel pot with coke?

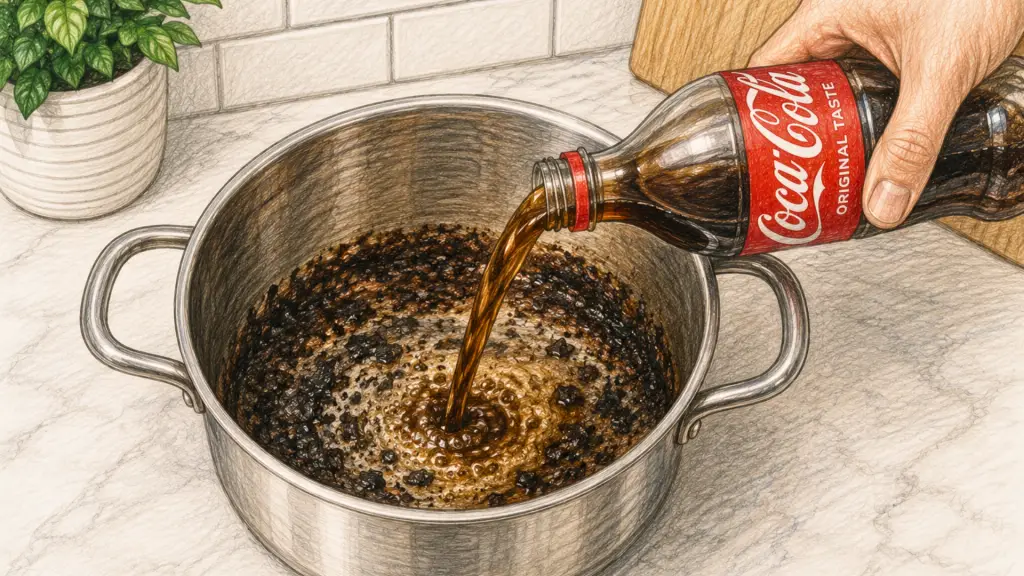
Yes I know this sounds even weirder than the previous tip but it works well. All you need to do is fill inside the pot with coke (coca-cola) and let it sit there for around 5 hours.

After that just use a steel wool or scotch brite to scrub away the burnt sugar that’s inside the stainless steel pot. When you finished scrubbing make sure to give the pot a swash with dish soap.

Washing it with dish soap will get rid of the burnt sugar and stickiness that was inside the pot.


HOW DO YOU CLEAN THE BOTTOM OF A BURNT POT?

So throughout this article, I’ve talked about cleaning the inside of a burnt pot. But what about the outside. Cleaning the bottom of a burnt pan is actually the same process as cleaning the inside.

All you need to do is get a wet steel wool or scotch brite.I prefer to use steel wool because it scrubs things way better.

Now squeeze a few drops of dish soap on the steel wool and sprinkle some baking soda on the bottom of the burnt pot. Then scrub the bottom of the burnt pan until it looks brand new again.

I hope this article on how to clean a burnt pot helped you out.


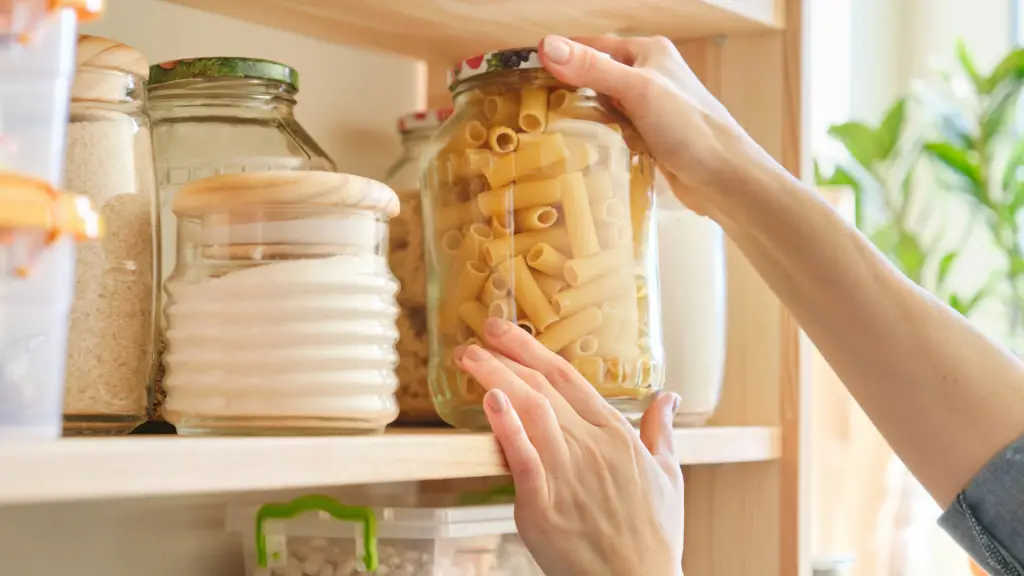
If your pantry feels a little out of control, you’re not alone. One minute it’s fine, and the next you’re digging past half-empty boxes, mystery bags, and items you forgot you even bought. The truth is, an organized pantry isn’t about making everything look perfect—it’s about making life easier. With a few simple tweaks and realistic systems, you can turn your pantry into a space that actually works for you, saves you money, and makes cooking feel a whole lot less stressful. Let’s break it down in a way that’s simple, doable, and easy to keep up with.


 Start With a Smart Reset

Empty the pantry completely so you can see the space you’re working with instead of organizing around clutter.

  • Wipe shelves with warm soapy water or vinegar before putting anything back to prevent crumbs and pests.

  • Toss expired food immediately so it doesn’t sneak back onto shelves “just in case.”


Organize by How Often You Use Items

  • Place everyday items at eye level for quick access.

  • Store seasonal or rarely used items on the highest shelves.

  • Keep kid-approved snacks within reach so children can help themselves without rummaging.

Create Pantry Zones That Make Sense

  • Assign each shelf a purpose, such as breakfast foods, snacks, baking supplies, canned goods, or cooking essentials.

  • Keep foods you use together stored together so cooking feels faster and less chaotic.

  • Store heavy items on lower shelves to avoid spills and accidents.


Label for Effortless Maintenance

  • Label containers clearly so everyone in the household knows where things belong.

  • Use simple, easy-to-read labels instead of decorative ones that fade or peel.

  • Add purchase dates to bulk items so you know when to use them up.


Use Containers Strategically

  • Transfer dry goods into airtight containers to keep food fresh and pest-free.

  • Choose square or stackable containers to reduce wasted shelf space.

  • Keep original packaging instructions clipped inside containers for reference.


Unique Pantry Organization Ideas

  • Create a “use-first” bin for items nearing expiration so they don’t get forgotten.

  • Dedicate one shelf to quick meals, such as pasta, sauces, canned beans, and boxed mixes.

  • Store measuring cups and spoons inside your baking bin so everything is ready in one grab.

  • Use slim bins vertically to store tortillas, wraps, or flatbread without folding.

  • Install tension rods to keep tall items upright and prevent bottles from tipping.

  • Turn a lazy Susan into a sauce or oil station for deep shelves.

  • Hang a small clipboard inside the pantry to track grocery items you’re running low on.

  • Use color-coded bins to separate snacks, baking supplies, and breakfast foods.

  • Store spices alphabetically or by cuisine to avoid buying duplicates.

  • Keep pet food, treats, or supplements in a sealed container on the bottom shelf.


Make Small Pantries Feel Bigger

  • Use shelf risers to double vertical storage.

  • Store bulky packaging outside the pantry and keep only refills inside.

  • Limit duplicate items to avoid overcrowding shelves.

  • Keep tall containers toward the back and shorter ones in front for visibility.


GROUP ITEMS TOGETHER

For this method, you want to make sure that you group your items together by placing similar items with one another. For example group all your snacks together in one place and call that area “SNACKS” or group all your dry foods together such as peas, nuts, etc and call it “DRY FOODS”. If you do this you don’t have to worry about you cant finding certain stuff in your pantry.


PLACE DRY FOODS INTO A LABELED CONTAINER

This goes together with the hack I mentioned above. For this, all you need to do is place foods such as peas, nuts, dry snacks, etc in their separate but labeled containers. Make sure the containers aren’t too big but not too small.


OVER THE DOOR RACK

With an over-the-door rack, you can get additional storage without taking up too much space. You can add stuff such as small containers, snacks, etc into one of these over the door rack. You can get one right here.


USE COMMAND HOOKS

Using command hooks allows you to have extra storage. With command hooks, you can place things such as dish towels, pots, and even chips(make sure to make a circular hole where you normally open up the chips so they can fit on the command hook).


Pantry Habits That Keep It Organized

  • Do a five-minute pantry reset once a week.

  • Rotate older food to the front after grocery shopping.

  • Avoid storing non-food clutter in the pantry to maintain purpose.

  • Reassess shelf zones every few months as your cooking habits change.


tHE TAKEAWAY

An organized pantry isn’t about perfection — it’s about creating a system that works for your daily routine. The simpler the setup, the easier it is to maintain long-term.


You might be wondering why would anyone want to make their own Febreze when they can get one at the store. Well, sometimes it’s great to try new things. Making your own air freshener is also great because it saves you a lot of, money each month.


So here is the best way to make your own DIY homemade Febreze air freshener.


THINGS YOU NEED:

  • 1/3 cup of fabric softener
  • 2 cups of water
  • 2 drops of your favorite essential oil
  • Spray bottle


Mix all the ingredients above and place them into the spray container.


With this, all you need to do now is spray the areas such as sofa(fabric) curtains and any fabric areas.


GET A DRAWER ORGANIZER FOR YOUR KITCHEN UTENSILS

Drawer organizers are great because they sectionalize inside your drawer. Just make sure you get the right size. Here is a link to one, click here.


CLEAR OUT REFRIGERATOR

Get rid of food that you know that you aren’t going to eat. These foods are mostly unwanted leftovers. You should also properly put things together in the fridge so that it can look really neat.


USE COMMAND HOOKS (CUPS, DISHCLOTH, POTS)

You can use command hooks to hang up things like dishcloths and pots. This will make your kitchen look more spacious. You can get some right here.


GET AN CABINET ORGANIZER( OVER CABINET STORAGE ORGANIZER)

This will allow you to hold more things inside of your cabinets without taking up too much space.


PUT DRY FOODS IN STORAGE(SNACKS)

To make your kitchen look more organized you can get a couple of small plastic containers and put your dry food(peas, nuts, and other nacks) in them.


OVER THE SINK DISH DRAINER

An over-the-sink dish drainer is probably the best dish drainer you can get. Not only do they make your dishes dry much faster but you also don’t have to worry about cleaning the bottom because the sink is where the water that drips from the dishes goes.