When most people think of the Amish, they picture horse-drawn buggies, tidy white farmhouses, and women in bonnets working peacefully in the kitchen. But behind that simple way of life lies a world of wisdom — practical, sustainable, and surprisingly modern in its effectiveness.
The Amish have mastered the art of living well with less. They know how to stretch what they have, keep their homes spotless without chemicals, and make every corner functional and beautiful.
And the best part? You can bring that same sense of order, peace, and purpose into your own home — no matter where you live.
Here are 30 everyday Amish living hacks you can start using today — simple, natural, and timeless tricks that make home life calmer, cleaner, and more meaningful.
Amish Cleaning Hacks
1. Clean as You Go
Amish homes are never chaotic because cleaning isn’t a weekend event — it’s a daily rhythm. They wipe down counters after every meal, sweep floors at the end of each day, and tidy as they go. This keeps their homes peaceful and clutter-free without marathon cleaning days.
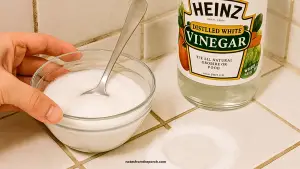
2. Vinegar: The Amish All-Purpose Cleaner
Amish families use white vinegar for everything — floors, windows, sinks, and bathrooms. Mix equal parts vinegar and water in a spray bottle for a streak-free, chemical-free cleaner that truly works.
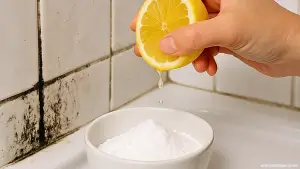
3. Baking Soda for Scouring
Forget fancy scrubs — Amish homemakers rely on baking soda to clean sinks, stoves, and tubs. It’s gentle, natural, and lifts dirt with minimal effort.
4. Homemade Air Fresheners
Instead of artificial sprays, Amish families simmer water with orange peels, cinnamon sticks, and cloves on the stove. The result? A home that smells cozy and inviting — naturally.
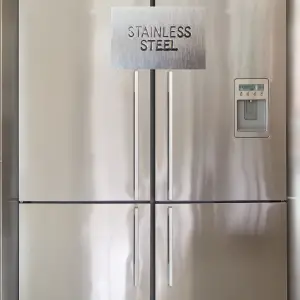
5. Flour for Polishing Stainless Steel
Yes, flour! Sprinkle a bit on a dry cloth and buff your sink or appliances. The Amish use this trick to make steel shine without chemicals.
Amish Laundry and Fabric Hacks
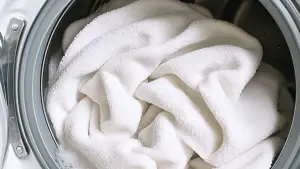
6. Sun-Dried Laundry
Amish homes don’t need fabric softeners. Their secret? Sunlight. Hanging laundry outdoors not only saves energy but also gives clothes a clean, crisp scent you can’t bottle.
7. Vinegar Softener Substitute
Add a cup of white vinegar to your final rinse cycle to soften clothes and remove detergent buildup — the Amish way.
8. Reusing Fabric Scraps
No fabric goes to waste in an Amish home. Scraps are turned into quilts, cleaning rags, or braided rugs. It’s sustainability at its finest — and every piece tells a story.
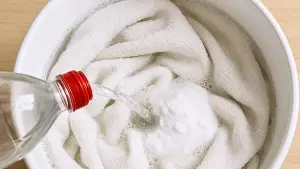
9. Homemade Stain Remover
Mix baking soda, vinegar, and a little dish soap to make a paste that removes stains from fabric naturally — no harsh chemicals, just old-fashioned effectiveness.
10. Seasonal Laundry Routine
Amish families follow a routine — Monday is wash day, Tuesday is ironing, and so on. Sticking to a rhythm makes chores feel lighter and keeps chaos out of the home.
Amish Organization and Home Order
11. The “One In, One Out” Rule
If something new comes into the home, something old goes out. This keeps clutter away and teaches appreciation for what you already own.
12. Everything Has a Place
You’ll never find piles of random items in an Amish kitchen. Every pot, jar, and tool has a home. Adopt this system, and tidying up becomes second nature.
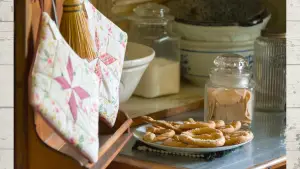
13. Amish Pantry Organization
Their pantries are a thing of beauty — rows of glass jars filled with grains, beans, and preserves. Label your jars, use baskets for categories, and keep everything visible and functional.
14. Keep Surfaces Clear
The Amish love simplicity. Fewer items on tables and counters mean less to clean and more visual calm. Try keeping just one decorative item per surface — it makes a difference.
15. Routine Over Rush
Their daily routines are slow but consistent. Schedule cleaning, cooking, and rest into your day — structure brings peace and productivity.
Amish Kitchen Wisdom
16. Cook from Scratch
Amish cooking revolves around simple ingredients — flour, butter, sugar, eggs, and love. Start baking bread or making soups at home. It’s cheaper, healthier, and deeply satisfying.
17. Save and Reuse Cooking Water
Water used to boil potatoes or pasta is often saved for soups or to water plants — waste nothing!
18. Homemade Seasoning Mixes
The Amish make their own seasoning blends using salt, herbs, and dried vegetables. Store-bought seasoning packets? Not needed.
19. Glass Jars for Everything
Instead of plastic, they store everything in glass jars — flour, rice, herbs, and dried fruit. It looks beautiful and keeps food fresh longer.
20. Preserve the Season
Canning and preserving are core to Amish life. Even if you don’t have a garden, you can pickle vegetables or make jam from store-bought produce — it’s satisfying and reduces waste.
Amish Natural Living and Wellness
21. Use Herbs for Healing
Many Amish families grow small herb gardens filled with mint, chamomile, and lavender. They brew teas to calm nerves, ease headaches, or settle the stomach naturally.
22. Natural Pest Control
They rely on plants and pantry staples to repel pests — peppermint oil for ants, lemon for fruit flies, and vinegar for gnats. No toxic sprays needed.
23. Bring the Outdoors In
Amish homes are full of fresh flowers, greenery, and open windows. Nature keeps the air clean and the spirit calm. Try keeping herbs or potted plants by your kitchen window.
24. Seasonal Cleaning Routines
Each season brings a new rhythm — spring is for decluttering, summer for preserving, fall for deep cleaning, and winter for rest. Living in tune with the seasons brings balance to the home.
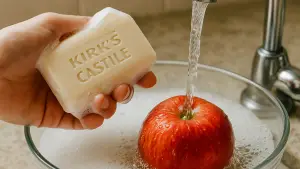
25. Homemade Soaps and Cleaners
Many Amish make soap from lard, ash, and lye — but you can simplify this by using Castile soap. Mix with water, vinegar, and essential oils for your own gentle cleaner.
Amish Lifestyle and Mindset Hacks
26. Live by the “Use It Up” Philosophy
The Amish live by this golden rule: “Use it up, wear it out, make it do, or do without.” Before you buy something new, ask yourself if you can repair, repurpose, or live without it.
27. Quiet Mornings, Productive Days
They begin the day in silence or prayer — no rushing, no phones. Try starting your morning quietly — make coffee, light a candle, or take a moment of gratitude before diving into the day.
28. Handcrafted Simplicity
They craft what they can — whether it’s sewing curtains, building furniture, or making gifts. Creating things by hand adds meaning and reduces dependency on mass-produced items.
29. Waste Nothing, Value Everything
From using rainwater for gardens to saving bread crusts for chickens, Amish homes function with almost zero waste. Start small — reuse jars, compost scraps, and buy less.
30. Gratitude in Daily Work
The biggest Amish hack of all? Gratitude. Every task — whether it’s scrubbing a floor or baking bread — is done with thankfulness. It transforms chores into purpose and turns a house into a true home.
Conclusion:
The Amish lifestyle isn’t about giving things up — it’s about gaining peace, purpose, and appreciation for what truly matters. Their ways remind us that a happy home isn’t measured by how much we own, but by how well we care for what we have.
You don’t need to live off the grid to live like the Amish. Start small — open your windows, bake something from scratch, or switch to natural cleaners. Soon, you’ll notice your home feels calmer, fresher, and more meaningful.
Because sometimes, the old ways really are the best ways.


")


 My Little Kitchen Discovery