Some of the best life hacks don’t come from experts, influencers, or expensive products. They come from everyday people experimenting, failing, and stumbling onto surprisingly clever solutions that just work. I’ve learned over the years that when something sounds a little weird, it’s often worth at least understanding why people swear by it.
I used to scroll right past articles like this, assuming they were exaggerated clickbait. But after testing a handful myself — and realizing how many solved problems I didn’t even know I had — I started paying attention. This post pulls together unusual but practical tricks that actually make sense once you understand the logic behind them.
Let’s dive in.
1. The “Yellow Gold” Garden Secret People Don’t Talk About
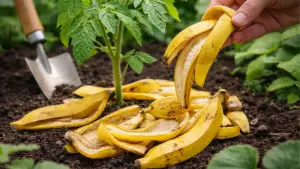
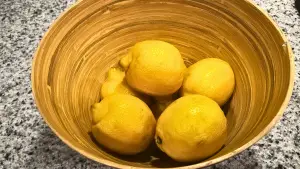
Gardeners have quietly been using turmeric for decades, not just in the kitchen but in soil. Turmeric contains curcumin, a compound with natural antifungal and antibacterial properties, which can help protect seedlings and roots from common soil diseases.
When lightly mixed into compost or sprinkled around vulnerable plants, it may help reduce mold and root rot issues without harsh chemicals. Some gardeners also mix turmeric with water to create a mild soil drench for plants struggling with fungus.
It’s especially useful for indoor plants where airflow is limited. Turmeric won’t replace proper drainage or sunlight, but it can be a helpful supplement. The key is moderation — too much can stain soil and containers. Used correctly, this “yellow gold” becomes a quiet garden ally.
2. The Simple Toenail Fungus Trick People Try Before Bed
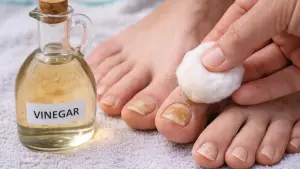
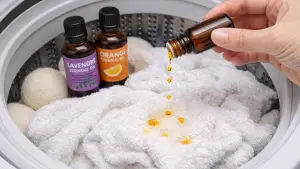
Toenail fungus thrives in warm, damp environments, which is why nighttime treatment can be effective. Many people use diluted vinegar or tea tree oil before bed because both create an environment fungus doesn’t love. Applying it at night gives the treatment hours to work without socks or shoes trapping moisture.
Consistency matters more than strength here — daily application is what shows results. Keeping nails trimmed and dry improves effectiveness dramatically.
This isn’t an overnight fix, but many people see improvement within weeks. It’s affordable, low-risk, and easy to test. For stubborn cases, it works best alongside proper foot hygiene.
3. The 30-Second Turmeric Habit Linked to Weight Support
Turmeric has been studied for its potential role in reducing inflammation, which is often tied to weight gain and insulin resistance. Some people add a pinch of turmeric and black pepper to warm water or tea before meals. Black pepper helps your body absorb curcumin more efficiently.
While this isn’t a magic weight-loss solution, it may support digestion and metabolic health over time. Reducing inflammation can help the body respond better to exercise and nutrition changes.
It’s simple, inexpensive, and easy to maintain. Think of it as support, not replacement, for healthy habits. The real benefit is consistency.
4. Five Smart Ways Empty Bottles Become Free Household Tools
Before tossing bottles, consider how useful they actually are. Plastic bottles can become watering tools by poking holes in the cap. Glass bottles work beautifully as oil dispensers or DIY vases.
Spray bottles can be reused for homemade cleaners. Larger bottles can store bulk items like rice or pet food. Even cut bottles can act as funnels or scoops.
Reusing containers saves money and reduces clutter. Once you start repurposing, you’ll see bottles differently. They’re not trash — they’re tools.
5. The $2 Cloth That Can Reduce Car Scratches
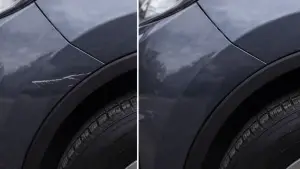
Microfiber cloths are designed to trap dirt instead of dragging it across surfaces. When paired with a proper scratch-removal polish, they can reduce the appearance of light scratches significantly.
The key is using clean, high-quality microfiber, not old rags. Circular motion and gentle pressure prevent further damage. This method works best for surface-level scratches, not deep paint damage.
Many people panic and assume repainting is necessary when it isn’t. This simple approach can save thousands in cosmetic repairs. Patience makes all the difference.
6. Why Heavy Gas Blowers Are Wrecking Your Back
Gas leaf blowers are heavier than most people realize and often force awkward posture. Repeated use strains the lower back and shoulders. Switching to lightweight electric or backpack models redistributes weight more evenly.
Some homeowners even use wide push brooms for small areas with better control and zero vibration. Reducing noise is another unexpected bonus. Ergonomics matter more as we age. Your back will thank you later. Sometimes simpler really is better.
7. How to Whiten Teeth Without Bleach Damage
Bleach-based whiteners can weaken enamel over time. Alternatives like baking soda used sparingly can polish surface stains without harsh chemicals.
Oil pulling with coconut oil may also help reduce plaque buildup. Eating crunchy fruits like apples can naturally scrub teeth. Consistency beats intensity here.
Whitening toothpaste works best when paired with proper brushing technique. Avoid acidic overuse, which erodes enamel. A gentle routine protects your smile long-term.
8. Never Spill Boiling Water Again
Using a ladle or heat-safe measuring cup gives more control than pouring directly from a pot. This is especially helpful for pasta water or blanching vegetables.
Pouring slowly reduces splash risk and burns. Many home cooks swear by pouring through a spout strainer. It’s safer and less stressful. Small changes prevent big accidents. Your hands will notice the difference immediately. Kitchen safety matters.
9. Why Eating Burgers Upside Down Makes Sense
Burger buns are thicker on top for a reason. Flipping the burger lets the sturdier side absorb juices instead of falling apart. It improves structural integrity and bite consistency.
Less mess, more flavor. Chefs have quietly recommended this for years. It sounds odd but works instantly. Once you try it, it’s hard to go back. Sometimes physics wins.
10. How to Actually Maximize Your Microwave
Microwaves heat unevenly due to wave patterns. Placing food in a ring shape allows more even heating. Covering food traps steam, preventing dryness.
Stirring halfway through improves results dramatically. Lower power settings cook more evenly than full blast. Letting food rest allows heat distribution. These small adjustments change everything. Your leftovers deserve better.
11. Three Household Items That Remove Shoe Stains
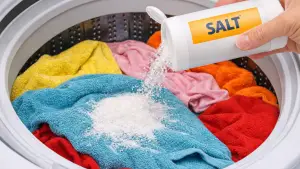
Baking soda lifts odors and stains. White vinegar breaks down grime. Dish soap cuts grease marks. Used together gently, they clean most shoe materials safely.
Soft brushes prevent damage. Air drying avoids warping. This combo works on canvas, rubber, and synthetic shoes. Always spot test first. Simple ingredients often outperform expensive cleaners.
13. The Binder Clip Trick That Ends Cable Chaos
Binder clips grip cords without slipping. Attaching them to desk edges keeps chargers accessible. They prevent cables from falling behind furniture.
This works for home offices and nightstands. No drilling or adhesives needed. It’s cheap and adjustable. Once organized, you’ll wonder why you waited. Small hacks create big relief.
14. The 60-Second Teeth and Gum Ritual
Gentle gum massage improves circulation. Using a soft toothbrush or clean finger stimulates tissue. This can reduce inflammation over time.
Pairing it with proper flossing supports oral health. It takes one minute daily. Many dentists recommend it quietly. Healthy gums support healthy teeth. Simple habits compound.
15. Why Restaurants Hang Bags of Pennies Outside
Pennies reflect light and movement, which deters flies. The water magnifies the effect. It’s an old-school insect control trick. No chemicals required.
It’s inexpensive and easy to maintain. Many outdoor eateries still rely on it. It looks strange but works surprisingly well. Sometimes tradition sticks for a reason.
16. The Real Benefits of Cinnamon People Overlook
Cinnamon may help regulate blood sugar when used consistently. It also has antimicrobial properties. Adding it to oatmeal or coffee is easy.
It’s not a cure, but it supports metabolic health. Quality matters — Ceylon cinnamon is preferred. Moderation is key. It’s a spice with benefits beyond flavor. Food can be functional.
17. The 5-Second Bedtime Routine for Tired Skin
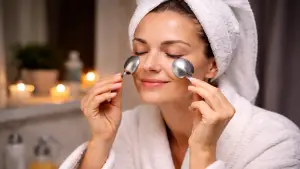
Cold spoons or chilled eye rollers reduce puffiness by constricting blood vessels. This can temporarily minimize eye bags. It also feels incredibly soothing.
Many dermatologists recommend cold therapy. It takes seconds but delivers visible results. No products required. Consistency enhances effect. Beauty doesn’t have to be complicated.
18. Why Keep a Bread Clip in Your Wallet
Bread clips can organize keys, label cords, or act as makeshift stands. Travelers use them to mark luggage zippers. They’re lightweight and versatile.
In emergencies, they solve small problems fast. It’s a tiny tool with surprising utility. You’ll find uses everywhere. Sometimes the simplest items are the most useful.
19. How to Avoid Scraping Ice Off Mirrors
Covering mirrors with plastic or cardboard prevents frost buildup. This saves time and avoids scratches. Even a towel works overnight.
Preparation beats frustration. Your mirrors stay clear. Winter mornings become easier. Small habits reduce daily stress. Think ahead once, benefit all season.
20. Why Mustard Doesn’t Belong in the Fridge

Mustard contains vinegar and salt, natural preservatives. Refrigeration isn’t necessary for safety. Cold temperatures can dull flavor.
Pantry storage keeps it tasting better. Always check labels for exceptions. This applies to many condiments. Not everything needs chilling. Taste matters.
21. Why Foil-Wrapped Car Keys Are Trending
Aluminum foil blocks RFID signals. This prevents keyless car theft attempts. Wrapping keys overnight adds a security layer. It’s inexpensive and easy.
Many people now use signal-blocking pouches. Prevention beats replacement. Technology has loopholes. Awareness is power.
22. Why Eggshells and Orange Peels Are Valuable
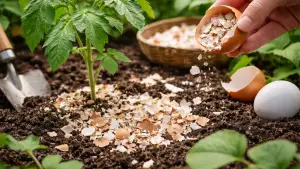
Eggshells add calcium to soil. Orange peels repel pests and add scent. Both compost beautifully. They reduce waste and improve gardens.
Citrus oils deter insects naturally. Crushed shells improve drainage. Nothing goes to waste. Nature recycles best.
Final Thoughts
Life hacks don’t need to be dramatic or expensive to make a real difference. Often, the most effective solutions are hiding in plain sight — waiting for someone curious enough to try them. When you understand the why behind a trick, it becomes more than a gimmick; it becomes useful knowledge.
Try a few that fit your life. Keep what works. Ditch what doesn’t. And remember — sometimes the weirdest ideas turn out to be the smartest ones.


")


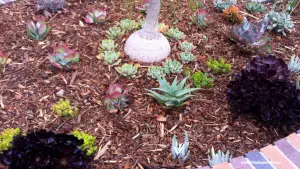
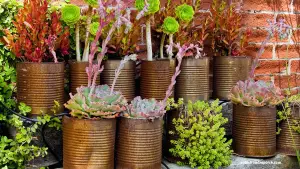
 If you’ve ever loved plants but hated the responsibility that comes with them, welcome — succulents are your people. A succulent garden is perfect for anyone who forgets to water, travels often, or simply doesn’t want their plants to act dramatic when life gets busy. These hardy little plants are built to survive neglect, and with the right setup, they don’t just survive — they thrive. The secret isn’t constant care. It’s smart planning from the start.


 I have always used electric stoves with grates and burners but, I recently moved into my new home that have a glass top stove. This made me wondered, how on earth do I clean a glass top stove without scratching it. However, I figured it out so, if you are in the same situation here is how to clean it.