Category

Food tips

Category

My Little Kitchen Discovery

I’ve been using Kirk’s Castile Soap for years as a shower soap. It’s gentle on my skin, affordable, and has never let me down. But one day, while washing dishes and scrubbing my hands with Kirk’s, I had a lightbulb moment. I thought, If this soap is safe enough for my body and free of harsh chemicals, what else could it do?

That’s when I discovered something I never imagined—I could use Kirk’s Castile Soap to wash my fruits and vegetables. Yep, you read that right. A bar of soap that started as part of my shower routine ended up becoming one of the best food-prep hacks in my kitchen.

And trust me, once you try it, you’ll never look at store-bought produce sprays the same way again.

 If you think rinsing your apples under plain water is enough, think again.
 Why spend money on expensive produce cleaners when a 180-year-old soap recipe does the job naturally?

Why It Works

Kirk’s Castile Soap has been around since 1839, made in the USA with plant-based ingredients. It doesn’t contain synthetic detergents, animal by-products, or harsh chemicals. That means it’s gentle enough to be safe but strong enough to cut through dirt, wax, and pesticide residue on produce.

Most people just rinse fruits and veggies under water, but here’s the truth: water alone doesn’t fully remove the grime. That’s why this soap hack is such a game-changer.

How to Wash Produce with Kirk’s Castile Soap

Here’s exactly how you can turn your bar of Kirk’s into a natural fruit and veggie cleaner:

Instruction:

  1. Fill a large bowl or sink with cool water.

  2. Wet your hands and rub a little Kirk’s Castile Soap until it lathers.

  3. Swish your soapy hands into the water to create a light, diluted solution.

  4. Add your fruits and veggies into the water and gently rub them for 20–30 seconds.

  5. Rinse thoroughly under cool running water to remove all soap.

  6. Dry with a clean towel or let air-dry before storing.

Tip: Avoid soaking berries or delicate produce for too long—just a quick dip and rinse works best.

My First Test Run

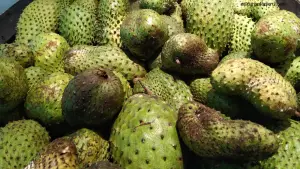
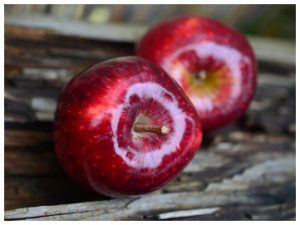
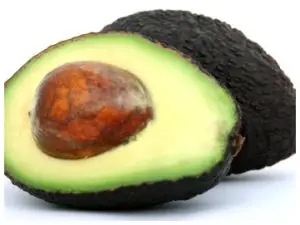
The first time I tried this, I used it on a batch of apples and cucumbers from the farmer’s market. Usually, my cucumbers would feel waxy, and the apples had that shiny coating that made me wonder what I was really biting into. After a quick wash with Kirk’s, the difference was unbelievable. The cucumbers lost their greasy film, and the apples actually smelled fresher.

It felt like I was eating produce straight from the garden—except it came from a crowded store. That’s when I realized this wasn’t just a quirky experiment; it was a kitchen hack worth sharing.

Why You’ll Love This Hack

  • Saves Money: No need to buy pricey produce sprays.

  • Eco-Friendly: One bar lasts forever and has minimal packaging.

  • Safe & Gentle: If it’s safe for your skin, it’s safe for your apples.

  • Multi-Purpose: You can use the same bar for your shower, laundry stains, and now—your produce.


Final Thoughts

Kirk’s Castile Soap may look like a simple bar, but it’s packed with hidden uses. Who would’ve thought it could double as a natural fruit and veggie wash? It’s one of those “wow factor” discoveries that make you wonder what else this 180-year-old soap is capable of.

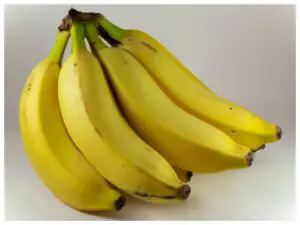
So the next time you bring home a bag of apples, grapes, or cucumbers, skip the overpriced produce wash. Grab your trusty bar of Kirk’s and let this old-fashioned soap give your food the clean start it deserves.


How to Make the 3 Most Popular Starbucks Coffees at Home

Starbucks has become a daily ritual for millions of people. Whether it’s the comfort of a caramel drizzle, the nostalgia of pumpkin spice, or the bold punch of a strong coffee, these drinks have earned their place at the top of the coffee chain. But let’s be real—those daily coffee runs add up fast. The good news? You can make Starbucks’ three most popular drinks right in your own kitchen. Let’s break down each one, why it’s loved, and how you can recreate it.

1. Caramel Macchiato (Copycat Recipe)

Why it’s popular:
The Caramel Macchiato is the perfect mix of sweet and strong. With its layers of espresso, milk, vanilla syrup, and caramel drizzle, it feels like a coffee dessert. It’s Instagram-worthy and indulgent without being overly heavy.

Ingredients:

  • 1 cup milk (whole milk or oat milk for creaminess)

  • 2 shots espresso (or ½ cup strong brewed coffee)

  • 1 tablespoon vanilla syrup (store-bought or homemade)

  • Caramel sauce for drizzling

Instructions:

  1. Heat and froth the milk until it’s hot and foamy.

  2. Pour the vanilla syrup into the bottom of your mug.

  3. Add the steamed milk, holding back the foam with a spoon, then spoon the foam on top.

  4. Slowly pour the espresso over the foam (this creates the “macchiato” effect).

  5. Drizzle caramel sauce generously across the top.

Pro tip: Want it iced? Use cold milk instead of steamed milk, pour everything over ice, and drizzle with caramel.

2. Pumpkin Spice Latte (Copycat Recipe)

Why it’s popular:
The Pumpkin Spice Latte (or PSL) is more than a drink—it’s a cultural icon. It signals the arrival of fall, cozy sweaters, and all things pumpkin. Starbucks sells millions every season, but you can have this warm hug in a mug anytime at home.

Ingredients:

  • 2 cups milk (any kind you like)

  • 2 tablespoons pumpkin purée

  • 1–2 tablespoons sugar (adjust to taste)

  • ½ teaspoon pumpkin pie spice (plus extra for garnish)

  • 1 teaspoon vanilla extract

  • 1–2 shots espresso (or ½ cup strong brewed coffee)

  • Whipped cream for topping

Instructions:

  1. In a saucepan, heat the milk, pumpkin purée, and sugar over medium heat until hot (do not boil).

  2. Whisk in the pumpkin pie spice and vanilla extract.

  3. Brew your espresso and pour it into a large mug.

  4. Add the pumpkin milk mixture and stir.

  5. Top with whipped cream and a sprinkle of pumpkin pie spice.

Pro tip: Make a big batch of pumpkin spice syrup ahead of time and keep it in the fridge for quicker lattes all season long.

3. Caffè Americano (Copycat Recipe)

Why it’s popular:
Sometimes simple is best. The Caffè Americano is just espresso topped with hot water, but the result is smooth, rich, and less bitter than drip coffee. It’s the go-to drink for those who love bold coffee without the frills.

Ingredients:

  • 2 shots espresso (or ½ cup very strong brewed coffee)

  • ½ to 1 cup hot water

Instructions:

  1. Brew two shots of espresso.

  2. Heat your water until hot but not boiling.

  3. Pour the hot water into your mug, then add the espresso on top.

  4. Adjust the ratio of water to espresso to your taste preference (less water = stronger flavor).

Pro tip: For a smoother Americano, always pour the espresso over the water, not the other way around.

Final Thoughts

Starbucks’ most popular drinks are delicious, but they don’t have to cost you $5–$7 a cup. With just a few simple ingredients and a little practice, you can enjoy your favorite Caramel Macchiato, Pumpkin Spice Latte, or Caffè Americano from the comfort of your home. The best part? You’ll save money, avoid long lines, and be able to customize each drink exactly how you like it.

So the next time you’re craving a Starbucks fix, skip the drive-thru—your kitchen barista skills have got you covered.

10 Everyday Foods That Could Make You a Mosquito Magnet

You’re likely swatting at mosquitoes more than your friends—and while factors like body heat, carbon dioxide, and genetics play major roles, what you’re eating can also subtly bump your attractiveness to these buzzing bloodsuckers. Here’s a rundown of 10 common foods and drinks that science and expert observations suggest may turn you into a mosquito magnet:

1. Beer

Unsurprisingly, the most strongly studied culprit is beer. Multiple studies—including one in PLOS One with malaria mosquitoes in Burkina Faso—show that beer consumption increases mosquito landings.Delish+7SELF+7Tuxedo Mosquito Control+7

2. Bananas

A 2018 experimental study found that eating bananas led to a significant increase in mosquito encounters.SELF+2Delish+2

3. Fermented Foods & Stinky Cheeses

Foods like miso, sauerkraut, yogurt, kimchi, and especially pungent cheeses (think Limburger) may increase your body odor’s carboxylic acid levels—compounds that mosquitoes seem to favor.Delish+3SELF+3SELF+3

4. Sugary Foods & Desserts

Though not always backed by direct experimental studies, there’s widespread belief (supported by acidity and lactic acid production theories) that sweets and sugary treats might raise your appeal to mosquitoes. Vogue

5. Salty Snacks

Consuming salty foods can increase lactic acid levels in your sweat—another attractant for mosquitoes.Wikipedia+12Tuxedo Mosquito Control+12Mosquito Squad+12

6. Caffeine

Caffeine may elevate your metabolism and raise body temperature—both potential signals that could draw in mosquitoes.Mosquito Squad+1

7. Spicy Foods

Spicy meals can raise your internal heat and metabolic rate, potentially making you a hotter target for these heat-seeking insects.Mosquito SquadThe Washington Post

8. Ice Cream

Combining dairy (leading to lactic acid production) and sugar, ice cream checks both boxes for attractiveness to mosquitoes.Tuxedo Mosquito Control

9. Potassium-Rich Foods (Avocados, Potatoes, Raisins)

Foods high in potassium—like avocados, potatoes, raisins, and bananas—play a role in lactic acid generation, likely enhancing your attractiveness.Verywell Health+6joshuaspestcontrol.com+6Mosquito Squad+6

10. High-Lactic-Acid Emitting Foods

More broadly, anything that elevates lactic acid—whether through heavy carbs, sodium, or metabolism—could make your skin chemistry inviting to mosquitoes. It’s often not just one food, but cumulative effects.SELF+3Reddit+3SELF+3

What This Means in Real Life

While these foods are linked to increased mosquito attraction, the science is still evolving—and dietary choices won’t override bigger factors like body heat, carbon dioxide output, blood type, or genetics.Food & Wine+6SELF+6Tuxedo Mosquito Control+6 Still, if you notice a correlation (like more bites after eating bananas or beer), you might experiment with shifting choices during high-bug seasons.

Pro Tips to Reduce Bites (No Diet Overhaul Required)

  • Dress smart: Wear light-colored, loose clothing that hides scent and minimizes skin exposure.Verywell HealthThe Washington Post

  • Use EPA-approved repellents: Look for DEET, picaridin, or oil of lemon eucalyptus.Delish+4SELF+4SELF+4

  • Avoid peak mosquito times: Dawn and dusk see the most action.SELF

  • Minimize environmental hotspots: Remove standing water, prune dense shrubs, and allow airflow around your space.The Washington Post


Final Thoughts

Might your snack of chips, sugary pops, or a beer make mosquitoes buzz your way more often? Possibly. While dietary shifts alone aren’t a magic shield, being aware of triggers—like fermented flavors or sweet, salty, potassium-rich treats—can help you tweak habits and stay just a bit less bite-prone.

Lettuce is a popular vegetable for salads and sandwiches but when it gets saggy then its not so tasty. In this post i am sharing my failure and my victories in the best way to store lettuce.

What You’ll Learn Here:

1. How to store lettuce

2. The Best bag for storing lettuce

3. The best place in he fridge to store lettuce

Lettuce rots easily if not store correctly. Lettuce is best stored in the refrigerator but not just anywhere in the refrigerator.  To store lettuce here is what you need to do first.

Step 1. Wrapping the lettuce

If the you are planning on storing the lettuce whole the first thing to do is to make sure the lettuce is fresh. Storing a stale lettuce will not give you the best results.

Its best to place it in plastic wrap rather than a Ziploc bag. I noticed that Ziploc bags gather moister which can cause lettuce to rot faster. So, wrapping the lettuce in plastic wrap if storing whole will make it stay fresh for weeks.

Extra tip: Covering the stem of the whole lettuce keep it fresh longer.

Step 2. Storing Shredded Lettuce

Most of us like to prep our vegetables . If this is the case go ahead and shred the leaves and place them in a Ziploc bag. I will let you know where to to place this in the fridge as it could determine the texture of the vegetable at eating time. Only store in a Ziploc b bag if its shredded. DO NOT WASH AT THIS TIME.

The Best Place for Storing Lettuce:

As mentioned before, the refrigerator is the best place to store lettuce. After packaging the lettuce place it in the crisper or the lower drawers in the fridge. Do not freeze lettuce as this could ruin the vegetable.

Washing Lettuce: Safety measures

Always wash lettuce before eating to prevent E-coli even if it was already prepackaged at the store. Also, lettuce is best use within three weeks of purchase or reaping if stored properly.

Keep in mind this is a vegetable and has to rot all you are trying to is to slow the process.

The Take-Away:

That is how easy it is to store lettuce. So, now that you know the best way to store lettuce I hope you will always have fresh crunchy lettuce lasting you for weeks.

You May Also Like:

How to Preserve Scallions Using a Blender: Lasts for 2 Months


Cleaning fruits isn’t something that everyone thinks about a lot. But it’s always good to do. You might be wondering “why?”. Well, this is because when we shop for fruits we usually pick them up and place them into our fruit baskets without even cleaning them. Even if we clean them we just use water. Now the reason why it’s good to clean your fruits is that doing so will get rid of all the bacteria and germs that were on them in the supermarket. Also not cleaning your fruits can make you really sick by giving you stomach aches etc. In this article, I will show you a quick and easy way to clean your fruits.


SOAK THEM IN VINEGAR

Get a large bowl/dish and fill it up with water Then add 1/2 of vinegar into it. After doing that place fruits such as apples, cherries, and grapes into it. Let them sit in the bowl/dish for about 2-5 minutes. After doing that take them out and rinse them under cold water.

Doing this will make your fruits clean and safe to eat.


SPRAY MIXTURE

Just mix the vinegar and cold water together in a spray bottle and use this mixture to spray your fruits. After spraying them rinse them under cold water and use a paper towel to dry them.

HOW TO CLEAN THE LETTUCE

When storing lettuce you can’t forget to clean it first. You don’t want your stored food to be unclean. Cleaning lettuce is rather easy. Just do the following.


First, you need to put the lettuce head in medium temp water (not too warm and not too cold). Then leave it there for 1 minute. Now all you have to do is to wash the lettuce in cold water.


Now place the lettuce in a lettuce spinner and let it dry for 2 mins. If you don’t have a lettuce spinner use a clean, dry kitchen cloth to dry the lettuce. If you don’t have a cloth use a paper towel instead.


STORING PROCESS

When you are planning to store lettuce you need to be careful. Moisture can be a huge problem when it comes on to lettuce storing. Sometimes you might think that lettuce needs a little moisture but when you are going to store it you don’t need moisture. If you want to perverse your lettuce the right way just follow these tips.


First, you need to wrap the lettuce in a paper towel, this will remove the excess moisture. Then place the lettuce head in a plastic bag. Now Place the bag of lettuce in the refrigerator. To be safe I would probably double or triple up the bags so that the lettuce doesn’t get moist.


If you have shredded lettuce just rinse it off, dry it with a lettuce spinner or dry cloth. Then wrap the shredded lettuce in a paper towel. Then after doing that put shredded lettuce in a jar and refrigerate it.


Most people want to eat healthier even though it can be hard at times. Believe me, I used to eat a lot of junk food and I only ate healthy for a week or 2 and return back to my unhealthy diet. I realized that the problem for me and most people was the change. No one likes to switch to something completely different in a short amount of time.

What I learned in eating healthy is that I need to add a bit more healthy stuff in my diet, without completely getting rid of everything. The only time you should get rid of every unhealthy thing in your diet is if you have been eating more healthy things overtime.

Fruits helped me to stay healthy but I only ate a couple of them. Here are some incredible fruits with the best health benefits that helped me to maintain a healthy diet.


1.APPLES

Apples are the best fruits to eat when you are on a healthy diet. They have a lot of benefits. So if you are on a healthy diet or want to start one you can add apples to your diet. Here are the benefits of apples.


BENEFITS

  • Eating 2 a day can make your heart healthier.
  • Reduce the risk of diabetes
  • Prevent constipation
  • Helps to boost your immune system


2.BANANAS


Bananas are the world most popular fruit for a good reason.  They provide a lot of energy. Most people usually eat them before workouts or going to work. But if you are running late and haven’t eaten breakfast yet you can just grab a banana and you will have a lot of energy to do your daily tasks. Here are more incredible benefits of bananas.


BENEFITS

  • They are rich in potassium which can help you maintain healthy blood pressure.
  • Bananas are low in  fat
  • They contain vitamin C and B6
  • One banana can provide you with a lot of energy.


3.ORANGES

Oranges contain a small amount of calories and they are very nutritious as well. It’s best to eat oranges with your standard breakfast in the mornings. Here are some incredible health benefits of oranges.


BENEFITS

  • Relieve constipation
  • Helps to create a better vision
  • Oranges provide a lower risk of diseases
  • oranges help to prevent the risk of cancer


4.WATERMELONS

Watermelons are very juicy and delicious. They are even better in fruit salads. They are different types of watermelons. The two most common ones are the ones with a yellow color inside and the other one has the red color inside. The red one is the most popular watermelon. Here are some health benefits of watermelons.


BENEFITS

  • Hydration
  • Contains vitamin c
  • High in lycopene
  • May reduce the risk of diabetes


5.AVACADO

Avocados go great with a lot of things such as sandwiches and wraps. Despite them containing a lot of fat, they are really healthy. The fat they contain is good fats and not the ones people usually worry about. It’s best to eat half of an avocado every day. Only eat an avocado daily if you can accommodate more calories in your diet. Here are some benefits of Avacado.


BENEFITS

  • Contains healthy fat
  • Good source of Vitamins A & E
  • Contains fiber


6.GRAPEFRUIT

Grapefruits are part of the citrus family and they are very nutritious. They are sour with a bit of sweetness. Grapefruits taste way better if you blend them and turn them into juice. Here are some health benefits of Grapefruits.


BENEFITS

  • Boost immune system
  • High in potassium which is good for your blood pressure.
  • Helps to prevent cancer


7.STRAWBERRIES

Strawberries are very tasty. Its always good to have a small cup of strawberries every day.  There is nothing to lose by doing this. because not only are you eating healthy you are also eating something delicious. Here are some mind-blowing benefits of strawberries.


BENEFITS

  • Contains vitamin c
  • Low in carbs
  • Contains fiber


Most people usually find it very hard to make their favorite foods. In my case, I wanted to make pizza but I didn’t know where to start. Until my mom taught me. I used her recipe and I was able to make my very own pizza. The recipe below will teach you how to make your first homemade pizza even better than I did.


WHAT YOU NEED:

  • CHEESE
  • TOPPING
  • PIZZA SAUCE
  • DOUGH


MAKING THE PIZZA DOUGH

  • Get a bowl and add yeast, sugar, and warm water in it.
  • Let the mixture sit there for 3-5 minutes. After 5 minutes add flour, salt, and the tip of olive and 3 teaspoons of olive oil.
  • The mixture will become more solid.  Sprinkle flour on a clean surface.
  • Form a ball with the flour mixture and place it on the floured surface.
  • Knead the dough on the surface for 5-8 minutes.
  • After you finish kneading it place the dough in a large container and cover it. Let the dough sit at room temperature for 1-2 hours.


DIRECTIONS


STEP 1

Roll the dough until it has a circular shape


STEP 2

Roll the radars of the dough to make the end look puffy. This will make the end of the dough thicker.


STEP 3

Place the pizza sauce directly onto the dough, then add the cheese and the topping.


STEP 4

Preheat the oven to 350 degrees F. Remember to place the pizza baking sheet or the pizza stone in it.


STEP 5

Place the pizza in the oven. Bake it for around 25-30 mins until the crust has a crispy golden brown appearance.

Now that you have made your very own pizza. It’s time to enjoy and saber every bite