Category

cleaning tips

Category

HOW TO CLEAN OVEN RACKS AND GRILLS

Cleaning grills/racks can be very hard to do. Because sometimes they have a lot of grease stains on them. So in this article, I will be showing you some of the best ways to clean your racks and grills.


CLEAN THEM WITH DISH SOAP

Get a sponge or Scotch-Brite and squeeze a few drops of dish soap on it. Now use it to scrub everywhere on the grill/racks. Be sure to clean in between the grills.


USE BAKING SODA AND SCOTHBRITE

Get a wet Scotch-Brite and add some dish soap to it. Then dip the cloth bite into some baking soda and use it to scrub the grills and racks. Doing this will get rid of any built-up grease that was on them.


USE VINEGAR

Soak a sponge with vinegar and squeeze a few drops of dish soap onto it. Now use the sponge to clean the racks and grills.

TOILET CLEANER recipes

Making a toilet cleaner is very simple. In this article, I will be telling you how to make your own toilet cleaner. Making this will make cleaning your toilet seem like an easy task. All you need is these mixed together:

RECIPE ONE:

  • 2 tbsp of dish soap
  • 2 cups of disinfectant
  • Warm water
  • 1 cup of rubbing alcohol


Mix all of them together into a spray bottle and spray your entire toilet with it. You can also spray the inside of it as well. Be sure to wipe away the soap residue with a paper towel.

RECIPE 2

1. Pour a tablespoon of Dawn dish soap into a spray bottle

2. Fill with warm water

3. Pour in on tablespoon Clorox bleach

4. shake the bottle to incorporate

Mist the exterior and inside the bowl with the solution. Then, use the toilet brush to wash. Focus on scrubbing underneath the toilet seat rings. Wash for 2 minutes to make sure all the stains and bad odor is gone. Next, flush and it is done.

KEEPING YOUR TOILET FRESH

Wash every morning and clean beneath the toilet seat with this mixture (bleach and water in a spray bottle). This is where urine gather and sends out that reeking smell in your bathroom.

THE SECRET TO A CLEAN TOILET:

This is no longer a secret since I am sharing it with you but, all there is to a clean toilet is constant cleaning. Stick a Bowl Fresh toilet bowl deodorizer in and your toilet will always smell good and fresh.

You can purchase Bowl Fresh toilet deodorizer at any supermarket in the bathroom isle or purchase online on Amazon.com. There are also other types of toilet bowl deodorizers it really doesn’t matter the thing is you have to clean your toilet regularly and use the deodorizer to maintain it’s freshness.

THE END:

You see, making a toilet bowl cleaner is not that of a genius act. Its less expensive and Its just you wanting a clean toilet and therefore you’ll do everything in your power to keep it clean like making your own toilet bowl cleaner recipe. I feel like i am speaking to myself here because that’s exactly what i am doing. So, I am going to clean my toilet now . It was nice chatting with you.

Thanks for checking out this post. I hope this will article helped you.

BE SURE TO ORGANIZE FIRST


Just make sure everything is in their place.


CLEAN THE WOOD

Cleaning the wood is kind of hard. The first thing you want to do is to sweep the deck floor. After sweeping, you can use a wood or deck cleaner to clean the wood. When cleaning be sure to use a hose and a push broom as this will give you a better clean.


CLEAN TABLES AND CHARIS

If you have glass tables just spray them with glass cleaner and wipe them with paper towels. If you have a wood table on your deck just wipe it with murphy’s oil soap. Also, spray your chairs with disinfectant and air freshener.

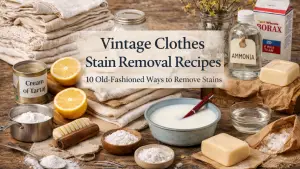
Before stain sticks, enzyme sprays, and brightly colored bottles lined store shelves, people relied on simple, time-tested stain removal recipes made from everyday household staples. These vintage stain removal methods weren’t fancy—but they were effective. More importantly, they were gentle enough to preserve fabric while still lifting stubborn stains.

If you’re looking for old-fashioned stain removal recipes, natural alternatives, or simply want to know how to remove stains from clothes without harsh chemicals, these tried-and-true methods are worth keeping in your laundry routine.

1. Milk Soak for Ink and Dye Stains

A surprising but well-known vintage trick.

How to make and use it:
Soak the stained area in milk overnight. Rinse thoroughly and wash the garment the next day. This method works best for fresh ink stains on cotton and linen.

2. Cream of Tartar and Lemon Juice for Rust Stains

A traditional solution for rust marks on clothing.

How to make and use it:
Make a paste using cream of tartar and lemon juice. Apply it to the rust stain and allow it to sit in sunlight until the stain fades. Rinse well and wash as usual.

3. Bar Soap Scrub for Everyday Stains

Before liquid detergents, bar soap was the backbone of laundry care.

How to make and use it:
Wet the stained area and rub directly with a plain bar soap. Gently scrub the fabric together, rinse, and repeat if needed. Launder as usual. This works well for food, makeup, and dirt stains.

4. Ammonia and Water for Greasy Collars and Cuffs

A carefully used vintage solution for heavy buildup.

How to make and use it:
Mix one tablespoon of clear ammonia with one cup of water. Dab onto the stained area using a cloth. Rinse thoroughly before washing. Never mix ammonia with bleach.

5. Vinegar and Baking Soda Recipe (Whites)

Stains happen — on clothing, linens, upholstery — and it can be frustrating to see a favorite item ruined. But you don’t always need store-bought products. This DIY stain remover is simple, affordable, and uses ingredients you may already have on hand.

What You’ll Need

  • 1 cup white vinegar

  • 2 cups rubbing (Isopropyl) alcohol

  • 3 tablespoons liquid dish soap

(Optional enhancement: baking soda)

instructions:

  1. Mix the solution. Combine the vinegar, rubbing alcohol, and dish soap in a spray bottle.

  2. Apply to the stain. Spray the stained area generously, saturating the fabric but avoiding drenching it.

  3. Work it in. Use a soft clothing brush, toothbrush, or cloth to gently scrub the stain in circular motions.

  4. Optional: add baking soda. For tougher stains, sprinkle a little baking soda on top of the pretreated area and gently brush again. The baking soda can help lift residue and neutralize odors.

  5. Rinse or launder. After treatment, either rinse with cold water or launder as usual according to the fabric care instructions

Tips & Precautions

  • Test first. Always do a spot test on an inconspicuous area before treating the whole stain to ensure the solution doesn’t discolor or weaken the fabric.

  • Act fast. The sooner you can treat a stain, the better your chances of full removal.

  • Avoid heat until stain is gone. Don’t dry or iron stained fabric until you’re sure the stain is removed — heat can set it permanently.

  • Use gentle scrubbing. Be careful with delicate fabrics like silk or wool; very soft brushing or even blotting may be better.

  • Store safely. Label your spray bottle and keep it out of reach of children or pets. The mixture includes rubbing alcohol, which is flammable.

Why This Works

  • Vinegar helps break down certain stains and neutralize odors.

  • Rubbing alcohol is effective at dissolving many oily or dye-based stains.

  • Dish soap acts as a surfactant, helping lift grease and grime from fabrics.

  • Baking soda adds gentle abrasive action and can help absorb remaining residues.


When This Might Not Be Enough

Very stubborn stains — like red wine, ink, or paint — may require specialized stain removers or professional cleaning. Always check the garment’s care label; dry-clean–only fabrics may not respond well to DIY treatments.

6. White Vinegar and Baking Soda for Set-In Stains

This classic combination was commonly used to tackle sweat stains, food spills, and mystery marks.

How to make and use it:
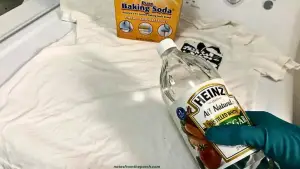
Sprinkle baking soda directly onto the stain. Slowly pour white vinegar over it and allow it to fizz. Let the mixture sit for 15–30 minutes, gently rub the fabric together, then rinse with warm water and wash as usual. This method works especially well for cotton and linen fabrics.

7. Cornstarch for Oil and Grease Stains

A dry method that absorbs oil before it spreads.

How to make and use it:
Sprinkle cornstarch directly onto the grease stain and let it sit for at least 30 minutes. Brush off the powder, then wash the garment. Repeat if needed. This works especially well on delicate fabrics.

8. GETTING RID OF FOOD STAIN:

Getting rid of food stains from shirts can be really hard to do. But this article will make it seem very easy. All you have to do is make your own stain remover.  This might sound hard to do but trust me it’s very easy to make.


Here are the things you need:

  • 1 cup of Vinegar
  • 2 cups of Rubbing alcohol
  • 3 tbsp Dish soap

INSTRUCTION:

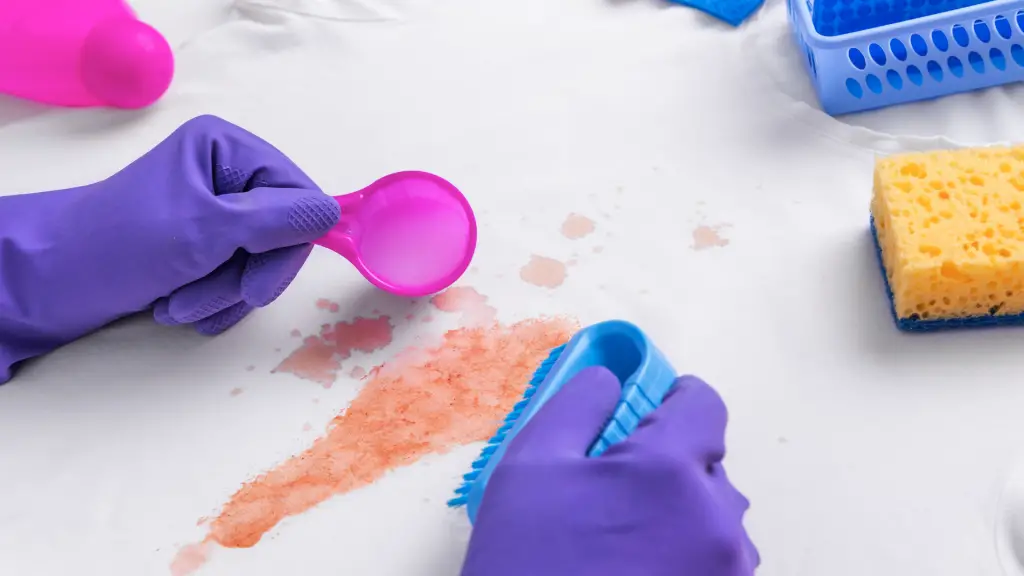
Mix these together into a spray bottle and spray the stained area of your shirt. Then use a small clothing brush to clean the stained area.

You can add baking powder to the stained area to get get a better clean.


9. Hydrogen Peroxide and Dish Soap for Protein Stains

A go-to remedy for blood, sweat, and food stains in light-colored clothing.

How to make and use it:
Mix equal parts hydrogen peroxide and mild dish soap. Apply directly to the stain and gently work it in with your fingers or a soft brush. Let it sit for 10 minutes, rinse thoroughly, then launder. Always spot-test first, as peroxide can lighten fabric.

10. Salt and Cold Water for Red Wine and Berry Stains

A vintage emergency fix often used before stains could set.

How to make and use it:
Blot excess liquid first. Sprinkle a generous amount of salt over the stain and pour cold water through the fabric from the back. Once the stain fades, rinse and wash. This works best when done immediately.


11. Lemon Juice and Sunlight for Yellowing

Used for generations to naturally brighten whites.

How to make and use it:
Saturate the stained area with fresh lemon juice. Place the garment in direct sunlight for several hours. Rinse and wash normally. This method is ideal for removing yellow stains from white shirts, pillowcases, and linens.

12. Borax Soak for Heavy Dirt and Grease

Borax was a laundry staple long before modern detergents existed.

How to make and use it:
Dissolve ½ cup of borax in a basin of warm water. Soak stained clothing for 1–2 hours, then wash as usual. This method is effective for work clothes, collars, and grease-stained fabrics.

Conclusion

This DIY stain remover gives you a powerful, economical tool for handling many common stains right at home. With a few pantry ingredients, a little patience, and the right approach, you can often restore your fabrics without expensive products.

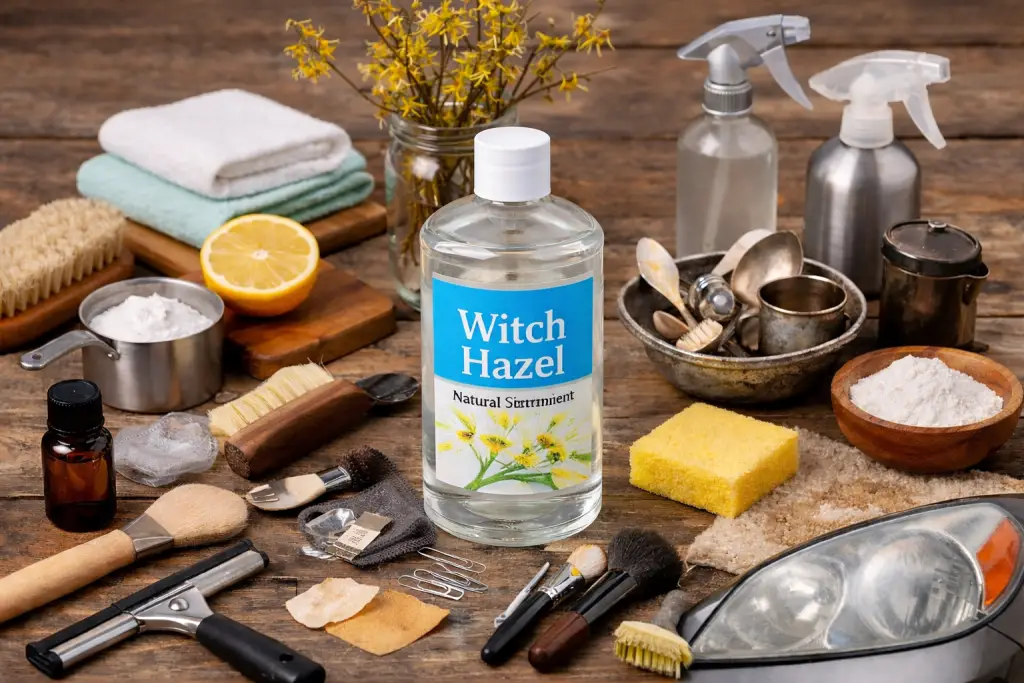
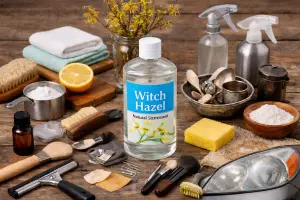
Witch hazel is one of those underrated household staples that quietly does way more than most people realize. While it’s best known for skincare, this natural, plant-based solution has earned a permanent spot in many homes for cleaning, deodorizing, and freshening surfaces without harsh chemicals. If you’ve ever wondered what else witch hazel can be used for around the house, you’re in the right place.

From cleaning glass and stainless steel to removing carpet stains, polishing silver, freshening laundry, and even lifting toilet bowl stains, witch hazel proves itself as a gentle yet effective alternative to store-bought cleaners. It’s affordable, easy to use, and safe for everyday cleaning when used properly. In this guide, you’ll discover practical witch hazel home uses and cleaning hacks that actually work—no gimmicks, just real-life solutions you can start using today.

1. Natural Glass and Mirror Cleaner

Witch hazel works surprisingly well on glass because it cuts through fingerprints and haze without leaving streaks.

How to use it:
Pour witch hazel into a spray bottle and lightly mist mirrors or glass surfaces. Wipe clean with a microfiber cloth or newspaper for a streak-free shine. No rinsing needed.

2. All-Purpose Countertop Freshener

It’s gentle enough for everyday wipe-downs but still effective at removing grime.

How to use it:
Mix equal parts witch hazel and water in a spray bottle. Spray onto kitchen or bathroom counters and wipe with a clean cloth. It leaves surfaces clean without harsh chemical smells.


3. Deodorizing Trash Cans

If your trash can smells even after taking the bag out, witch hazel helps neutralize odors.

How to use it:
Spray the inside of the empty trash can with witch hazel and wipe dry. For stubborn odors, let it sit for 5 minutes before wiping.

4. Cleaning and Deodorizing Cutting Boards

Witch hazel helps freshen cutting boards, especially after cutting onions or garlic.

How to use it:
Spray directly onto the board, scrub lightly with a cloth or sponge, then wipe dry. For wooden boards, avoid soaking—just a light mist works best.

5. Stainless Steel Smudge Remover

It removes fingerprints without leaving oily residue.

How to use it:
Dampen a cloth with witch hazel and wipe stainless steel appliances following the grain. Buff dry with a clean cloth.

6. Soap Scum Remover (Light Buildup)

While it won’t replace deep cleaners, witch hazel works well for maintenance cleaning.

How to use it:
Spray onto shower doors, faucets, or soap dishes. Let it sit for 2–3 minutes, then wipe clean with a damp cloth.

7. Natural Air Freshener

Perfect for people sensitive to artificial fragrances.

How to use it:
Add witch hazel to a spray bottle and mix in a few drops of essential oil (optional). Lightly mist the air or fabric surfaces like curtains.

8. Cleaning Makeup Brushes

Witch hazel helps break down makeup residue and kills odor-causing bacteria.

How to use it:
Mix witch hazel with warm water and a drop of gentle soap. Swirl brushes in the mixture, rinse thoroughly, and air dry flat.

9. Removing Sticker Residue

It loosens sticky residue without damaging surfaces.

How to use it:
Apply witch hazel to a cloth and rub the sticky area until residue lifts. Wipe clean with a damp cloth afterward.

10. Deodorizing Shoes

Great for freshening shoes without soaking them.

How to use it:
Spray the inside of shoes lightly with witch hazel and allow them to air dry completely. This helps neutralize odor instead of masking it.

11. Cleaning Door Handles and Light Switches

These high-touch areas collect oils and grime fast.

How to use it:
Spray witch hazel onto a cloth (not directly on electrical switches) and wipe thoroughly. Dry with a clean cloth.

12. Refreshing Upholstery Between Deep Cleans

Useful for quick touch-ups on fabric furniture.

How to use it:
Lightly mist witch hazel onto a cloth and blot upholstery. Do a spot test first and avoid over-wetting the fabric.

13. Bathroom Sink and Faucet Shine

It removes water spots and toothpaste residue easily.

How to use it:
Spray witch hazel directly onto sinks and faucets. Wipe clean with a microfiber cloth and buff dry.

14. Cleaning Kids’ Toys (Non-Electronic)

A gentler option for everyday toy cleaning.

How to use it:
Spray witch hazel onto a cloth and wipe toys clean. Let them air dry before giving them back to kids.

15. Natural Laundry Freshener (Light Odors)

Helps remove musty smells from lightly worn clothing.

How to use it:
Add ½ cup of witch hazel to the rinse cycle or lightly spray odor-prone areas before washing. Wash as usual.


16. USE IT TO CLEAN JEWELRY

Dip a cloth into some witch hazel and use it to clean your jewelry. Before you do this make sure that the material on your jewelry can handle witch hazel.


17. Cleaning Toilet Stains (Soaking Method)

Witch hazel helps loosen light stains and mineral rings when given time to sit.

How to use it:
Pour witch hazel directly around the inside rim of the toilet bowl, making sure it coats stained areas. Let it soak for at least 20–30 minutes (longer for tougher stains). Scrub with a toilet brush and flush. This works best for maintenance cleaning and light discoloration.

18. Cleaning and Brightening Silver Utensils

It helps lift tarnish and restore shine without harsh abrasives.

How to use it:
Dampen a soft cloth with witch hazel and gently rub silver utensils, focusing on dull or darkened areas. Rinse with warm water and dry immediately with a clean towel to prevent water spots.

19. Polishing Stainless Steel Surfaces

Witch hazel removes smudges while leaving a clean, polished finish.

How to use it:
Apply a small amount of witch hazel to a microfiber cloth. Wipe stainless steel surfaces in the direction of the grain, then buff dry with a second cloth for extra shine.

20. Cleaning Cloudy Car Headlights

It helps remove surface grime and haze that dull headlights.

How to use it:
Apply witch hazel to a clean cloth and rub headlights using circular motions. Wipe with a dry cloth to remove residue. This is great for light oxidation and quick refreshes between deeper cleanings.

21. Removing Carpet Stains

Witch hazel works well on fresh spills and mild stains.

How to use it:
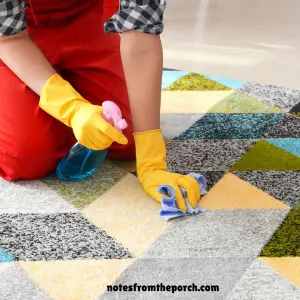
Blot the stained area with a cloth dampened with witch hazel. Do not scrub—press gently to lift the stain. Continue blotting with a clean cloth until the stain fades, then let the area air dry. Always spot-test first.

Conclusion

Witch hazel may not look like a heavy-duty cleaner, but its versatility is exactly what makes it so valuable around the home. Whether you’re polishing stainless steel, cleaning silver utensils, deodorizing shoes, removing carpet stains, or maintaining a fresh bathroom, this simple liquid can handle a surprising number of everyday tasks. It’s especially useful for light to moderate cleaning, routine maintenance, and odor control without overwhelming your space with strong chemical smells.

How to Clean Toilet Stains with Kool-Aid

There are many ways you can clean a filthy toilet. Some people swear by bleach, others use vinegar, and then there are endless store-bought cleaners lined up on the shelves. But one of the most unusual—and surprisingly effective—ways I’ve discovered is using Kool-Aid.

Yes, Kool-Aid. The same powder you stir into a pitcher to make a fruity drink.

The first time I heard this, I laughed out loud. I mean, Kool-Aid is for kids’ drinks and summer afternoons, not scrubbing a toilet! But curiosity got the best of me. I figured, why not? After all, what did I have to lose besides some stubborn toilet stains?

So, one day I decided to test it. I grabbed a packet of lemon Kool-Aid, sprinkled it into the bowl, and walked away. Honestly, I wasn’t expecting much. But when I came back later to flush, I was amazed. The stains were noticeably lighter, the bowl looked brighter, and there was even a fresh citrusy scent left behind. That was the moment I became a believer—and I haven’t looked back since.

What is Kool-Aid?

Kool-Aid is a powdered drink mix that you combine with water (and usually sugar) to make a fruit-flavored soft drink. But here’s the secret: the powder contains citric acid. That’s the same natural acid found in lemons, oranges, and other citrus fruits. Citric acid is a powerful cleaner, especially against mineral deposits, rust stains, and the grime that builds up in toilets over time.

Scrub Away Toilet Stains with Kool-Aid

Here’s how you can try this clever trick at home:

  1. Grab a packet of lemon-flavored Kool-Aid. (The lemon works best because it contains the most citric acid.)

  2. Sprinkle the powder evenly into your toilet bowl, making sure to cover stained areas.

  3. Let it sit for at least 30 minutes. For tougher stains, leave it overnight.

  4. Give the bowl a quick scrub with your toilet brush.

  5. Flush and admire the results!

Why I Love This Hack

After that first test, I realized this hack wasn’t just a gimmick—it actually works. The citric acid lifts stains without the harsh chemicals found in many commercial cleaners. Plus, it’s affordable and fun. For less than a dollar, you can get a fresh-looking toilet and even a light citrus scent.

And honestly, there’s something oddly satisfying about telling people you clean your toilet with Kool-Aid. Their reactions are priceless—half disbelief, half curiosity.

Tips for Best Results

  • Use only the powdered drink mix, not the liquid version.

  • Stick with lemon flavor for maximum cleaning power.

  • For extra tough stains, scrub lightly before flushing.

  • Repeat once a week to keep your toilet bowl sparkling.

Final Thoughts

Sometimes the best cleaning hacks come from the most unexpected places. Who knew something designed for kids’ drinks could double as a toilet cleaner? Using Kool-Aid to clean my toilet not only saved me money but also made me rethink what everyday products can do.

Next time you see a packet of lemon Kool-Aid at the store, grab one—not for your kids, but for your bathroom. You just might be as surprised as I was when you see the amazing results.


HOW TO CLEAN SUEDE


When cleaning suede it’s best to avoid water. It might seem hard to clean your suede materials without water but trust me it’s not that hard. So here are 3 incredible and easy ways to clean your suede material.


JUST USE AN OLD TOOTHBRUSH

Just use an old toothbrush to rub the parts on the suede material you want to clean.


USE A SUEDE ERASER

You can get a suede eraser online. You can use one of these to rub/clean any dried-up dirt on the suede material.


USE VINEGAR

If you stained the suede material don’t worry because you can use vinegar to clean it. Get a small dish and fill 1/4 of it with vinegar (only vinegar). Then get a dry cloth a dip only the tip of it in the vinegar and use it to clean the stained areas on your suede material.

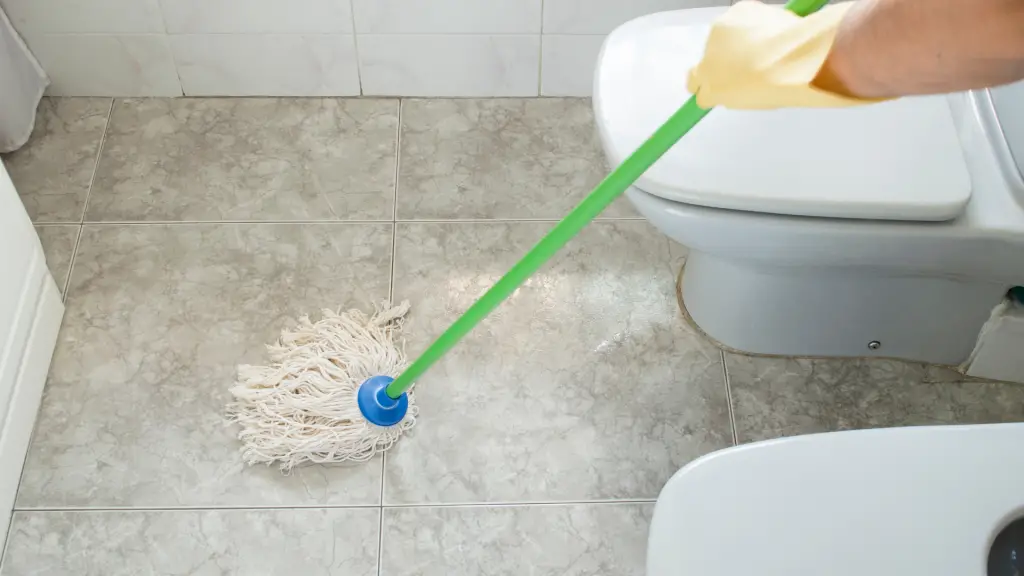
In this post i am sharing 3 simple ways to clean your bathroom floor. Why you may ask? Well, you use your bathroom everyday. Moisture and bad order stick to the floor even though you cannot see it. This can cause your bathroom floor to be sticky and even make your bathroom smell awful. To clean and maintain a clean bathroom floor follow these step by step guide.

These bathroom floor cleaning uses only natural household staple. These are amazing floor cleaner that works even better that the ones at the store.


 Clear the Floor

Before you start cleaning your bathroom floor, remove the rugs. It would be nice if you could toss them in the washer while you clean the floor.


SWEEP or VACUUM Before moping

Keeping the floor clean mean removing dust and trash. Before you mop the floor vacuum or sweep for best results.

This is the simplest and easiest method on this list. Just simply vacuum/sweep the floors including the rugs.


1. CLEAN WITH DISINFECTANT

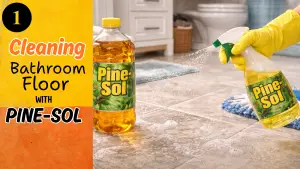
Disinfectant like Pine-Sol is great for deodorizing areas in your house but it also cleans bathroom floors.

Get a microfiber mop (damp) and combine 1/2 cup Pine-Sol diluted with 1/2 cup water in a spray bottle. Mist the floor focusing  on behind the toilet. Next mop as you go. For  best results rinse the mop and wipe a second time. This not only cleans the floor, but leave the bathroom smelling amazing.


2.CLEAN WITH White Distilled VINEGAR

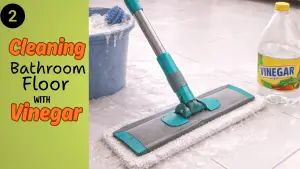
The old fashion way to clean bathroom tile floor is to use a bucket and a mop. However, you can still use one of these modern mops.

Simple make a mixture of vinegar and water in a spray bottle. Next must the floor and wipe. Ensure the mop is clean. A dirty mop will leave the floor sticky and ever more dirty.

If you are worried about the left behind vinegar smell try this article.


Using an Old-Fashioned Mop and Bucket

I love using this type of mop as they get into the corners and crack easier. To clean with a bucket following the instructions below.

Get a mop and a bucket with water. Next,  pour 2 cups of vinegar on it. Submerge the mop in the water. Now use the mop to clean everywhere on the bathroom tile floor. Be sure to clean the hard-to-reach areas as well. After doing this I recommend you rinse the vinegar smell out of the mop, then use it to double wipe the floor(without adding vinegar).

This cleaning method is for bathroom tile floor .


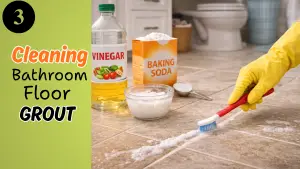
4. CLEAN TILE GROUT WITH BAKING SODA AND VINEGAR

Now. lets clean the floor tile grout.

Get a small dish and mix 3 cups of vinegar and 3 cups of baking soda into it. Then dip a cloth or scrubbing brush a toothbrush works even better. Dip into the mixture and use it to scrub in between the tiled flooring of your bathroom. After doing use a cloth or clean  mop to clean away the mixture residue.


The Take-Away:

It doesn’t take a lot to clean your bathroom floor. No matter the type of floor you have these floor cleaning tips will make them cleaner.

You May Also Like:

10 HELPFUL TIPS TO CLEAN AND CARE FOR 10 TYPES OF FLOORS

Keeping your towels fresh, soft, and long-lasting requires more than just tossing them in the washer. Proper care and washing techniques can make a significant difference. In this guide, we’ll share expert tips on how to clean towels the correct way, ensuring they remain in excellent condition for years to come.

Sorting Out the Towels:

Start by sorting your towels from other laundry items. Towels, especially new ones, can shed lint, which can cling to other fabrics. Washing towels separately helps prevent this issue and allows them to get a thorough clean. Always use warm water and avoid overloading the machine to give your towels enough room to move freely during the wash cycle.

Adding Vinegar to the Rinse:

Choose a mild, high-quality detergent to preserve the fabric’s integrity and color. Overuse of detergent can lead to a build-up of residue, making towels stiff and less absorbent. Opt for a small amount of detergent and add white vinegar to the rinse cycle to help remove any soap residue and keep your towels soft.

SOAK THEM IN VINEGAR

Get a bucket filled halfway up with water then pour 2-3 cups of vinegar into it. Now soak the towels inside the bucket for 1 hour. After doing that you can either rinse them normally (inside the washer ) or you can do it with your hands. Then dry them.

Softening the towels:

Avoid using fabric softeners on your towels, as they can coat the fibers and reduce their absorbency. Instead, consider adding a tennis ball or dryer balls to the dryer to help fluff up the towels as they dry. This simple trick can enhance the towels’ softness and ensure they dry evenly.

WASH THEM WITH OXI CLEAN

Throw the towels into the washer and add 5 scoops of oxi clean into the washer. This will make your towels really clean. Remember to use fabric softener to make the towels smell better.


CLEAN THEM WITH BORAX

Put the towels into the washer then pour 4 cups of borax into it, and some fabric softener as well. Now turn on the washer. After washing them you can either air dry them or just use the dryer.

Tips to Remember:

1. It’s also essential to wash towels at the right frequency. While it might be tempting to reuse towels multiple times, washing them after every three uses helps to prevent the build-up of bacteria and mildew. For those who live in more humid climates, washing towels more frequently might be necessary to maintain their freshness.

2.  Pay attention to the drying process. Shake out your towels before placing them in the dryer to help them dry more evenly and fluff up. Avoid over-drying, as it can damage the fibers and make the towels rough. Instead, dry them on a medium heat setting and remove them while they’re still slightly damp to air dry completely.

3. Store your towels properly to maintain their cleanliness and freshness. Make sure they are completely dry before folding and storing them to prevent mold and mildew growth. Keeping towels in a well-ventilated area or linen closet can help keep them fresh between uses.

Conclusion:

By following these expert tips you’ll learn how to clean towels to ensure your towels stay soft, absorbent, and in great condition. Proper washing, drying, and storage techniques are key to extending the life of your towels and keeping them fresh for every use. Say goodbye to rough, musty towels and hello to a more luxurious bathroom experience.

Welcome to the world of effortless cleaning! Whether you’re a seasoned pro or just starting your journey to a spotless home, these five incredible simple cleaning hacks will transform the way you tackle household chores. Say goodbye to hours of scrubbing and hello to quick, efficient solutions that make maintaining a clean space a breeze. These tips are not only easy to implement but also incredibly effective, saving you time and energy so you can enjoy a pristine home without the hassle. Let’s dive into these game-changing hacks that will revolutionize your cleaning routine!

Tip # 1. DEGREASE CABINETS WITH DISH SOAP

Cabinets and cupboards can get greasy very easily. To degrease your cabinets. Just get a damp cleaning sponge and squeeze a few drops of dish soap onto it. Then wipe your cabinets. After wiping them be sure to use a dry cloth to wipe away the soap from them.


Tip #2. REMOVE CARPET STAIN WITH THIS MIXTURE

For this, all you need to do is mix 1 cup of hydrogen peroxide,  1 cup of vinegar, 1 tbsp of dish soap, and baking soda into a small open container(dish or bowl). Then dip an old toothbrush into the mixture and use it to gently scrub the stained area on your carpet. Let is sit for 30 minutes then tap with a dampen cloth. Allow to completely dry before walking on.

Tip: Test the solution on a hidden area of the carpet and watch for any color change. If the color changes then discontinue use of the solution.


tip #3. REMOVE CLOTHES STAIN WITH THIS

Use the same mixture I mentioned above and get an old toothbrush to clean the stained areas on your clothes. Be sure that the material is strong enough to handle this mixture.


tip#4. CLEAN MICROWAVE WITH LEMONS

Get a dish and fill it halfway up with warm water. Now slice a lemon up into round circular slices and put them into the dish. Then place the dish into the microwave and turn it on for 4 minutes. After doing this use a clean cloth to wipe inside of the microwave.


Tip#5. DIY GLASS CLEANER

Making glass cleaner is pretty easy. Just mix 2 and a half cups of rubbing alcohol with 1/2 cup of vinegar. Then pour the mixture into a spray bottle, then add 1 cup of warm water shake well and start cleaning your mirrors and windows using a clean microfiber cleaning cloth.

Conclusion:

And there you have it – five incredible simple cleaning hacks that will make your life so much easier. With these tips in your cleaning arsenal, you can keep your home sparkling clean without spending endless hours on chores. Embrace these easy-to-follow strategies and enjoy the satisfaction of a pristine living space. Remember, a clean home is not just about appearance; it’s about creating a healthy, stress-free environment for you and your loved ones. So, put these hacks into practice and see the difference they can make in your daily life!