Author

Khalphano Mills

Browsing

How to Make the 3 Most Popular Starbucks Coffees at Home

Starbucks has become a daily ritual for millions of people. Whether it’s the comfort of a caramel drizzle, the nostalgia of pumpkin spice, or the bold punch of a strong coffee, these drinks have earned their place at the top of the coffee chain. But let’s be real—those daily coffee runs add up fast. The good news? You can make Starbucks’ three most popular drinks right in your own kitchen. Let’s break down each one, why it’s loved, and how you can recreate it.

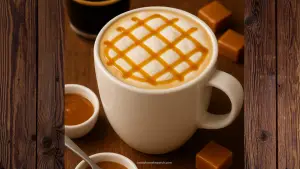
1. Caramel Macchiato (Copycat Recipe)

Why it’s popular:
The Caramel Macchiato is the perfect mix of sweet and strong. With its layers of espresso, milk, vanilla syrup, and caramel drizzle, it feels like a coffee dessert. It’s Instagram-worthy and indulgent without being overly heavy.

Ingredients:

  • 1 cup milk (whole milk or oat milk for creaminess)

  • 2 shots espresso (or ½ cup strong brewed coffee)

  • 1 tablespoon vanilla syrup (store-bought or homemade)

  • Caramel sauce for drizzling

Instructions:

  1. Heat and froth the milk until it’s hot and foamy.

  2. Pour the vanilla syrup into the bottom of your mug.

  3. Add the steamed milk, holding back the foam with a spoon, then spoon the foam on top.

  4. Slowly pour the espresso over the foam (this creates the “macchiato” effect).

  5. Drizzle caramel sauce generously across the top.

Pro tip: Want it iced? Use cold milk instead of steamed milk, pour everything over ice, and drizzle with caramel.

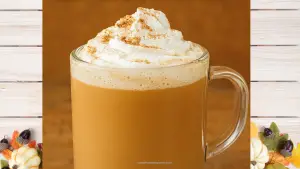
2. Pumpkin Spice Latte (Copycat Recipe)

Why it’s popular:
The Pumpkin Spice Latte (or PSL) is more than a drink—it’s a cultural icon. It signals the arrival of fall, cozy sweaters, and all things pumpkin. Starbucks sells millions every season, but you can have this warm hug in a mug anytime at home.

Ingredients:

  • 2 cups milk (any kind you like)

  • 2 tablespoons pumpkin purée

  • 1–2 tablespoons sugar (adjust to taste)

  • ½ teaspoon pumpkin pie spice (plus extra for garnish)

  • 1 teaspoon vanilla extract

  • 1–2 shots espresso (or ½ cup strong brewed coffee)

  • Whipped cream for topping

Instructions:

  1. In a saucepan, heat the milk, pumpkin purée, and sugar over medium heat until hot (do not boil).

  2. Whisk in the pumpkin pie spice and vanilla extract.

  3. Brew your espresso and pour it into a large mug.

  4. Add the pumpkin milk mixture and stir.

  5. Top with whipped cream and a sprinkle of pumpkin pie spice.

Pro tip: Make a big batch of pumpkin spice syrup ahead of time and keep it in the fridge for quicker lattes all season long.

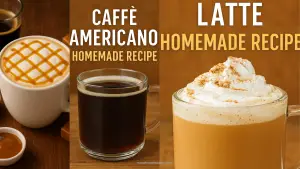
3. Caffè Americano (Copycat Recipe)
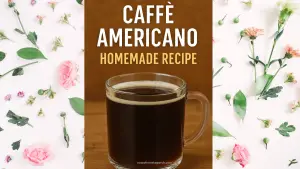
Why it’s popular:
Sometimes simple is best. The Caffè Americano is just espresso topped with hot water, but the result is smooth, rich, and less bitter than drip coffee. It’s the go-to drink for those who love bold coffee without the frills.

Ingredients:

  • 2 shots espresso (or ½ cup very strong brewed coffee)

  • ½ to 1 cup hot water

Instructions:

  1. Brew two shots of espresso.

  2. Heat your water until hot but not boiling.

  3. Pour the hot water into your mug, then add the espresso on top.

  4. Adjust the ratio of water to espresso to your taste preference (less water = stronger flavor).

Pro tip: For a smoother Americano, always pour the espresso over the water, not the other way around.

Final Thoughts

Starbucks’ most popular drinks are delicious, but they don’t have to cost you $5–$7 a cup. With just a few simple ingredients and a little practice, you can enjoy your favorite Caramel Macchiato, Pumpkin Spice Latte, or Caffè Americano from the comfort of your home. The best part? You’ll save money, avoid long lines, and be able to customize each drink exactly how you like it.

So the next time you’re craving a Starbucks fix, skip the drive-thru—your kitchen barista skills have got you covered.

Coconut oil has a reputation as a kitchen and beauty staple, but here’s a surprise: it also works wonders on stainless steel appliances. 🥥 If your fridge or oven is dull and covered in fingerprints, a dab of coconut oil can make it shine like new—without harsh chemicals.

How to Clean Stainless Steel Appliances with Coconut Oil:

I love a shiny stainless steel appliance but, lately I realized that they can get pale and scratchy. Nope, if you are thinking well, why not just clean it with soap and water? Well, i wish it was that simple, when i tried that the grease and finger marks went but, after the appearance was dull. I needed to find a stainless steel cleaner that’s cost effective to maintain my stainless steel appliances then i bumped into this hack.

Why Coconut Oil Works

  • Creates a protective coating that resists smudges.

  • Enhances shine and smooths small scratches.

  • Natural, non-toxic, and safe around food and kids.

Supplies You’ll Need

  • Coconut oil (solid or liquid)

  • Two microfiber cloths

  • Warm, soapy water for pre-cleaning

Step 1: Pre-Clean the Appliance

Wipe the surface with warm, soapy water to remove grease or dirt. Dry completely.

Step 2: Apply Coconut Oil

  • Put a pea-sized amount on a clean microfiber cloth.

  • Rub gently into the stainless steel, following the grain.

Step 3: Buff with a Dry Cloth

Use a second dry clean cloth to buff until shiny. A thin coat will remain, protecting the surface.

Bonus Uses

Coconut oil also works for stainless steel sinks, faucets, and small appliances like toasters.

Bonus Tip: Don’t over use. A small amount goes a far way. Use this stainless steel cleaning method every two weeks to keep that fridge looking shiny new and just gorgeous.

Conclusion

Coconut oil isn’t just for cooking or skincare—it’s an all-natural stainless steel polish that leaves appliances looking spotless and shiny. It’s a cheap, safe, and eco-friendly way to maintain a gleaming kitchen.

For more odd ways to clean and maintain a pristine stainless steel appliance, Check out this article. How to Clean stainless steel appliances with FLOUR.

How to Clean and Maintain a Stainless Steel Sink:

A stainless steel sink can make your kitchen sparkle, but without proper care, it can quickly lose its shine. From fingerprints and grease to stubborn water spots, maintaining a flawless finish requires the right products and a simple routine. The good news? You don’t need fancy tools—just a few household staples like Murphy’s Oil Soap, Dawn dish soap, WD-40, rubbing alcohol, and even a standard stainless steel cleaner. Here’s a step-by-step guide to keeping your stainless steel sink clean and gleaming.

1. Deep Clean with Murphy’s Oil Soap

Murphy’s Oil Soap isn’t just for wood—it’s an excellent cleaner for stainless steel sinks, too. Add a small amount to a damp microfiber cloth and gently scrub the surface of your sink. This cleaner cuts through grease, grime, and soap scum without scratching the steel. Rinse thoroughly with warm water, then wipe the sink dry with a clean towel. Using Murphy’s Oil Soap once a week will keep your sink clean and smelling fresh while protecting the finish from dulling buildup.

2. Cut Grease with Dawn Dish Soap

For everyday cleaning, Dawn dish soap is one of the easiest and most effective options. Just add a few drops to warm water and use a soft sponge or cloth to wash the sink. Dawn is tough on grease and food particles, yet gentle enough not to damage the surface. After scrubbing, rinse thoroughly and dry with a microfiber towel to prevent streaks and water spots. This quick wash is especially helpful after cooking greasy meals, ensuring your sink always looks spotless.

3. Remove Stains and Add Shine with WD-40

Believe it or not, WD-40 can double as a stainless steel polish. Spray a light mist over your sink and buff it in with a soft, dry cloth. Not only does it remove water spots and streaks, but it also leaves behind a protective layer that helps repel fingerprints and stains. A once-a-week WD-40 application keeps your sink shining like new while making daily maintenance easier. Just remember to wash out the sink with dish soap before using it for food prep again.

4. Use a Stainless Steel Cleaner for a Professional Finish

If you want a showroom-level shine, a regular stainless steel cleaner is a reliable choice. These cleaners are designed to restore luster while protecting against smudges and scratches. Simply spray or apply the product according to the instructions, then wipe in the direction of the steel’s grain for best results. Doing this once or twice a week keeps your sink looking polished and professional.

5. Disinfect and Deodorize with Rubbing Alcohol

Rubbing alcohol is an underrated stainless steel cleaner. It not only removes fingerprints but also disinfects the sink naturally. Dampen a cloth with rubbing alcohol and wipe down the entire sink surface. Unlike water-based cleaners, rubbing alcohol evaporates quickly, leaving a streak-free finish. This is especially useful after handling raw meat or seafood to ensure your sink is both clean and germ-free.

6. Maintain the Sheen with Simple Habits

Cleaning is only half the battle—maintaining your sink’s sheen comes down to a few simple habits. First, always dry the sink after use to prevent water spots and mineral buildup. Second, avoid using steel wool or abrasive cleaners that can scratch the surface. Finally, once or twice a week, buff the sink with a microfiber cloth to restore its natural shine. By combining these habits with the cleaning methods above, your stainless steel sink will stay bright, spotless, and long-lasting.

Final Thoughts

Keeping your stainless steel sink in top condition doesn’t require expensive products or complicated routines. With Murphy’s Oil Soap for deep cleaning, Dawn dish soap for daily washes, WD-40 for extra shine, stainless steel cleaner for polish, and rubbing alcohol for disinfecting, you’ve got everything you need at home. Pair these with good maintenance habits, and your sink will look brand new for years to come.

How to Clean an Air Fryer – A Complete Step-by-Step Guide

Think your air fryer doesn’t get dirty because it uses less oil? Think again. Even though air fryers are marketed as a healthier alternative to deep frying, grease, food crumbs, and odors can build up quickly. If not cleaned properly, this can affect the taste of your food, cause smoke while cooking, and even shorten the life of your machine.

In this guide, you’ll learn exactly how to clean an air fryer, what products to use (and avoid), plus some handy tips for keeping it in top condition.

Why Cleaning Your Air Fryer Matters

Many people assume that because an air fryer uses little or no oil, it stays relatively clean. But here’s the truth:

  • Grease still splatters from foods like chicken wings, sausages, or bacon.

  • Food particles can get stuck in the basket or heating element.

  • Leftover residue can produce smoke, bad odors, or even affect performance.

  • Bacteria and mold may grow if moisture is left behind.

Regular cleaning ensures your air fryer remains safe, efficient, and long-lasting.

What You’ll Need to Clean an Air Fryer

Before you start, gather these essentials:

  • Warm water

  • Mild washing-up liquid (dish soap)

  • A soft sponge or cloth

  • A soft-bristled brush (an old toothbrush works well)

  • Microfiber cloth or paper towels

  • Non-abrasive scrub pad (for stubborn grease)

Important: Avoid metal utensils, scouring pads, or harsh chemicals — these can damage the non-stick coating.

Step-by-Step Guide: How to Clean an Air Fryer

Step 1: Unplug and Cool

Always unplug your air fryer before cleaning and let it cool completely. This prevents burns and keeps you safe.

Step 2: Remove the Basket and Pan

Take out the basket, tray, and pan (depending on your model). These removable parts are usually dishwasher safe, but it’s best to hand wash them to extend their lifespan.

Step 3: Soak in Warm Soapy Water

Fill your sink or a large basin with warm water and add a few drops of mild dish soap. Place the basket and pan inside and let them soak for 10–15 minutes.

Tip: Soaking helps loosen grease and baked-on food.

Step 4: Scrub Gently

Use a soft sponge or brush to remove food particles. Pay special attention to mesh baskets, as food often gets stuck in the small holes. If needed, use a toothbrush to scrub corners and crevices.

Step 5: Wipe the Interior

Dip a damp cloth in warm soapy water and carefully wipe down the inside of the air fryer. Avoid getting water into the heating element. For stubborn grease, use a non-abrasive scrub pad.

Step 6: Clean the Heating Element

Turn the air fryer upside down (or check your model’s manual for guidance). Use a soft brush or damp cloth to wipe the heating element. If it’s greasy, a paste of baking soda and water can help lift residue.

Step 7: Dry Thoroughly

Dry all parts with a microfiber cloth or let them air dry completely before reassembling. Moisture left inside can cause mold or odors.

Step 8: Wipe the Exterior

Finally, use a damp cloth to wipe the outside of the machine. Polish with a dry cloth to keep it looking new.

How Often Should You Clean an Air Fryer?

  • After every use: Wash the basket, pan, and tray.

  • Weekly (or every few uses): Wipe down the interior and heating element.

  • Monthly: Give your air fryer a full deep clean, including scrubbing any hidden grease build-up.


Tips for Stubborn Grease and Odors

  • Baking Soda Paste: Mix baking soda with water to form a paste. Apply to greasy areas, let sit for 15 minutes, then scrub gently.

  • Vinegar Spray: Combine equal parts vinegar and water in a spray bottle. Spray inside the fryer, leave for 10 minutes, and wipe clean.

  • Lemon Trick: Run the fryer with lemon slices inside for a few minutes to remove strong odors.


Mistakes to Avoid When Cleaning an Air Fryer

  1. Using metal scouring pads – These can scratch and ruin the non-stick coating.

  2. Skipping regular cleaning – Build-up becomes harder to remove the longer you leave it.

  3. Putting the main unit in water – Only removable parts are washable. The main unit contains electrical components.

  4. Not drying properly – Trapped moisture encourages mold and bacteria.

  5. Using harsh chemicals – Bleach, oven cleaners, or alcohol-based sprays can damage your air fryer.


How to Maintain Your Air Fryer

  • Line the basket with parchment paper or silicone mats to reduce mess.

  • Avoid spraying too much oil, as it can splatter and cause smoke.

  • Shake the basket halfway through cooking to prevent sticking.

  • Check for build-up regularly so it doesn’t become overwhelming.


Frequently Asked Questions (FAQs)

1. Can I put my air fryer basket in the dishwasher?
Yes, most baskets are dishwasher safe. However, hand washing is gentler and can help them last longer.

2. Why does my air fryer still smell after cleaning?
Strong-smelling foods (like fish) can linger. Use a vinegar spray or lemon slice method to neutralize odors.

3. How do I clean burnt food off the basket?
Soak it in hot, soapy water with a spoonful of baking soda for 20–30 minutes before scrubbing.

4. Do I need special cleaning products?
No, mild dish soap, warm water, and a soft sponge are all you need. Baking soda and vinegar work well for tougher stains.

5. Can I use cooking spray inside my air fryer?
It’s better to avoid aerosol sprays — they can damage the non-stick coating. Use a spray bottle with regular oil instead.

Final Thoughts

Cleaning your air fryer doesn’t have to be a chore. By giving it a quick wipe after each use and a deep clean once in a while, you’ll keep it working efficiently, smelling fresh, and producing the crispy, delicious results you love.

Remember: a clean air fryer is a happy air fryer — and it means healthier, tastier meals for you and your family.

10 Everyday Foods That Could Make You a Mosquito Magnet

You’re likely swatting at mosquitoes more than your friends—and while factors like body heat, carbon dioxide, and genetics play major roles, what you’re eating can also subtly bump your attractiveness to these buzzing bloodsuckers. Here’s a rundown of 10 common foods and drinks that science and expert observations suggest may turn you into a mosquito magnet:

1. Beer

Unsurprisingly, the most strongly studied culprit is beer. Multiple studies—including one in PLOS One with malaria mosquitoes in Burkina Faso—show that beer consumption increases mosquito landings.Delish+7SELF+7Tuxedo Mosquito Control+7

2. Bananas

A 2018 experimental study found that eating bananas led to a significant increase in mosquito encounters.SELF+2Delish+2

3. Fermented Foods & Stinky Cheeses

Foods like miso, sauerkraut, yogurt, kimchi, and especially pungent cheeses (think Limburger) may increase your body odor’s carboxylic acid levels—compounds that mosquitoes seem to favor.Delish+3SELF+3SELF+3

4. Sugary Foods & Desserts

Though not always backed by direct experimental studies, there’s widespread belief (supported by acidity and lactic acid production theories) that sweets and sugary treats might raise your appeal to mosquitoes. Vogue

5. Salty Snacks

Consuming salty foods can increase lactic acid levels in your sweat—another attractant for mosquitoes.Wikipedia+12Tuxedo Mosquito Control+12Mosquito Squad+12

6. Caffeine

Caffeine may elevate your metabolism and raise body temperature—both potential signals that could draw in mosquitoes.Mosquito Squad+1

7. Spicy Foods

Spicy meals can raise your internal heat and metabolic rate, potentially making you a hotter target for these heat-seeking insects.Mosquito SquadThe Washington Post

8. Ice Cream

Combining dairy (leading to lactic acid production) and sugar, ice cream checks both boxes for attractiveness to mosquitoes.Tuxedo Mosquito Control

9. Potassium-Rich Foods (Avocados, Potatoes, Raisins)

Foods high in potassium—like avocados, potatoes, raisins, and bananas—play a role in lactic acid generation, likely enhancing your attractiveness.Verywell Health+6joshuaspestcontrol.com+6Mosquito Squad+6

10. High-Lactic-Acid Emitting Foods

More broadly, anything that elevates lactic acid—whether through heavy carbs, sodium, or metabolism—could make your skin chemistry inviting to mosquitoes. It’s often not just one food, but cumulative effects.SELF+3Reddit+3SELF+3

What This Means in Real Life

While these foods are linked to increased mosquito attraction, the science is still evolving—and dietary choices won’t override bigger factors like body heat, carbon dioxide output, blood type, or genetics.Food & Wine+6SELF+6Tuxedo Mosquito Control+6 Still, if you notice a correlation (like more bites after eating bananas or beer), you might experiment with shifting choices during high-bug seasons.

Pro Tips to Reduce Bites (No Diet Overhaul Required)

  • Dress smart: Wear light-colored, loose clothing that hides scent and minimizes skin exposure.Verywell HealthThe Washington Post

  • Use EPA-approved repellents: Look for DEET, picaridin, or oil of lemon eucalyptus.Delish+4SELF+4SELF+4

  • Avoid peak mosquito times: Dawn and dusk see the most action.SELF

  • Minimize environmental hotspots: Remove standing water, prune dense shrubs, and allow airflow around your space.The Washington Post


Final Thoughts

Might your snack of chips, sugary pops, or a beer make mosquitoes buzz your way more often? Possibly. While dietary shifts alone aren’t a magic shield, being aware of triggers—like fermented flavors or sweet, salty, potassium-rich treats—can help you tweak habits and stay just a bit less bite-prone.

A Refresh on Freshness: How Chilly, Swift Washes Extend Your Clothes’ Lifespan


Have you ever wondered why your once-vibrant tee fades, frays, or loses its shape after just a few washes? It might not be your detergent—it’s likely your wash cycle. A recent study by the University of Leeds, backed by Procter & Gamble, delivers a surprising solution: cold water and quick cycles are the real magic formula for preserving clothing quality.

how do wash settings affect the durability of a garment?

At the heart of the experiment was a simple question: how do wash settings affect the durability of a garment? Researchers tested activewear T‑shirts from brands like Gildan, Russell, and Hanes, using them as proxies for everyday garments. After ensuring machines were microfiber-free, each shirt underwent wash sessions where scientists meticulously collected the cycle’s wash water. By evaporating and weighing the residue, they measured how many microfibers were shed.

They also employed “receiver” fabric swatches to assess how much dye bleeded into other materials—an effective way to simulate fading and greying caused by laundering.

A Tale of Two Washes: Cold Express vs. 40 °C Cotton Short

The comparison involved two wash types:

  • Cold Express (30 minutes) – a swift, chilly wash.

  • Cotton Short at 40 °C (85 minutes) – a warmer, longer alternative.

The results were unequivocal: the warmer, longer wash caused significantly more color loss, dye transfer, and microfiber shedding. Cold, shorter cycles preserved both color and structural integrity—setting the bar for garment longevity.Popular Mechanics+1Popular Mechanics

Even after eight or sixteen wash cycles, fibers continued to shed in the warmer setting—suggesting that damage isn’t limited to the first wash, but escalates over time.Popular Mechanics+1

More Than Just Cleaner Clothes

Choosing the Cold Express cycle isn’t just wise for your wardrobe—it’s better for the planet, too. Less microfiber release means fewer synthetic particles entering waterways. Less heat and shorter run times consume less energy. And since less soap is needed for colder water, it’s gentler on the planet and your dryer’s power bill. Popular Mechanics

Tips for Extending Garment Life

  1. Use the coldest, shortest cycle available. It’s gentler, longer-lasting, and eco-conscious.

  2. Sort by color and fabric type. Especially when dealing with delicate or dark prints.

  3. Don’t skip the screen filter. Microfiber catchers help trap loose fibers before they enter the water system.

  4. Air-dry when you can. Heat from dryers also contributes to wear and shrinkage.


In short: If you’re looking to keep your clothes vibrant, resilient, and enduring—go cold, go quick. It’s a small tweak with big benefits—for your wardrobe and the environment.

When I moved into my apartment I was surprised to know that one place could have so many different species of roaches. If you are in the same situation you are at the right place and you are not alone. This article will show you how to kill Cockroaches with Ortho Orthene Fire Ant Killer. Let’s get into it.

Warning!

Ortho Orthene Fire Ant killer MUST NOT be placed in open areas where it is accessible to children and pets. It should NEVER be placed on countertops nor near food supply as this is an insecticide that can harm humans and pets if consumed. PLEASE READ THE MANUFACTURERS INSTRUCTION AND FOLLOW THE STEPS PROVIDED IN THIS ARTICLE IF USING FOR ROACHES.

The name has nothing to do with this post and, that’s exactly what I thought when that maintenance guy told me to try it.  Before I get into how to use it to get rid of those pest its best to know a little about the behavioral pattern of roaches.

Types of Roaches in the Home:

Homes can become infested with a variety of cockroach species. The most prevalent ones are brown-banded cockroaches, Oriental cockroaches, American cockroaches, and German cockroaches. Because they can hide in a variety of places and reproduce quickly, German cockroaches are notoriously hard to eradicate.

German roaches are most common in households. These are the brown oval shape ones  and the other are the dark round ones small in size (oriental cockroaches). These type of roaches like to share kitchen, rooms and bathrooms with you. Yes, bathrooms! They like to eat hair and the smell of urine underneath the toilet rim attracts them. Also water, they need this to survive, They can only live for a few days without water.

Patterns of cockroach behavior in a home…
Since they are mostly nocturnal insects, cockroaches are most active at night. They would rather hide during the day in isolated, dark areas away from people and potential predators.

Signs of aN Infestation :
Seeing roaches: Because cockroaches often hide during the day, seeing them, especially during the day, may indicate a more serious infestation.


How They Communicate:

Cockroaches communicate with one another through pheromones, touching antennae, and even sounds.
They use pheromones to attract partners, indicate food sources, and alert others to danger.
When they feel threatened, they can also make hissing sounds.

Bathroom Roach Prevention TipS:

To  keep cockroaches out of the bathroom, sweep the floor every day and (clean the toilet using this method). And dry the sink and shower after using or before going to bed.

  Using  Ortho Orthene Fire Ant Killer in the Bathroom

Using a glove sprinkle a small amount of Ortho Orthene Fire Ant Killer on a sheet of paper and place it underneath the counter all the way to the back. Just a little goes a far way. Within  a week you’ll start seeing less cockroaches.

In the Kitchen

Pull out the stove and fridge then sprinkle an ample amount of the powder on a sheet of paper and place them at both corners on the floor. Next, gently push back the appliances in place. You’ll need to seal the container tightly and remove your gloves then proceed to wash your hands with soap and running water.

How to Keep COCKRoaches out of the Kitchen

Tip: Roaches will not stay where food is not provided.

1. Keep Countertops Clean by wiping with a damp cloth after each use. Don’t forget to clean the stove with Dawn dish soap to remove grease. Roaches will have a feast on the grease. Its like an energy drink.

2. Sweep floor regularly during usage and wipe daily.

3. Less clutter, less roaches, keep cabinets and underneath counter clutter-free

4. Empty trash bin daily

5. Its important to wash the trash bin once weekly to remove bad odors, The smell attracts roaches.

6. Do not leave dirty dishes in the sink overnight

7. Wipe the sink at nights before bed so the roaches has no water to quench their thirst.

Simply do your best to keep your kitchen clean and spotless.

Keeping Roaches Out of All Rooms:

Anywhere food  and clutter is there you’ll find roaches. They like to hind in dark places so keep areas clear. Avoid old news paper stocks and cardboard boxes if you can. They will actually feed on the material.

How to Use the Powder in Rooms:

On a sheet of paper place the powder behind furniture where children and pets cannot go. Just like you would in the bathroom and kitchen keep the area as clean as you can by dusting underneath the sofa cushions twice weekly and keeping the floor clear of food droppings and beverage spills. This will do the trick. Give it time. Within a week you see less roaches.

Do not leave dirty plates hanging around the home. When you are done eating take the plate back to the kitchen and wash it right away. This will do you a heck of a good.

The Take-Away:

This is how to kill cockroaches with Ortho Orthene Fire Ant Killer.  We hope these tips were helpful  as they were to me.

Thanks for stopping by, See you soon!


Homemade Cleaning Wipes (Easy DIY Recipe)

I started making my own cleaning wipes one winter when store shelves were empty and everything I usually bought was sold out—no sprays, no wipes, nothing. I needed a backup plan fast. So I searched for a simple homemade option, mixed up a batch in my kitchen, and haven’t looked back since. These wipes are easy, affordable, and just as effective as store-bought ones.

If you’ve ever wanted to make your own cleaning wipes, here’s the easiest recipe to try at home.


What You’ll Need:

  • 1 roll of paper towels (cut in half)

  • 2 ½ cups water

  • 2 cups rubbing alcohol (at least 70%)

  • 3 tablespoons dish soap

  • 10–15 drops lemon essential oil or any of your choice

  • 1 large jar or airtight container with a lid (wide enough to fit the paper towel roll)

Tip: I prefer to use a used wipes jar. If not any other jar as long as it has a lid so the wipes doesn’t dry out.


How to Make Homemade Cleaning Wipes:

Step 1: Cut the Paper Towel

Use a sharp knife to cut the paper towel roll in half. You’ll only use one half for this recipe. (Save the other half for next time.)

Step 2: Mix the Cleaning Solution

In a bowl or large measuring cup, combine:

  • 2 ½ cups water

  • 2 cups rubbing alcohol

  • 3 tablespoons dish soap

  • 10–15 drops of lemon essential oil

Stir gently to mix everything together.

Step 3: Add to the Container

Place the half-roll of paper towel into your container, cut side down.

Step 4: Pour the Mixture

Slowly pour the liquid mixture over the paper towels. Let it soak for 5–10 minutes so the liquid absorbs fully.

Step 5: Remove the Cardboard Tube

Once the center cardboard tube is soaked, pull it out. This will allow you to easily pull wipes from the center, just like store-bought ones.

Step 6: Use as Needed

Close the lid to keep your wipes moist. Grab one whenever you need to wipe down counters, doorknobs, light switches, or any frequently touched surface.


Helpful Tips:

  • Use a strong, high-quality paper towel brand so the wipes don’t fall apart.

  • Store in an airtight container to keep them from drying out.

  • Try other essential oils like tea tree, lavender, or eucalyptus for added antibacterial properties and a fresh scent.

  • Use gloves when handling surfaces with raw meat or heavy messes, even with these wipes.


Final Thoughts

Making your own homemade cleaning wipes is simple and budget-friendly. You control the ingredients, avoid harsh chemicals, and never have to worry about running out. This recipe is one of my favorite go-to cleaning hacks—and once you try it, it might become one of yours too.

Looking for more easy DIY cleaning solutions? Check out these reader-favorite cleaning tips or browse the cleaning section on NotesFromThePorch.com!

Lettuce is a popular vegetable for salads and sandwiches but when it gets saggy then its not so tasty. In this post i am sharing my failure and my victories in the best way to store lettuce.

What You’ll Learn Here:

1. How to store lettuce

2. The Best bag for storing lettuce

3. The best place in he fridge to store lettuce

Lettuce rots easily if not store correctly. Lettuce is best stored in the refrigerator but not just anywhere in the refrigerator.  To store lettuce here is what you need to do first.

Step 1. Wrapping the lettuce

If the you are planning on storing the lettuce whole the first thing to do is to make sure the lettuce is fresh. Storing a stale lettuce will not give you the best results.

Its best to place it in plastic wrap rather than a Ziploc bag. I noticed that Ziploc bags gather moister which can cause lettuce to rot faster. So, wrapping the lettuce in plastic wrap if storing whole will make it stay fresh for weeks.

Extra tip: Covering the stem of the whole lettuce keep it fresh longer.

Step 2. Storing Shredded Lettuce

Most of us like to prep our vegetables . If this is the case go ahead and shred the leaves and place them in a Ziploc bag. I will let you know where to to place this in the fridge as it could determine the texture of the vegetable at eating time. Only store in a Ziploc b bag if its shredded. DO NOT WASH AT THIS TIME.

The Best Place for Storing Lettuce:

As mentioned before, the refrigerator is the best place to store lettuce. After packaging the lettuce place it in the crisper or the lower drawers in the fridge. Do not freeze lettuce as this could ruin the vegetable.

Washing Lettuce: Safety measures

Always wash lettuce before eating to prevent E-coli even if it was already prepackaged at the store. Also, lettuce is best use within three weeks of purchase or reaping if stored properly.

Keep in mind this is a vegetable and has to rot all you are trying to is to slow the process.

The Take-Away:

That is how easy it is to store lettuce. So, now that you know the best way to store lettuce I hope you will always have fresh crunchy lettuce lasting you for weeks.

You May Also Like:

How to Preserve Scallions Using a Blender: Lasts for 2 Months

Not all showers comes with a shower glass door but those that do has a con. This con is dried up soap scum. In this article i will share with you cleaning tips on how to clean soap scum off shower glass door so it remains spotless all the time. Let’s dive right in.

There are many types of shower glass door, so, whether yours is a walk-in shower or a cute shower stall, a foggy soap covered door is not a clean look in your bathroom. The bad news is there is no way of preventing the shower glass doors from becoming foggy after you take a shower or maybe there is..


1. How to Clean Glass Shower Door

Instructions:

First you’ll need warm water, cleaning cloth , white distilled vinegar and a small bucket. Fill the bucket with water and pour 1/2 cup vinegar in. Next, add a tups of Dawn dish soap and wash the glass door. Make sure to get the corners.
If you have a shower head with a hose this is awesome! Simply turn it on warm and rinse the door until the soap is gone. To finish, dry with a clean dry cloth to prevent water spots.


2. Here is An Easier Way to Clean Soap Scum off Glass Shower Door:

Combine water and rubbing alcohol in a spray bottle and mist the door. Let it sit for 2 minutes then return and wipe with a damp cloth. NO SOAP THIS TIME.

As usual you can finish up with a touch of Windex glass cleaner but always make sure to clean away to soap scum before using the glass cleaner if you don’t do this it could leave the glass door even more messed up then before.

3. Do this When You Are Done Taking a Shower:

Keep a Cleaning cloth on the side of the shower or take one with you when taking a bath. When you are through taking a bath simply use the cloth to wipe the door. Doing this will only take a minute and will prevent soap spots and dried-up water marks on the glass door.

You can use this and cleaning cloth to wipe a way settled water to prevent mildew and stains on the grout. Yes, settle bath water is what turns into that nasty looking brown color on the grout especially in the corner, floor and between the tiles.

4. Cleaning the corners of the Shower

Use the same formula in the spray bottle to mist the corner floor and between the tile to keep away soap scum and stains YOU DON’T EVEN NEED TO SCRUB. Just do this every night before going to bed and your shower will remain free from soap scum and stains.


5. Preventing Soap Scum Build-Up on Shower Glass Door

If you are wondering if you can actually prevent soap scum build-up on glass shower door so too grout in the shower. The answer is yes, simply dry the door after each use or give it a quick wipe daily.


The End:

And there you have it “how to quickly clean soap scum off your shower glass door”. I even tossed a few extras tips in there. Now, you know how to clean and keep your shower glass door clean and also your shower free of stain and moreover smelling good.

Until next time happy cleaning!